Unityシェーダのパフォーマンス
Shaders in Unity are used through Materials, which essentially combine shader code with parameters like textures. An in-depth explanation of the Shader/Material relationship can be read here.
Material properties will appear in the Inspector when either the Material itself or a GameObject that uses the Material is selected. The Material Inspector looks like this:
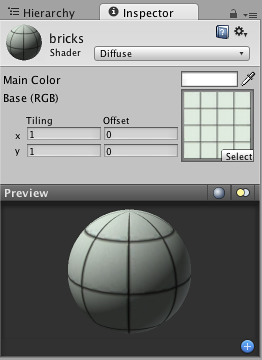
Each Material will look a little different in the Inspector, depending on the specific shader it is using. The shader iself determines what kind of properties will be available to adjust in the Inspector. Material inspector is described in detail in Material reference page. Remember that a shader is implemented through a Material. So while the shader defines the properties that will be shown in the Inspector, each Material actually contains the adjusted data from sliders, colors, and textures. The most important thing to remember about this is that a single shader can be used in multiple Materials, but a single Material cannot use multiple shaders.
Unityシェーダのパフォーマンス
ゲームの全体的なパフォーマンスに影響する要素はたくさんあります。このページはBuilt-in Shaders に絞ってパフォーマンスの考慮事項を説明します。シェーダのパフォーマンスは主に2つのことに大きく影響を受けます:シェーダ自体と,プロジェクトあるいは特定のカメラにより使用されるRendering Path です。自分でシェーダを記述する際のパフォーマンスの秘訣についてはShaderLab Shader Performance のページを参照下さい。
レンダリングパスとシェーダパフォーマンス
Unityでサポートされているレンダリングパスのうち,Deferred Lighting と Vertex Lit もっともパフォーマンスを予見可能です。Deferred Lightingでは各オブジェクトは一般に どのようなライトに影響を受けるかに関わらず2回描画されます。同様にVertex Litで各オブジェクトは1回だけ描画されます。すなわちシェーダのパフォーマンスの違いは使用してるテクスチャの数とどのような計算を行うかに依存します。
Forwardレンダリングパスのシェーダパフォーマンス
Forward レンダリングパスではシェーダのパフォーマンスはシェーダ自体とシーンのライト__両方__に影響を受けます。次のセクションは詳細について説明します。パフォーマンス観点から2つの基本的なカテゴリがあり,Vertex-LitとPixel-Litです。
ForwardレンダリングパスのVertex-Litシェーダは常にPixel-Litシェーダより安価です。これらのシェーダはメッシュ頂点にもとづいてライティングを計算します。このため,オブジェクトにいくつライトが照らされていても,描画するのは1回のみとなります。
Pixel-Litシェーダは描かれたピクセルごとに最終的なライティングを計算します。このため,オブジェクトはAmbient(環境光)およびDirectional light(指向性照明)を得るために1回描画され,追加のライティングごとに1回する必要があります。計算式はN回のレンダリングパスであり,Nはオブジェクトに最終的に照らされるpixel lightの数です。これによりCPUの処理,グラフィックカードへの命令発信,頂点およびピクセルを描画するグラフィックスカード,の負荷が増加します。スクリーンに表示されるPixel-litオブジェクトの大きさもまた描画速度に影響します。オブジェクトが大きいほど描画に時間がかかります。
このためpixel litシェーダはパフォーマンスコストが大きいが,そのコストにより素晴らしいエフェクトが得られます:代表的な名前だけ挙げても影,法線マッピング,良い見栄えのspecular highlightやlight cookieなどあります。
ライトを強制的に,pixel(“重要”)あるいはvertex/SH(“さして重要でない”)のモードに,切り替えることが出来ることを覚える必要があります。Pixel-Litシェーダに照らされるvertex lightsはオブジェクトの頂点または全体で計算され,レンダリングコストあるいはlightに伴う映像エフェクトには加えられません。
一般的なシェーダのパフォーマンス
ビルトイン シェーダ について,おおよそ次の順序に従って複雑さが増加します:
- Unlit. テクスチャのみ,ライティングによる影響をうけません。
- VertexLit.
- Diffuse.
- Normal mapped. Diffuse(拡散)よりわずかに高価:テクスチャ(法線マップ)をひとつ,シェーダの指示を複数追加します。
- Specular. Specular highlight(鏡面ハイライト)の計算を追加します。
- Normal Mapped Specular. Specularよりわずかに高価。
- Parallax Normal mapped. Parallax法線マッピング計算を追加します。
- Parallax Normal Mapped Specular. Parallax法線マッピングとSpecular highlight(鏡面ハイライト)計算を追加します。
さらに,Unityはモバイルプラットフォーム向けのシンプルなシェーダをいくつか“Mobile”カテゴリーの下に用意しています。これらシェーダは他のプラットフォームでも良く動作するため,このシンプルさ(例えば,approximate specular, no per-material color support (ほぼ鏡面,マテリアルごとのカラーサポートなし)等)を活用するため,是非とも試してみて下さい。