Applying Edge Padding to Alpha Textures
Why do I need to apply edge padding?
Unity renders a scene using a process known as downsampling which uses texture filtering to smoothly render the textures. If the ‘gutters’ (blank areas between UV’s) have colors/transparencies that are very different from the colors inside the UV’d areas, then those colors can ‘bleed’ together which creates seams on the model. This problem will also occur when neighbouring UV shells have different colors; as the texture is downsampled eventually those colors start to mix.
To avoid this problem, edge padding should be added to the empty spaces around each UV shell. Edge padding is the process of dilating the pixels along the inside of the UV edge to spread the colors outward, forming a border of similar colors around the UV shell.
When the UV layout is created, the spacing between the shells should be done with edge padding in mind. If the gutters between the UV shells aren’t at least double the width of the edge padding, neighboring shells will tend to bleed together more quickly.
Unity はストレートな alpha blending を使用します。 従って色レイヤーを拡張する必要があります。 Unity でのアルファ チャンネルが Photoshop ファイルの最初のアルファ チャンネルから読み込まれます。
This example shows how this technique of edge padding can be achieved using Photoshop. Bear in mind that the alpha channel in Unity will be read from the first alpha channel in the Photoshop file.
This technique can be achieved in other software however this example is specifically using Photoshop.
設定
設定を行う前に,これらのアルファ ユーティリティ Photoshop アクションをインストールします。 AlphaUtility.atn.zip
インストール後には,アクション パレットに AlphaUtility と呼ばれるフォルダが含まれます。
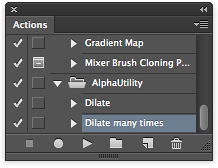
パディングを適用する
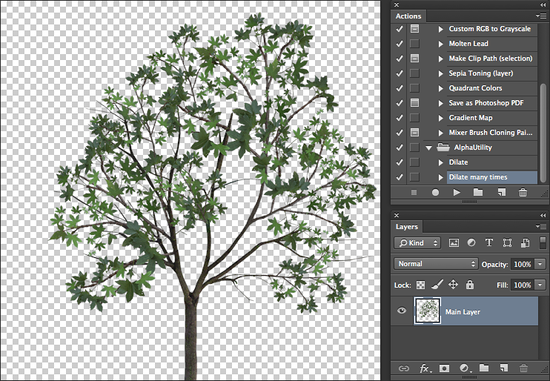
Photoshop 内の透明なレイヤーにアルファ テクスチャがあるとします。 次のようになります。
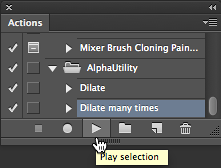
You will need to duplicate the layer by right-clicking on it in the Layers Palette and selecting ‘Duplicate’. Select the lowest layer in your Layers Palette; this will be source for the dilation of the background. Now select and click OK with the default properties. This blends the pixels along the edge of your image to merge it with the transparent background.
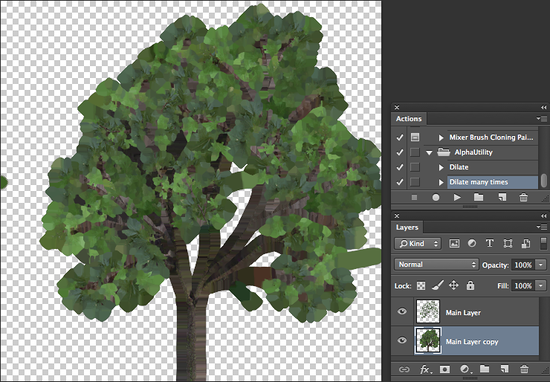
_Dilate Many_アクションを数回実行します。 これにより,背景が新しいレイヤーに展開されます。
Now Select all the dilation layers including the original layer selected for dilation and merge all the layers into one using on a mac and on windows.
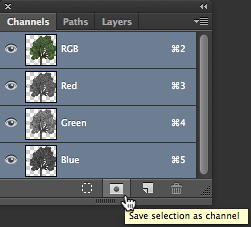
アルファ レイヤーに透明さをコピーする必要があります。
To do this set the selection to be the contents of your main layer by Command-clicking on the layer thumbnail in the Layer Palette. Switch to the Channels Palette and select ‘save selection from channel’ from the bottom of the /Channels Palette.
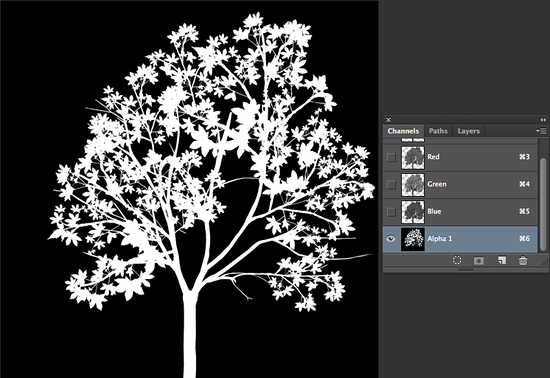
下の画像は,アルファレイヤーがどのように見えるべきかを示しています。アルファレイヤーの白い部分が画像の見えている部分となり,黒い部分が隠れている部分となります。
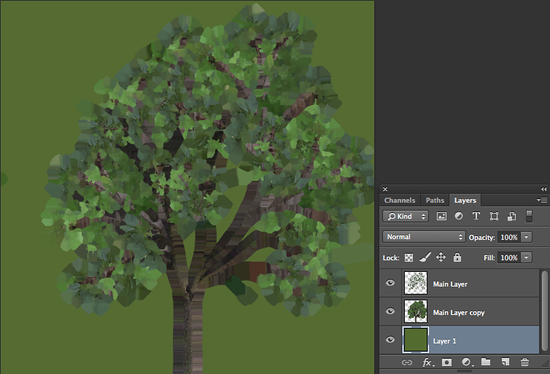
もし(レイヤーをマージした後)透明を含む画像であれば,Unityは全レイヤーからマージされた透明部からアルファの方を使い,アルファマスクは無視します。 これの回避方法としては,画像スタックの下にあるソリッドカラーレイヤーを使用することです。これはドキュメントの(この場合は緑がかった)一般的な色と一致すべきです。
PSD ファイルを保存します。これで準備ができました。