木 / Trees
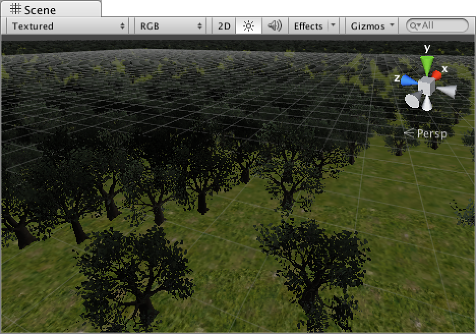
Unity terrains can be furnished with trees. Patches of trees can be painted onto a terrain in much the same way that heightmaps and textures are painted but the trees are solid 3D objects that grow from the surface. Unity uses optimisations (eg, billboarding for distant trees) to maintain good rendering performance, so you can have dense forests with thousands of trees and still keep an acceptable framerate.
Enabling Trees
The tree button on the toolbar enables tree painting.

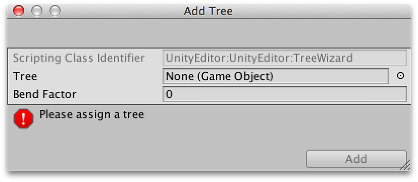
Initially, the terrain will have no trees available but if you click the Edit Trees button and select Add Tree you will see a window to select a tree asset from your project.
Unity comes with a tree object in the standard assets for prototyping purposes (menu: ) but you can also create suitable objects with a 3D modelling app or by using Unity’s Tree Creator tool.
The bend factor can be used to adjust how the trees respond to the wind. See the section on Making trees bend in the wind below.
Treeのペイント(木の描画)
With a tree selected, you can paint onto the landscape in the same way you paint textures or heightmaps. You can remove trees from an area by holding the shift key while you paint and remove just the currently selected tree type by holding down the control key. The familiar Brush Size option is available for tree painting but the Opacity property is replaced by Tree Density, which controls the average number of trees painted into a given unit of area. There is also a control for Color Variation and the trees’ heights and widths can be specified, again with variation. The variation options help to create the impression of a random, natural-looking forest rather than an artificial plantation of identical trees.
The Mass Place Trees button is a very useful way to create an overall covering of trees without painting over the whole landscape. Following a mass placement, you can still use painting to add or remove trees to create denser or sparser areas.
Treeの作成
Unity has its own Tree creator that you can use to produce new tree assets but you can also use a standard 3D modelling app for the task. The tree mesh should have fewer than 2000 triangles (for performance reasons) and the anchor point should be right at the base of the tree where it emerges from the ground. The mesh should always have exactly two materials, one for the tree body and the other for the leaves.
TreeはNature/Soft Occlusion LeavesおよびNature/Soft Occlusion Bark shaderを使用する必要があります。これらのシェーダを使うために,Treeは“Ambient-Occlusion”の名前を含む,特別なフォルダに配置しなければなりません。モデルをフォルダに配置したり,再インポートしたりすると,UnityはTreeに特化された,Soft Ambient Occlusionを計算します。 “Nature/Soft Occlusion”シェーダには,この情報が必要です。もし,命名ルールに従わなければ,樹木は真っ黒な変なものに見えてしまうでしょう。
When you save a tree asset from the modelling app, you will need to click the Refresh button (shown in the inspector when the tree painting tool is selected) in order to see the updated trees on your terrain.
Using Colliders with Trees
You can add a Capsule Collider to a new tree asset by instantiating it in the scene, adding the collider (menu: ) and creating a new prefab for the modified tree object. When you add the tree to the terrain for painting, make sure you select the prefab with the collider rather than the original object. You should also enable Create Tree Colliders in the terrain’s Terrain Collider component inspector to allow.
Note that the physics engine has a limit of 65536 colliders in a single scene. This is normally not an issue but when trees are used with colliders, you should make sure you don’t exceed this limit (also bear in mind the colliders other than those on trees that you are using in the scene).
Making trees bend in the wind
The first thing you will need to do is create a wind zone. You can do this by selecting from the menu:
At this point, you will need to make sure that your trees are set to bend. Select your tree types, then select Edit Trees… -> Edit tree. Setting the bend value to 1 will cause the trees to adjust if you have not already done this.
You may notice that your trees are moving about quite violently. To fix this, you can change your bend value, but it is probably easier to set the values on the “Wind zone” directly, keeping your tree bend value set to 1. Too keep the trees from fluttering around too much, adjust the wind turbulence down to around 0.1 to 0.3 and everything will become much smoother. If you don’t want the trees blowing all the way to one side, set the Wind Main value down to the same value as your turbulence.