ファイル サイズの削減
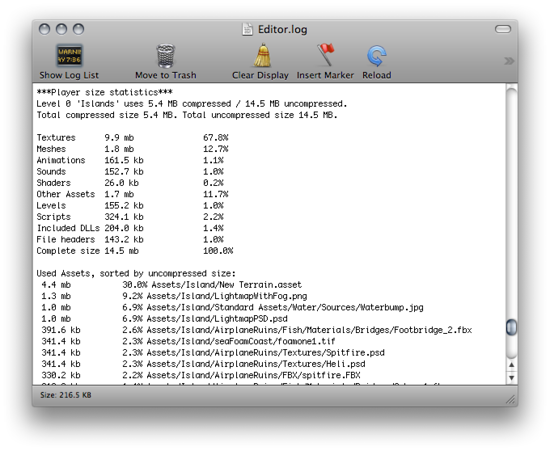
Keeping the file size of the built app to a minimum is often important, especially for mobile devices or for app stores that impose a size limit. The first step in reducing the size is to determine which assets contribute most to it, since these assets are the most likely candidates for optimisation. You can find this information out from the Editor Log just after you have performed the build (select from the small panel menu in the top right of the Console window).

The log provides a summary of assets broken down by type and then lists all the individual assets in order of size contribution. Typically, things like textures, music and videos will take up the most storage while scripts, levels and shaders are often negligible. Note that the File Headers mentioned in the summary are not assets in themselves. The headers are actually the extra data that is added to “raw” asset files to store references and settings. The headers normally make very little difference to asset size but if the value may be large if you have numerous large assets in the Resources folder.
The log helps you identify assets that you might want to remove or optimise but you should consider the following before setting to work:
Unity re-codes imported assets into its own internal formats, so the choice of source asset type is not relevant. For example, if you have a multi-layer Photoshop texture in the project then it will be flattened and compressed before building. Exporting the texture as a PNG file will not make any difference to build size, so you should stick to the format that is most convenient for you during development.
Unity strips most unused assets during the build, so you don’t gain anything by manually removing assets from the project. The only assets that are not removed are scripts (which are generally very small anyway) and assets in the Resources folder (since Unity can’t determine which of these will be needed and which won’t). With this in mind, you should make sure that the assets in the Resources folder are only the ones you really need for the game. You might be able to replace assets in Resources with AssetBundles to load assets dynamically and thereby reduce the player size.
Suggestions for Reducing Build Size
テクスチャ
多くの場合,テクスチャはビルド内のほとんどのスペースを消費します。 最初に,圧縮テクスチャ形式 (DXT(Desktop platforms) または PVRTC) を使用できる場所で使用します。
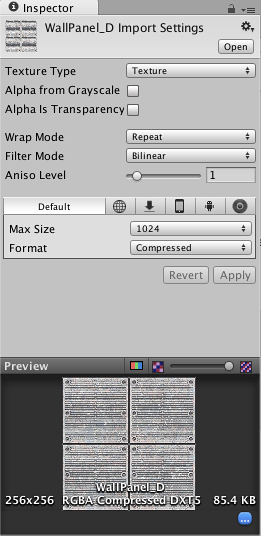
サイズが減らない場合は,テクスチャのサイズを減らしてみてください。 ここでのポイントは,実際のソースの内容を編集する必要がないということです。 プロジェクト ビューでテクスチャを選択し,インポート設定で_Max Size_を設定します。 Scene View で見た目が悪くなり始めるまで,テクスチャを使用するオブジェクトを拡大し,_Max Size_を調整するのはよい考えです。

The following table shows how much storage the image formats take up in bytes per pixel:
| Compression | メモリの消費 (bytes/pixel) |
|---|---|
| Standalone | |
| RGB Compressed DXT1 | 0.5 bpp |
| RGBA Compressed DXT5 | 1 bpp |
| RGB 16bit | 2 bpp |
| RGB 24bit | 3 bpp |
| Alpha 8bit | 1 bpp |
| RGBA 16bit | 2 bpp |
| RGBA 32bit | 4 bpp |
| iOS | |
| RGB Compressed PVRTC 2 bits | 0.25 bpp (bytes/pixel) |
| RGBA Compressed PVRTC 2 bits | 0.25 bpp |
| RGB Compressed PVRTC 4 bits | 0.5 bpp |
| RGBA Compressed PVRTC 4 bits | 0.5 bpp |
| RGB 16bit | 2 bpp |
| RGB 24bit | 3 bpp |
| Alpha 8bit | 1 bpp |
| RGBA 16bit | 2 bpp |
| RGBA 32bit | 4 bpp |
| Android | |
| RGB Compressed DXT1 | 0.5 bpp (bytes/pixel) |
| RGBA Compressed DXT5 | 1 bpp |
| RGB Compressed ETC1 | 0.5 bpp |
| RGB Compressed PVRTC 2 bits | 0.25 bpp (bytes/pixel) |
| RGBA Compressed PVRTC 2 bits | 0.25 bpp |
| RGB Compressed PVRTC 4 bits | 0.5 bpp |
| RGBA Compressed PVRTC 4 bits | 0.5 bpp |
| RGB 16bit | 2 bpp |
| RGB 24bit | 3 bpp |
| Alpha 8bit | 1 bpp |
| RGBA 16bit | 2 bpp |
| RGBA 32bit | 4 bpp |
テクスチャの合計サイズの求め方は: 幅 * 高さ * bpp。 ミニマップがある場合は 3倍以上にします。
デフォルトでは,Unity はインポート時にすべてのテクスチャを圧縮します。 ワークフローをより高速にするため,Preferences でこれをオフにできます。 ゲーム作成時,圧縮されていないすべてのテクスチャが圧縮されます。
メッシュおよびアニメーション
ゲーム ファイルでの使用スペースを減らすよう,Meshes およびインポートされたアニメーション クリップを圧縮できます。 メッシュ インポート設定で圧縮をオンにできます。
メッシュとアニメーションの圧縮は,少ないスペースしか取りませんが圧縮は不精密なデータになることに注意してください。あなたのモデルで許容できる圧縮レベルを試してみてください。
メッシュ圧縮は小さいデータ ファイルしか生成せず,ランタイムで使用するメモリは少なくなることに留意して下さい。 アニメーションKeyframe reductionは,小さいデータ ファイルしか生成せず,ランタイムで使用するメモリは少なくなり,一般に,常にキーフレーム削減を使用します。
DLLs
デフォルトでは,Unityはビルドされたプレイヤでのみ次のDLLを含みます:
- mscorlib.dll
- Boo.Lang.dll
- UnityScript.Lang.dll
- UnityEngine.dll
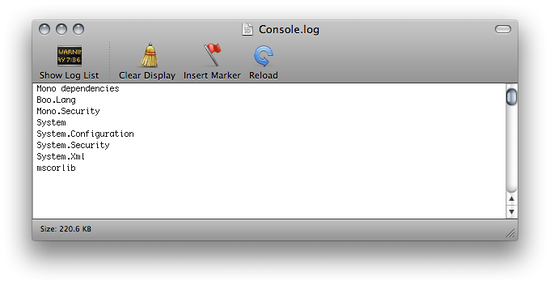
When building a player, you should avoid any dependencies on System.dll or System.Xml.dll. Unity does not include these in the built player by default but if you use their classes then they will get included. These DLLs will add about a megabyte to the player’s storage size. If you need to parse XML in your game, you can use a library like Mono.Xml.zip as a smaller alternative to the system libraries. While most Generic containers are contained in mscorlib, Stack<> and few others are in System.dll, so you should avoid these if possible.

モバイル用 .NET Library のサイズ削減
Unity supports two .NET API compatibility levels for some mobile devices: .NET 2.0 and a subset of .NET 2.0. You can select the appropriate level for your build in the Player Settings.
The .NET 2.0 API profile is similar to the full .NET 2.0 API. Most library routines are fully implemented and so this option offers the best compatibility with pre-existing .NET code. However, for many games, the full library is not needed and the superfluous code takes up valuable memory space.
To avoid wasted memory, Unity also supports the .NET 2.0 Subset API profile. This is very similar to the Mono “monotouch” profile, so many limitations of the “monotouch” profile also apply to Unity’s .NET 2.0 Subset profile. (More information on the limitations of the “monotouch” profile can be found here). Many library routines that are not commonly needed in games are left out of this profile in order to save memory. However, this also means that code with dependencies on those routines will not work correctly. This option can be a useful optimization but you should check that existing code still works after it is applied.