Cámara
Cameras are the devices that capture and display the world to the player. By customizing and manipulating cameras, you can make the presentation of your game truly unique. You can have an unlimited number of cameras in a scene. They can be set to render in any order, at any place on the screen, or only certain parts of the screen.
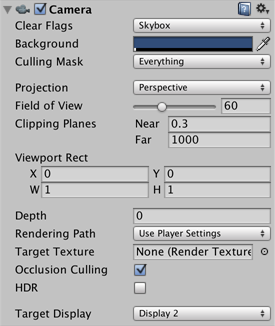
Propiedades
| Propiedad: | Función: |
|---|---|
| Clear Flags | Determina qué partes de la pantalla serán despejadas. Esto es útil cuando utilice múltiples cámaras para dibujar diferentes elementos de juego. |
| Background | The color applied to the remaining screen after all elements in view have been drawn and there is no skybox. |
| Culling Mask | Includes or omits layers of objects to be rendered by the Camera. Assigns layers to your objects in the Inspector. |
| Projection | Activa o desactiva la capacidad de la cámara para simular perspectiva. |
| Perspective | La cámara va a renderizar objetos con la perspectiva intacta. |
| Orthographic | Camera will render objects uniformly, with no sense of perspective. NOTE: Deferred rendering is not supported in Orthographic mode. Forward rendering is always used. |
| Size (when Orthographic is selected) | El tamaño de la vista gráfica de la Cámara cuando es establecido a Orthographic. |
| Field of view (when Perspective is selected) | The width of the Camera’s view angle, measured in degrees along the local Y axis. |
| Clipping Planes | Distancias desde la cámara para comenzar o parar de renderizar. |
| Near | El punto más cercano relativo a la cámara dónde el dibujo va a ocurrir. |
| Far | El punto más lejano relativo a la cámara dónde el dibujo va a ocurrir. |
| Normalized View Port Rect | Four values that indicate where on the screen this camera view will be drawn. Measured in Screen Coordinates (values 0–1). |
| X | La posición inicial horizontal dónde la vista de la cámara será dibujada. |
| Y | El inicio de la posición vertical dónde la vista de la cámara será dibujada. |
| W (Width) | Ancho del output de la cámara en la pantalla. |
| H (Height) | Altura del output de la cámara en la pantalla. |
| Depth | La posición de la cámara en el orden de dibujo (draw order). Las cámaras con un valor mayor serán dibujadas encima de las cámaras con un valor más pequeño. |
| Rendering Path | Opciones para definir qué métodos de renderización serán utilizados por la cámara. |
| Use Player Settings | Esta cámara va a utilizar cualquier Rendering Path que esté establecido en Los Ajustes del Reproductor. |
| Vertex Lit | Todos los objetos renderizados por esta cámara serán renderizados como objetos Vertex-Lit. |
| Forward | Todos los objetos serán renderizados con un pass por material. |
| Deferred Lighting | All objects will be drawn once without lighting, then lighting of all objects will be rendered together at the end of the render queue. NOTE: If the camera’s projection mode is set to Orthographic, this value is overridden, and the camera will always use Forward rendering. |
| Target Texture | Reference to a Render Texture that will contain the output of the Camera view. Setting this reference will disable this Camera’s capability to render to the screen. |
| HDR | Activa el renderizado High Dynamic Range para esta cámara. |
| Target Display | Defines which external device to render to. Between 1 and 8. |
Detalles
Cameras are essential for displaying your game to the player. They can be customized, scripted, or parented to achieve just about any kind of effect imaginable. For a puzzle game, you might keep the Camera static for a full view of the puzzle. For a first-person shooter, you would parent the Camera to the player character, and place it at the character’s eye level. For a racing game, you’d probably have the Camera follow your player’s vehicle.
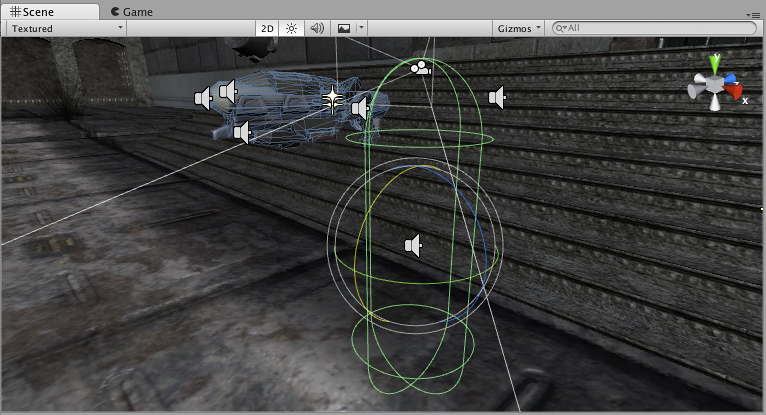
You can create multiple Cameras and assign each one to a different Depth. Cameras are drawn from low Depth to high Depth. In other words, a Camera with a Depth of 2 will be drawn on top of a Camera with a depth of 1. You can adjust the values of the Normalized View Port Rectangle property to resize and position the Camera’s view onscreen. This can create multiple mini-views like missile cams, map views, rear-view mirrors, etc.
Render path
Unity supports different rendering paths. You should choose which one you use depending on your game content and target platform / hardware. Different rendering paths have different features and performance characteristics that mostly affect lights and shadows. The rendering path used by your project is chosen in Player Settings. Additionally, you can override it for each Camera.
For more information on rendering paths, check the rendering paths page.
Clear Flags
Each Camera stores color and depth information when it renders its view. The portions of the screen that are not drawn in are empty, and will display the skybox by default. When you are using multiple Cameras, each one stores its own color and depth information in buffers, accumulating more data as each Camera renders. As any particular Camera in your scene renders its view, you can set the Clear Flags to clear different collections of the buffer information. To do this, choose one of the following four options:
Skybox
This is the default setting. Any empty portions of the screen will display the current Camera’s skybox. If the current Camera has no skybox set, it will default to the skybox chosen in the Lighting Window (menu: Window > Lighting). It will then fall back to the Background Color. Alternatively a Skybox component can be added to the camera. If you want to create a new Skybox, you can use this guide.
Solid color
Any empty portions of the screen will display the current Camera’s Background Color.
Depth only
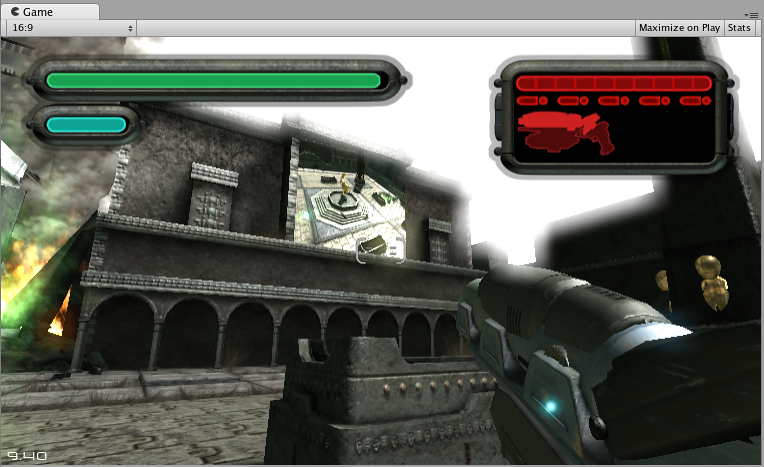
If you want to draw a player’s gun without letting it get clipped inside the environment, set one Camera at Depth 0 to draw the environment, and another Camera at Depth 1 to draw the weapon alone. Set the weapon Camera’s Clear Flags to depth only. This will keep the graphical display of the environment on the screen, but discard all information about where each object exists in 3-D space. When the gun is drawn, the opaque parts will completely cover anything drawn, regardless of how close the gun is to the wall.
Don’t clear
This mode does not clear either the color or the depth buffer. The result is that each frame is drawn over the next, resulting in a smear-looking effect. This isn’t typically used in games, and would more likely be used with a custom shader.
Clip Planes
The Near and Far Clip Plane properties determine where the Camera’s view begins and ends. The planes are laid out perpendicular to the Camera’s direction and are measured from its position. The Near plane is the closest location that will be rendered, and the Far plane is the furthest.
The clipping planes also determine how depth buffer precision is distributed over the scene. In general, to get better precision you should move the Near plane as far as possible.
Tenga en cuenta que los planos near y far clip juntos con los planos definidos por el campo de vista de la cámara describen lo que es popularmente conocido como el frustum de la cámara. Unity asegura que cuando usted renderize sus objetos, esos que están completamente afuera de este frustum no son mostrados. Esto se llama Frustum Culling. Frustum Culling occure independientemente si usted utiliza Occlusion Culling(Eliminación de Oclusión) en su juego.
For performance reasons, you might want to cull small objects earlier. For example, small rocks and debris could be made invisible at much smaller distance than large buildings. To do that, put small objects into a separate layer and set up per-layer cull distances using Camera.layerCullDistances script function.
Culling Mask
The Culling Mask is used for selectively rendering groups of objects using Layers. More information on using layers can be found here.
Normalized Viewport Rectangles
Normalized Viewport Rectangle is specifically for defining a certain portion of the screen that the current camera view will be drawn upon. You can put a map view in the lower-right hand corner of the screen, or a missile-tip view in the upper-left corner. With a bit of design work, you can use Viewport Rectangle to create some unique behaviors.
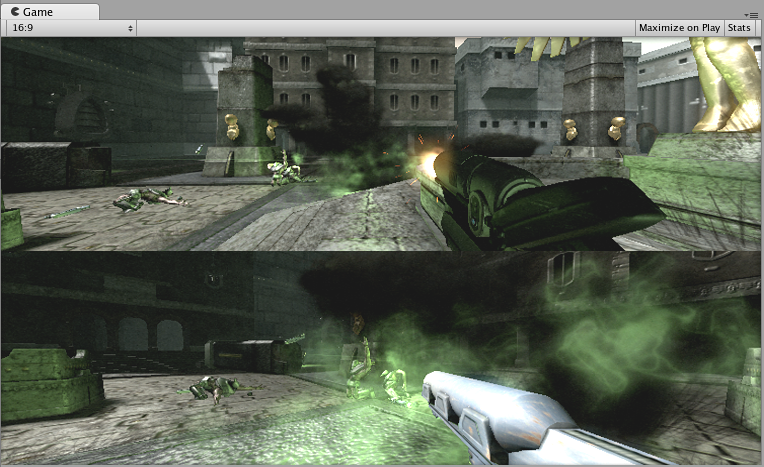
It’s easy to create a two-player split screen effect using Normalized Viewport Rectangle. After you have created your two cameras, change both camera’s H values to be 0.5 then set player one’s Y value to 0.5, and player two’s Y value to 0. This will make player one’s camera display from halfway up the screen to the top, and player two’s camera start at the bottom and stop halfway up the screen.
Orthographic (Ortográfica)
Marking a Camera as Orthographic removes all perspective from the Camera’s view. This is mostly useful for making isometric or 2D games.
Note that fog is rendered uniformly in orthographic camera mode and may therefore not appear as expected. This is because the Z coordinate of the post-perspective space is used for the fog “depth”. This is not strictly accurate for an orthographic camera but it is used for its performance benefits during rendering.
Render Texture (Textura Renderizada)
This will place the camera’s view onto a Texture that can then be applied to another object. This makes it easy to create sports arena video monitors, surveillance cameras, reflections etc.
Target display
A camera has up to 8 target display settings. The camera can be controlled to render to one of up to 8 monitors. This is supported only on PC, Mac and Linux. In Game View the chosen display in the Camera Inspector will be shown.
Recomendaciones
- Las Cámaras pueden ser istanciadas, criadas(parented), y scripted como cualquier otro GameObject.
- To increase the sense of speed in a racing game, use a high Field of View.
- Cameras can be used in physics simulation if you add a Rigidbody Component.
- No hay un limite para el número de Cámaras que usted puede tener en sus escenas.
- Orthographic cameras are great for making 3D user interfaces.
- If you are experiencing depth artifacts (surfaces close to each other flickering), try setting Near Plane to as large as possible.
- Las Cámaras no pueden renderizar a la Pantalla del Juego y una Render Texture al mismo tiempo, sólo una o la otra.
- There’s an option of rendering a Camera’s view to a texture, called Render-to-Texture, for even more interesting effects.
- Unity comes with pre-installed Camera scripts, found in Components > Camera Control. Experiment with them to get a taste of what’s possible.