Shadows (Sombras)
Las luces de Unity pueden emitir Shadows desde un objeto a otras partes de sí mismo u otros objetos cercanos. Las sombras agregan un grado de profundidad y realismo a una escena ya que estos traen la escala y la posición de objetos que de lo contrario se verían “planos”.
Cómo funcionan las sombras?
Considere el caso más simple de una escena con una sola fuente de luz. Los rayos de luz viajan en lineas rectas desde una fuente y podrían eventualmente golpear los objetos en la escena. Una vez un rayo ha golpeado un objeto, este no puede viajar más allá para iluminar cualquier cosa (ie, este “rebota” del primer objeto y no pasa a través de este). Las sombras emitidas por el objeto son simplemente áreas que no están iluminadas ya que la luz no pudo llegar a estas.

Otra manera de ver esto es imaginar una cámara en la misma posición que la luz. Las áreas de la escena que están en sombra son precisamente estas áreas que la cámara no ve.

De hecho, esta es la manera cómo Unity determina las posiciones de las sombras desde una luz. La luz utiliza el mismo principio que una cámara para “renderizar” la escena internamente desde su punto de vista. Un sistema de un buffer de profunidad, como se utiliza para las cámaras de la escena, mantiene rastro de las superficies que están más cercas a la luz; las superficies en una linea directa de luz recibe iluminación pero todas las demás están en sombra. El mapa de profundidad en este caso es conocido como un Shadow Map (usted puede encontrar la Página de Wikipedia Page acerca de shadow mapping útil para información adicional).
Habilitando Sombras
Usted puede habilitar sombras para una luz individual con la propiedad Shadow Type en el inspector.

The Hard Shadows setting produces shadows with a sharp edge. Hard shadows seldom occur in everyday life (unless you are an astronaut) but they involve less processing overhead than the more realistic Soft Shadows and are acceptable for many purposes. Also, soft shadows tend to reduce the “blocky” aliasing effect from the shadow map. The Strength setting determines how dark the shadows are; in general, some light will be scattered by the atmosphere and reflected off other objects, so you usually don’t want shadows to be set to maximum strength. The Resolution property sets the rendering resolution for the shadow map “camera” mentioned above. If you find your shadows have very visible edges then you might want to increase this value. The near plane property allows you to choose the value for the near plane when rendering shadows. Any objects closer than this distance to the light will not cast any shadows.
Each Mesh Renderer in the scene also has properties called Cast Shadows and Receive Shadows which must be enabled as appropriate.

Cast Shadows has simple On and Off options to enable or disable shadow casting for the mesh. There is also a Two Sided option to allow shadows to be cast by either side of the surface (ie, backface culling is ignored for shadow casting purposes) while Shadows Only allows shadows to be cast by an otherwise invisible object.
Shadow Mapping and the Bias Property
The shadows for a given light are determined during the final scene rendering. When the scene is rendered to the main view camera, each pixel position in the view is transformed into the coordinate system of the light. The distance of a pixel from the light is then compared to the corresponding pixel in the shadow map. If the pixel is more distant than the shadow map pixel, then it is presumably obscured from the light by another object and it will get no illumination.
A surface directly illuminated by a light can sometimes appear to be partly in shadow. This is because pixels that should be exactly at the distance specified in the shadow map will sometimes be deemed farther away (a consequence of using a low resolution image for the shadow map; or using shadow filtering). The result is arbitrary patterns of pixels in shadow when they should really be lit, giving a visual effect known as “shadow acne”.
To prevent shadow acne, a bias value can be added to the distance in the shadow map to ensure that pixels on the borderline will definitely pass the comparison as they should; or while rendering into the shadow map, objects can be inset a bit along their normals. These values are set by the Bias and Normal Bias properties in the light’s inspector when it has shadows enabled.
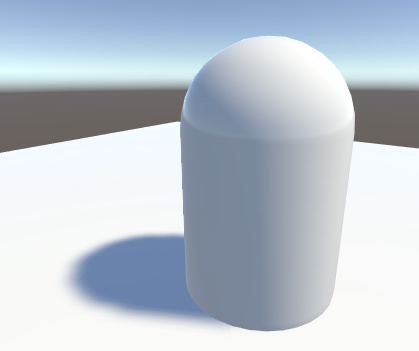
Do not set the Bias value too high though, however, since areas of a shadow near to the object casting it can then sometimes be falsely illuminated. This effect is known as “Peter Panning” (i.e. the disconnected shadow makes the object look as if it is flying above the ground, like Peter Pan).
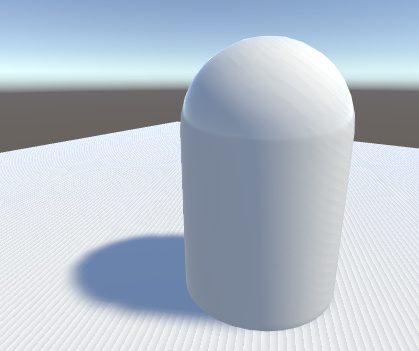
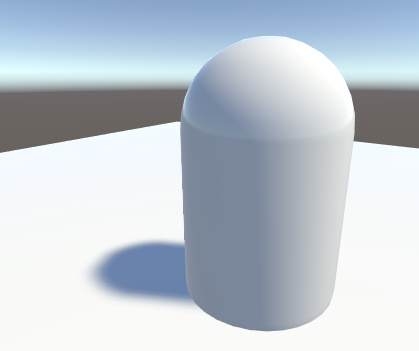
Likewise, setting the Normal Bias value too high will make the shadow appear too narrow for the object:
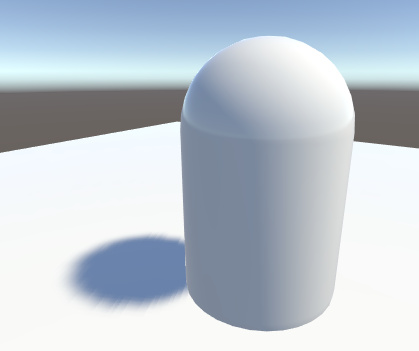
The bias values for a light may need a bit of tweaking to make sure that neither shadow acne nor Peter Panning occur. It is generally easier to gauge the right value by eye rather than attempt to calculate it.