Sombras de las Luces Direccionales
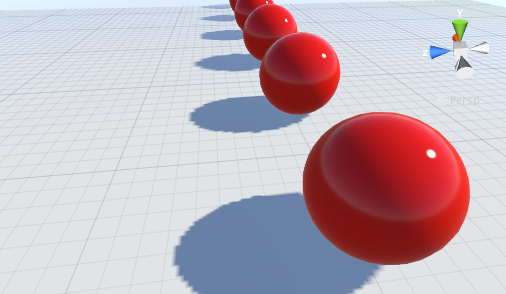
Una luz direccional normalmente simula la luz solar y una sola luz puede iluminar toda la escena. Esto significa que el mapa de sombras a menudo cubrirá una gran parte de la escena a la vez y esto puedo llevar a un problema con las sombras llamado “perspective aliasing”. En definitiva, este problema significa que los píxeles del mapa de sombras cercanos a la cámara se ven aumentados y “gruesos” comparados con los más alejados.
Perspective aliasing es menos perceptible cuando se utiliza sombras suaves y una resolución alta para el mapa de sombras. Sinembargo, utilizar estas características aumentará los requisitos gráficos y puede puede afectar a la frecuencia de fotogramas.
Shadow Cascades
El motivo por el que ocurre el problema de perspective aliasing es que diferentes zonas del mapa de sombras se escalan desproporcionadamente debido a la perspectiva de la cámara. El mapa de sombras de una luz necesita cubrir únicamente la parte de la escena visible por la cámara, definida por el view frustum de la cámara. Si usted se imagina un caso simple donde la luz direccional viene directamente desde arriba, se puede ver la relación entre el tronco y el mapa de sombras.
The distant end of the frustum is covered by 20 pixels of shadow map while the near end is covered by only 4 pixels. However, both ends appear the same size onscreen. The result is that the resolution of the map is effectively much less for shadow areas that are close to the camera. (Note that in reality, the resolution is much higher than 20x20 and the map is usually not perfectly square-on to the camera.)
Using a higher resolution for the whole map can reduce the effect of the “chunky” areas but this uses up more memory and bandwidth while rendering. You will notice from the diagram, though, that a large part of the shadow map is “wasted” at the near end of the frustum because it will never be seen; also shadow resolution far away from the camera is likely to be too high. It is possible to split the frustum area into two zones based on distance from the camera. The zone at the near end can use a separate shadow map at a reduced size (but with the same resolution) so that the number of pixels is evened out somewhat.
These staged reductions in shadow map size are known as cascaded shadow maps (sometimes called “Parallel Split Shadow Maps”). From the Quality Settings, you can set zero, two or four cascades for a given quality level.
The more cascades you use, the less your shadows will be affected by perspective aliasing, but increasing the number does come with a rendering overhead. However, this overhead is still less than it would be if you were to use a high resolution map across the whole shadow.

Note: on mobile platforms, shadow cascades are not available for directional lights.
Shadow Distance
Shadows from objects tend to become less noticeable the farther the objects are from the camera; they appear smaller onscreen and also, distant objects are usually not the focus of attention. Unity lets you take advantage of this effect by providing a Shadow Distance property in the Quality Settings. Objects beyond this distance (from the camera) cast no shadows at all, while the shadows from objects approaching this distance gradually fade out.
Setting the shadow distance as low as possible will help improve rendering performance since distant objects will not need to be rendered into the shadow map at all. Additionally, the scene will often actually look better with distant shadows removed. Getting the shadow distance right is especially important for performance on mobile platforms since they don’t support shadow cascades.
Visualising Shadow Parameter Adjustments
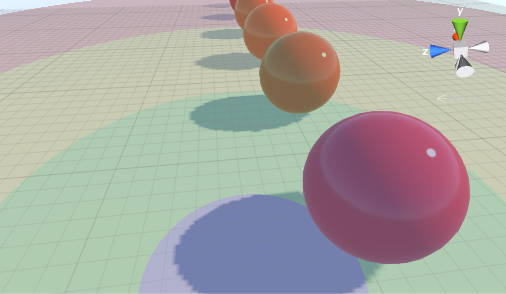
The Scene view has a draw mode called Shadow Cascades that uses coloration to show the parts of the scene using the different cascade levels. You can use this to help you get the shadow distance, cascade count and cascade split ratios just right.
