Managing importers with scripts
You can use C# scriptsA piece of code that allows you to create your own Components, trigger game events, modify Component properties over time and respond to user input in any way you like. More info
See in Glossary to interact with Unity’s built-in importers, or create a scripted importer to add support for files that aren’t natively supported by Unity.
Scripting with built-in importers
Use the callbacks in the AssetPostprocessor class to add custom behavior before or after Unity starts the import process for its built-in importers. You can manipulate import settings, analyze imported assets, or generate new assets dynamically during import. Refer to Supported asset type reference for a full list of built in importers available.
The following is an example of an AssetPostprocessor script that modifies the import settings of a texture before importing it, and then applies a red color tint to the texture after importing:
using UnityEngine;
using UnityEditor;

public class CustomTextureImporter : AssetPostprocessor
{
    // Increment the version number, when the AssetPostprocessors code/behavior is changed
    static readonly uint k_Version = 0;
    public override uint GetVersion() { return k_Version; }

    void OnPreprocessTexture()
    {
        // Get a reference to the TextureImporter
        TextureImporter importer = assetImporter as TextureImporter;

        // Customize settings
        importer.mipmapEnabled = false;
        importer.textureType = TextureImporterType.Default;
        importer.maxTextureSize = 512;
        importer.wrapMode = TextureWrapMode.Repeat;

        Debug.Log($"Texture '{assetPath}' has had its import settings changed in OnPreProcessTexture.");
    }

    void OnPostprocessTexture(Texture2D texture)
    {
        // Set a red color tint to the texture
        Color tintColor = new(1.0f, 0.5f, 0.5f, 1.0f);

        // Get the texture's pixels
        Color[] pixels = texture.GetPixels();
        for (int i = 0; i < pixels.Length; i++)
        {
            // Apply the tint color
            pixels[i] *= tintColor;
        }
        // Set the modified pixels back to the texture
        texture.SetPixels(pixels);
        // Apply the changes to the texture
        texture.Apply();

        // Log the change
        Debug.Log($"Texture '{texture.name}' has been tinted with a red color in OnPostProcessTexture.");
    }
}
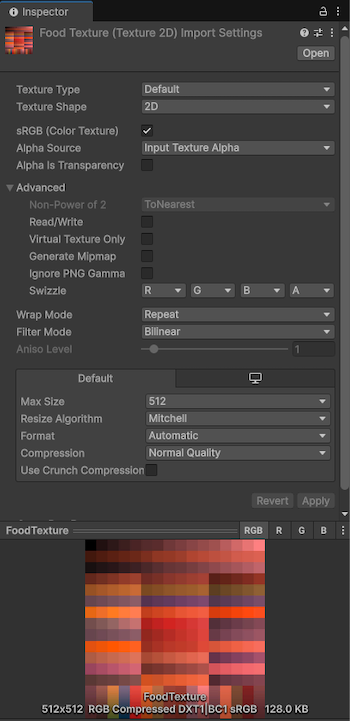
To use this example, place it in a new script file in somewhere your project’s Assets folder, and then add a new texture to the Assets folder. Unity then applies the settings to the texture, as shown in the following image:
Create custom importers
To add your own support for file formats that aren’t natively supported by Unity, you can use a ScriptedImporter to write custom asset importers in C#.
A scripted importer is a class that inherits from the abstract class ScriptedImporter and has the [ScriptedImporter] attribute. This registers your custom importer to handle one or more file extensions. When Unity detects a file that matches the registered file extensions as being new or changed, it invokes the method OnImportAsset of your custom importer.
Important: Scripted importers can’t handle a file extension that Unity already natively handles. You can use the overrideExts parameter to override this behavior and add the file extension for the existing importer. For a list of files Unity natively supports, refer to Supported asset type reference.
Once you have added a ScriptedImporter script to a project, you can use it the same way as any other file type supported by Unity. For more information, refer to Introduction to importing assets.
Create a scripted importer
The following code example imports asset files with the extension cube into a prefabAn asset type that allows you to store a GameObject complete with components and properties. The prefab acts as a template from which you can create new object instances in the scene. More info
See in Glossary with a cube primitive as the main asset and a default material and color. It then assigns its position from a value read from the asset file:
using UnityEngine;
using UnityEditor.AssetImporters;
using System.IO;

// The importer is registered with Unity's asset pipeline by placing the ScriptedImporter attribute on the
// CubeImporter class. The CubeImporter class implements the abstract ScriptedImporter base class.

[ScriptedImporter(1, "cube")]
public class CubeImporter : ScriptedImporter
{
    public float m_Scale = 1;

    // The ctx argument contains both input and output data for the import event

    public override void OnImportAsset(AssetImportContext ctx)
    {
        var cube = GameObject.CreatePrimitive(PrimitiveType.Cube);
        var position = JsonUtility.FromJson<Vector3>(File.ReadAllText(ctx.assetPath));

        cube.transform.position = position;
        cube.transform.localScale = new Vector3(m_Scale, m_Scale, m_Scale);

        // 'cube' is a GameObject and is automatically converted into a prefab.
        // Only the 'Main Asset' is eligible to become a prefab.
        ctx.AddObjectToAsset("main obj", cube);
        ctx.SetMainObject(cube);

        var material = new Material(Shader.Find("Standard"));
        material.color = Color.red;

        // Assets must be assigned a unique identifier string consistent across imports.
        ctx.AddObjectToAsset("my Material", material);

        // Assets that are not passed into the context as import outputs must be destroyed.
        var tempMesh = new Mesh();
        DestroyImmediate(tempMesh);
    }
}
For more information, refer to the AssetImporters.ScriptedImporter API documentation.
Create a custom import settings window
To create a custom import settings window for your scripted importer, create a class that inherits from ScriptedImporterEditor and decorate it with the [CustomEditor] attribute. For example:
using UnityEditor;
using UnityEditor.AssetImporters;
using UnityEditor.SceneManagement;
using UnityEngine;

[CustomEditor(typeof(CubeImporter))]
public class CubeImporterEditor: ScriptedImporterEditor
{
    public override void OnInspectorGUI()
    {
        var colorShift = new GUIContent("Color Shift");
        var prop = serializedObject.FindProperty("m_ColorShift");
        EditorGUILayout.PropertyField(prop, colorShift);
        base.ApplyRevertGUI();
    }
}
Import dependencies and determinism
When creating custom AssetPostprocessor or ScriptedImporter scripts, ensure that your import code is deterministic. A deterministic importer always produces the same output from the same input and dependencies. Unregistered dependencies or non-deterministic code can cause the Asset Pipeline to cache incorrect results, leading to inconsistent builds across machines or when the active build target changes.
Register import dependencies
If your import code reads from external files or depends on other environment states that aren’t covered by Unity’s automatic import dependencies, you must register those dependencies. Otherwise, Unity will not reimport the asset if those dependencies change. For the active build target used for the import, read selectedBuildTarget on the import context instead of tracking the platform manually.
For file dependencies, use context.DependsOnArtifact to register them. If the configuration file changes, Unity automatically reimports the dependent asset.
public class ConfigDependentPostprocessor : AssetPostprocessor
{
    void OnPreprocessTexture()
    {
        // Register the dependency before reading the asset
        context.DependsOnArtifact("Assets/Config/TextureImportConfig.asset");
        // Read config and apply settings...
    }
}
For import logic that depends on the active build target (for example, platform-specific compression or paths), avoid compile-time constants such as #if UNITY_EDITOR_WIN. Use runtime checks against the build target Unity is importing for. The approach depends on if you’re using a ScriptedImporter or an AssetPostprocessor:
-
Scripted importer: Read
selectedBuildTargetfrom theAssetImportContextpassed intoOnImportAsset. -
Asset postprocessor: Use the same property on the
contextinstance.
Accessing selectedBuildTarget registers an import dependency on that build target, so Unity reimports when the target relevant to the import changes.
using UnityEditor;
using UnityEngine;

public class PlatformAwarePostprocessor : AssetPostprocessor
{
    void OnPreprocessTexture()
    {
        switch (context.selectedBuildTarget)
        {
            case BuildTarget.StandaloneWindows64:
                // Apply settings for Windows standalone imports
                break;
            case BuildTarget.StandaloneOSX:
                // Apply settings for macOS standalone imports
                break;
            default:
                break;
        }
    }
}
Bump importer and postprocessor versions
When you change the behavior of a ScriptedImporter or an AssetPostprocessor, bump its version to invalidate the previously cached import results. If you don’t bump the version, next time the importer runs, it might reuse invalid import results.
-
Scripted importers: Increment the version argument on the
[ScriptedImporter]attribute whenever importer code changes. -
Asset postprocessors: Override
GetVersionand return a new value when theAssetPostprocessorcode changes.
The CustomTextureImporter example under Scripting with built-in importers shows a GetVersion implementation you can follow for postprocessors.
Avoid non-deterministic code
Custom import code that relies on time, random numbers, unordered collections, or asynchronous timing produces different results on each run.
-
Time-based operations: Don’t use properties like
DateTime.UtcNowto stamp assets during import. If you need to log import times, write to a log file outside the asset pipeline. -
Unordered collections: Iterating over
DictionaryorHashSetcollections produces elements in an undefined order. Use explicitly sorted collections, such asListor arrays, to guarantee a consistent processing order. -
Timing-dependent operations: Avoid relying on asynchronous completion order, thread scheduling, network availability, or file I/O performance. For example, if an importer spawns multiple
asynctasks to process subassets, sort or synchronize the tasks before combining their results instead of relying on the order in which they finish.
class OrderedCollectionProcessor : AssetPostprocessor
{
    void OnPostprocessModel(GameObject model)
    {
        var materialList = new List<Material>();
        // Populate list...

        // Sort explicitly by a deterministic property
        materialList.Sort((a, b) => string.Compare(a.name, b.name, System.StringComparison.Ordinal));

        foreach (var material in materialList)
        {
            // Modification order is now deterministic
        }
    }
}