Customize settings with build profiles
Customize specific project settings for each build profileA set of customizable configuration settings to use when creating a build for your target platform. More info
See in Glossary to create unique configurations for your target platforms.
Note: Build profile overrides are used in Play mode and within the Unity Player.
Refer to the following sections to add and manage settings through Add Settings, including information on overriding Diagnostics and Quality Settings.
Add custom settings
Use the Add Settings button to add optional settings to a build profile and then customize them as required. For a list of settings you can add, refer to Build Profiles window reference.
To add settings to a build profile, follow these steps:
- In the Build Profiles window, select or create a build profile for your target platform.
- Select Add Settings.
- From the dropdown, select the settings you want to add.
The settings you add appear in a section with a foldout, where you can customize them for the build profile.
Remove or reset settings
To remove or reset the settings in an added section, follow these steps:
Open the added section’s More (⋮) menu.
-
Select one of the following options:
Property Description Reset Reset the setting values in the section to the global values for the target platform. Set the global values from Edit > Project Settings. Remove Remove the section from the Build Profiles window. To configure the settings again, add the section back with Add Settings.
Override diagnostics data
The Diagnostics section is always visible for supported build profiles and isn’t added through Add Settings.
To override the default Diagnostics settings established in Project Settings, follow these steps:
- Go to File > Build Profiles.
- Select or create a build profile for your target platform.
- Under Diagnostics, select the required option from the Diagnostic Data dropdown. For more information, refer to the Build Profiles window reference.
Your build profile now uses the assigned value and overrides the Project Settings. To revert to using the value from Project Settings, set Diagnostic Data to Use Project Settings → Diagnostics.
Override Quality settings
When you add the Quality Settings section through the Add Settings button, quality levels for the build profile appear in the Quality Settings foldout.
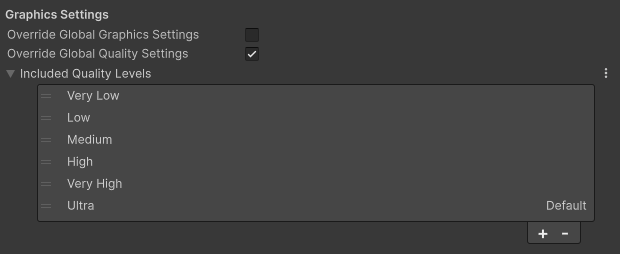
The list inherits quality levels for your target platform from the global Quality levels located in Edit > Project Settings > Quality.
Note: When in Play mode, the quality level used is the selected level in the global quality settings.
To add a new quality level to your build profile, follow these steps:
- Add a new quality level to the global quality settings in Edit > Project Settings > Quality.
- In the Build Profiles window, select the Add (+) button at the bottom of the quality level list.
- To set the added quality level as default, right-click (macOS: Ctrl+ click) on any quality level.
Note: Renaming or deleting a quality level in the global quality settings updates any build profile that contains that level.
Additional resources
- Create a build profile
- Project SettingsA broad collection of settings which allow you to configure how Physics, Audio, Networking, Graphics, Input and many other areas of your project behave. More info
See in Glossary