Introduction to 2D
You can use Unity to create 2D projects. This page introduces the gameplay, graphics, and physics specific to 2D Unity projects.
Gameplay in 2D
The familiar functions of the Unity Editor when you use 3D mode are still available but with helpful additions to simplify 2D development.
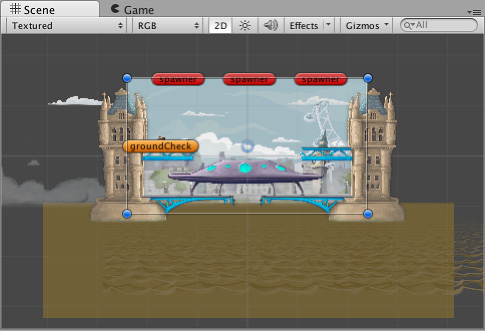
The most noticeable feature is the 2D view mode button in the toolbar of the Scene view. When you enable 2D mode, Unity will set an orthographic (perspective-free) view. This view means that the camera looks along the z-axis with the y-axis increasing upwards, which enables you to visualize the scene and easily place 2D objects.
For a full list of 2D components, how to change between 2D and 3D mode, and the different 2D and 3D mode settings, refer to 2D or 3D Projects.
2D graphics
Graphic objects in 2D are known as Sprites. Sprites are standard textures, with special techniques for combining and managing sprite textures for efficiency and convenience during development. Unity provides a built-in Sprite Editor to let you extract sprite graphics from a larger image. This enables you to edit many component images within a single texture in your image editor. You can use this, for example, to keep the arms, legs, and body of a character as separate elements within one image.
Sprites are rendered with a Sprite RendererA component that lets you display images as Sprites for use in both 2D and 3D scenes. More info
See in Glossary component rather than the Mesh RendererA mesh component that takes the geometry from the Mesh Filter and renders it at the position defined by the object’s Transform component. More info
See in Glossary used with 3D objects. You can add this to a GameObject via the Components menu (Component > Rendering > Sprite Renderer) or you can create a GameObject directly with a Sprite Renderer already attached (menu: GameObject > 2D Object > Sprites, then select a shape).
You can also use a Sprite Creator tool to make placeholder 2D images.
2D physics
Unity has a separate physics system to handle 2D physics so you can make use of optimizations only available with 2D. The components correspond to the standard 3D physics components such as RigidbodyA component that allows a GameObject to be affected by simulated gravity and other forces. More info
See in Glossary, Box ColliderA cube-shaped collider component that handles collisions for GameObjects like dice and ice cubes. More info
See in Glossary, and Hinge JointA joint that groups together two Rigidbody components, constraining them to move like they are connected by a hinge. It is perfect for doors, but can also be used to model chains, pendulums and so on. More info
See in Glossary, but with 2D appended to the name. Therefore, you can equip sprites with Rigidbody 2D, Box Collider 2D, and Hinge Joint 2D. Most 2D physics components are flattened versions of the 3D equivalents (for example, Box Collider 2D is a square while Box Collider is a cube) but there are a few exceptions.
For the full list of 2D physics components, refer to 2D or 3D Projects. For further information about 2D physics concepts and components, refer to the Physics section of the manual. To specify 2D physics settings, refer to the Physics 2D window.