- Unity 매뉴얼
- Platform-Specific
- 스탠드얼론
- 스탠드얼론 플레이어 설정(Standalone Player Settings)
스탠드얼론 플레이어 설정(Standalone Player Settings)
이 페이지에서는 스탠드얼론 플랫폼(Mac OSX, Windows, Linux)별 Player Settings 에 대해 자세하게 설명합니다. 일반 플레이어 설정에 대한 설명은 여기에서 확인할 수 있습니다.
해상도 및 프레젠테이션(Resolution And Presentation)
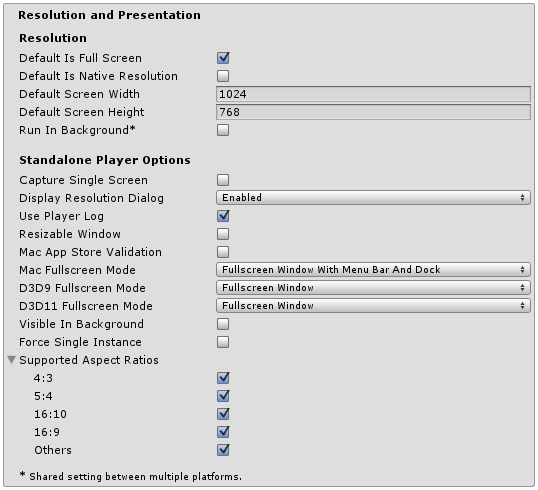
| 프로퍼티: | 기능: |
|---|---|
| Resolution | |
| Default is Full Screen | Should the game start in fullscreen mode by default? |
| Default Is Native Resolution | Should the game use the default resolution used on this machine? |
| Default Screen Width | 픽셀로 나타낸 게임 화면의 디폴트 너비입니다. |
| Default Screen Height | 픽셀로 나타낸 게임 화면의 디폴트 높이입니다. |
| Run in background | Should the game keep running (rather than pausing) if the app loses focus? |
| Standalone Player Options | |
| Capture Single Screen | If enabled, standalone games in fullscreen mode will not darken the secondary monitor in multi-monitor setups (no longer supported on Mac OS X). |
| Display Resolution Dialog | Should the game start with a dialog to let the user choose the screen resolution? The options are Disabled, Enabled and Hidden by Default (ie, the dialog only appears if the alt key is held down at startup). |
| Use Player Log | Write a log file with debugging information. If you plan to submit your application to the Mac App Store you will want to leave this option un-ticked. Ticked is the default. |
| Resizable Window | Allow user to resize the standalone player window. |
| Mac App Store Validation | Enable receipt validation for the Mac App Store. |
| Mac Fullscreen Mode | How should fullscreen mode operate on MacOSX? The options are Capture Display (ie, Unity takes over the whole display and the user cannot switch apps until fullscreen mode is exited), Fullscreen Window and Fullscreen Window with Menu Bar and Dock. |
| D3D9 FullScreen Mode | Default fullscreen mode when using DirectX 9. |
| Exclusive Mode | Sets the Default Fullscreen mode to encompass the whole screen without a window surronding it. |
| Fullscreen Window | 전체 화면일 때 게임을 창 안에 계속 표시합니다. 게임을 배경에서 실행하게 할 경우 유용합니다. |
| Exclusive Mode | 창 테두리가 보이지 않게 전체 화면이 표시되도록 설정하려면 디폴트 전체 화면 모드를 선택합니다. |
| Fullscreen Window | 전체 화면일 때 게임을 창 안에 계속 표시합니다. 게임을 배경에서 실행하게 할 경우 유용합니다. |
| Visible in Background | On Windows, show the application in the background if Fullscreen Windowed mode is used. |
| Force Single Instance | Restrict standalone players to a single concurrent running instance. |
| Supported Aspect Ratios | The aspect ratios that will appear in the Resolution Dialog at startup (as long as they are supported by the user’s monitor). |
아이콘
| 프로퍼티: | 기능: |
|---|---|
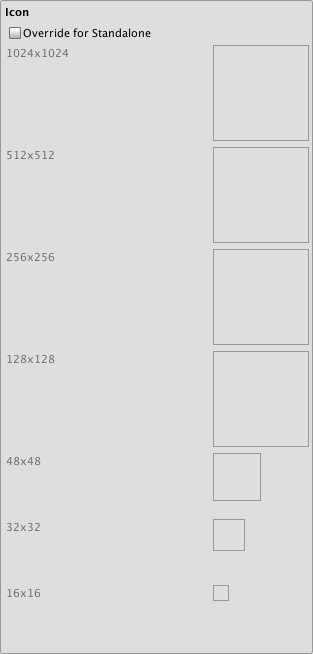
| Override for Standalone | Check if you want to assign a custom icon you would like to be used for your standalone game. Different sizes of the icon should fill in the squares below. |
스플래시 이미지
| 프로퍼티: | 기능: |
|---|---|
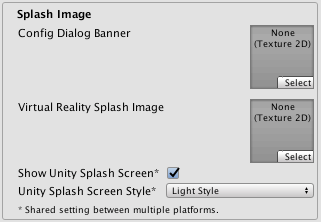
| Config Dialog Banner | Add your custom splash image that will be displayed in the Display Resolution Dialog. |
| Show Unity Splash Screen | Shows the Made with Unity Splash screen when the game is loading . |
기타 설정
| 프로퍼티: | 기능: |
|---|---|
| Rendering | |
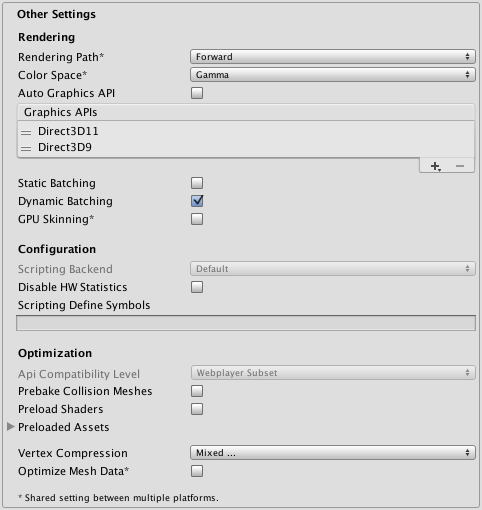
| Rendering Path | This property is shared between Standalone and WebPlayer content. |
| Vertex Lit | Lowest lighting fidelity, no shadows support. Best used on old machines or limited mobile platforms. |
| Forward with Shaders | Good support for lighting features; limited support for shadows. |
| Deferred Lighting | Best support for lighting and shadowing features, but requires certain level of hardware support. Best used if you have many realtime lights. (NOTE: If the camera’s projection mode is set to Orthographic, this value is overridden, and the camera will always use Forward rendering.) |
| Color Space | Which color space should be used for rendering? The options are Gamma and Linear. |
| Auto Graphics API for Windows | When this is checked your application will use the best Graphics API on the windows machine it runs on. When unchecked you are able to add and remove supported Graphics APIs |
| Auto Graphics API for Linux | When this is checked your application will use the best Graphics API on the Linux machine it runs on. When unchecked you are able to add and remove supported Graphics APIs |
| Auto Graphics API | When enabled, the game finds the most suitable Graphics API to use. When disabled, it allows you to choose it for yourself. |
| Static Batching | Set this to use Static Batching (inactive by default in Web Player builds). |
| Dynamic Batching | Set this to use Dynamic Batching on your build (activated by default). |
| GPU Skinning | If checked, DX11/ES3 GPU skinning is enabled. If unchecked, GPU skinning is disabled. |
| Configuration | |
| Scripting Backend | Mono2x is the only scripting backend currently supported on Standalone. |
| Disable HW Statistics | When checked the application will send information about the hardware to Unity (See hwstats page for more details). |
| Scripting Define Symbols | 커스텀 컴파일 플래그입니다. 자세한 내용은 플랫폼 종속 컴파일 페이지를 참조하십시오. |
| Optimization | |
| API Compatibility Level | See below |
| .Net 2.0 | .NET 2.0 라이브러리입니다. .NET 호환성 최대, 파일 크기 최대 |
| .Net 2.0 Subset | 전체 .NET 호환성의 부분 집합, 파일 크기 작음 |
| Prebake Collision Meshes | 빌드 시간에 충돌 데이터를 메시에 추가할지 설정합니다. |
| Preload Shaders | 플레이어가 시작될 때 셰이더를 로드할지 설정합니다. |
| Preloaded Assets | An array of assets to be loaded when the player starts up |
| Vertex Compression | Vertex compression can be set per channel. You can for instance choose to have compression enabled for everything, except positions and lightmap UVs. Whole mesh compression set per imported object will overide the vertex compression on objects that have it set, everything else will obey the vertex compression options/channels set here. |
| Optimize Mesh Data | 메시에 적용된 머티리얼이 사용하지 않는 데이터(탄젠트, 노멀, 컬러, UV)를 메시에서 제거합니다. |
API 호환성 수준
You can choose your mono api compatibility level for all targets except the webplayer. Sometimes a 3rd party .net dll will use things that are outside of the .net compatibility level that you would like to use. In order to understand what is going on in such cases, and how to best fix it, get “Reflector” on windows.
- 알아보고자 하는 API 호환성 레벨에 대한 .NET 어셈블리를 Reflector로 드래그합니다. 이러한 어셈블리는 Frameworks/Mono/lib/mono/YOURSUBSET/에서 확인할 수 있습니다.
- 확인하려는 타사 어셈블리도 드래그합니다.
- 타사 어셈블리를 마우스 오른쪽 버튼으로 클릭하고 “분석”을 선택합니다.
- 분석 리포트에서 “종속성” 섹션을 살펴보십시오. 타사 어셈블리가 사용하고 있지만 .NET 호환성 레벨에서는 사용할 수 없는 모든 항목이 빨간색으로 표시됩니다.
세부 정보
해상도 다이얼로그 커스터마이징
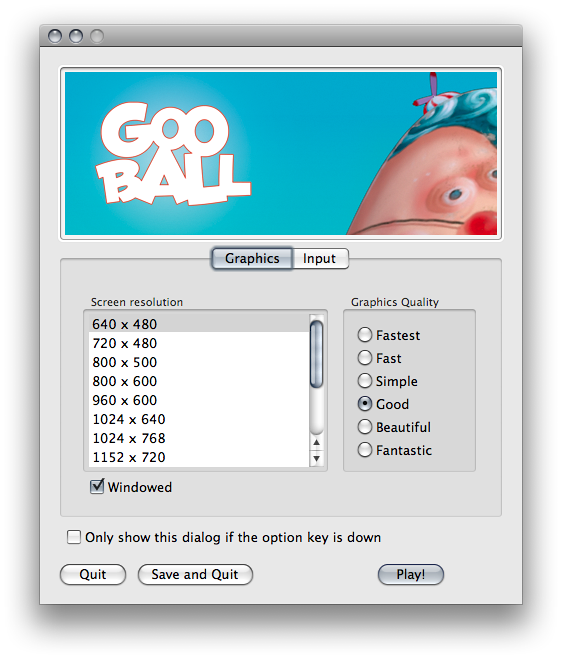
You have the option of adding a custom banner image to the Screen Resolution Dialog in the Standalone Player. The maximum image size is 432 x 163 pixels. The image will not be scaled up to fit the screen selector. Instead it will be centered and cropped.
Mac 앱 스토어에 퍼블리싱
Use Player Log enables writing a log file with debugging information. This is useful to find out what happened if there are problems with your game. When publishing games for Apple’s Mac App Store, it is recommended to turn this off, because Apple may reject your submission otherwise. See this manual page for further information about log files.
Use Mac App Store Validation enables receipt validation for the Mac App Store. If this is enabled, your game will only run when it contains a valid receipt from the Mac App Store. Use this when submitting games to Apple for publishing on the App Store. This prevents people from running the game on any computer then the one it was purchased on. Note that this feature does not implement any strong copy protection. In particular, any potential crack against one Unity game would work against any other Unity content. For this reason, it is recommended that you implement your own receipt validation code on top of this using Unity’s plugin feature. However, since Apple requires plugin validation to initially happen before showing the screen setup dialog, you should still enable this check, or Apple might reject your submission.
Windows Store Apps
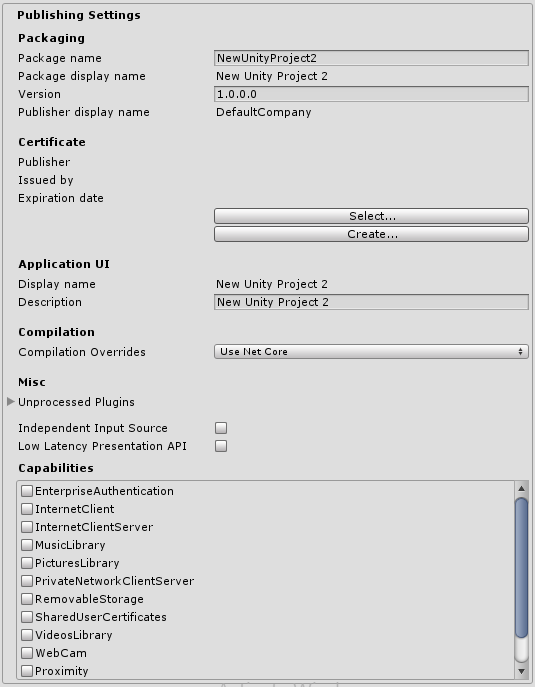
대부분의 설정은 Visual Studio 솔루션을 처음 만들 때 Package.appxmanifest로 전송됩니다.
Note: If you build your project on top of the existing one, Unity won’t overwrite Package.appxmanifest file if it’s already present, that means if you change something in Player Settings be sure to check Package.appxmanifest, if you want Package.appxmanifest to be regenerated, simply delete it, and rebuild your project from Unity.
To read more about App package manifest, please visit http://msdn.microsoft.com/en-us/library/windows/apps/br211474.aspx.
Packaging, Application UI, Tile, 스플래시 화면, Capabilities의 설정은 Package.appxmanifest 파일의 설정으로 직접 전송됩니다.
Certificate
Every Windows Store App needs a certificate which identifies a developer, Unity will create a default certificate, if you won’t provide your own.
Compilation
As you know, Unity uses Mono when compiling script files, and you can use the API located in .NET 3.5. Compilation Overrides allows you to use .NET for Windows Store Apps (also known as .NET Core) in your C# files, the API is available here.
When Compilation Overrides is set to:
- None - C# files are compiled using Mono compiler.
- Use .Net Core - C# files are compiled using Microsoft compiler and .NET Core, you can use Windows Runtime API, but classes implemented in C# files aren’t accessible from JS. Note: when using API from Windows Runtime, it’s advisable to wrap the code with NETFX_CORE define, because the API is only avaible when building to Windows Store Apps, and it’s not available in Unity Editor.
- Use .Net Core Partially - C# files not located in Plugins, Standard Assets, Pro Standard Assets folders are compiled using Microsoft compiler and .NET Core, all other C# files are compiled using Mono compiler. The advantage is that classes implemented in C# are accessible from JS.
Note: You won’t be able to test .NET Core API in Unity Editor, because it doesn’t have access to .NET Core, so you’ll be able to test the API only when running Windows Store App.
Note: You cannot use .NET Core API in JS.
Here’s a simple example how to use .NET Core API in scripts.
    string GetTemporaryFolder()
    {
    #if NETFX_CORE
        return Windows.Storage.ApplicationData.Current.TemporaryFolder.Path;
    #else
        return "LocalFolder";
    #endif
    }
Plugins
Unprocessed Plugins contains a list of plugins which are ignored by Unity’s preprocessing tools (like SerializationWeaver, AssemblyPreprocessor, rrw), usually you don’t need to modify this list, unless you’re getting an error that Unity’s failed to preprocess your plugin.
What will happen if you’ll add a plugin to this list?
Unity won’t inject additional IL code into your assembly used for serialization purposes, but if you’re plugin isn’t referencing UnityEngine.dll, that’s totally fine, because Unity won’t serialize any data from your plugin.
Independent Input Source
Let’s you enable an option for independent input source, you can read more here. Basically this makes your input more responsive, and usually you want this option to be enabled.
Low Latency Presentation API
Let’s you enable Low Latency Presentation API, basically this create D3D11 swapchain with DXGI_SWAP_CHAIN_FLAG_FRAME_LATENCY_WAITABLE_OBJECT flag, read more here and should increase input responsiveness. This option is disabled by default because on hardware with older GPU drivers, this option makes game laggy, if you enable this option - be sure to profile your game if the performance is still acceptable.
Capabilities
성능(Capabilities) 옵션은 Package.appxmanifest 파일에 직접 복사됩니다.
Note: If you’re build your game on top of previous package, Package.appxmanifest won’t be overwritten.