커브 편집
Curves can be used for many different things and there are several different controls in Unity that use curves that can be edited.
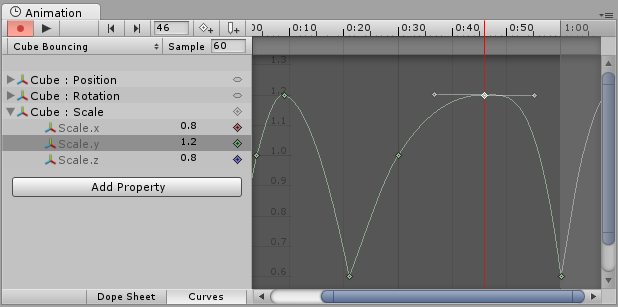
- 애니메이션 뷰에서는 커브를 사용하여 일정 기간 동안 애니메이션화되는 프로퍼티 값을 애니메이션 클립(Animation Clip) 에 표시하고 편집합니다.
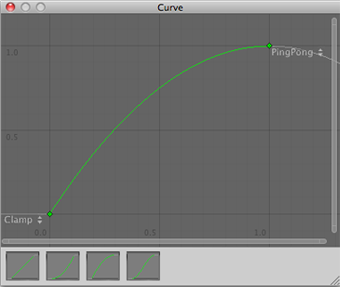
- 스크립트 컴포넌트에는 다양한 용도로 사용할 수 있는 애니메이션 커브 타입의 멤버 변수가 포함될 수 있습니다. 인스펙터에서 컴포넌트를 클릭하면 커브 에디터 가 열립니다.
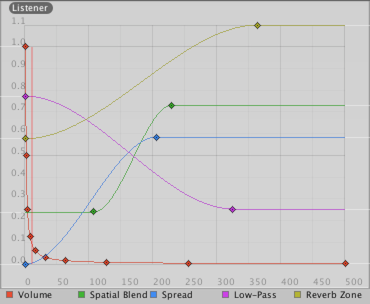
- The Audio Source component uses curves to control rolloff and other properties as a function of distance to the Audio Source.
이런 컨트롤은 각기 미묘한 차이가 있지만, 모든 컨트롤에서 커브 를 정확히 동일한 방법으로 편집할 수 있습니다. 이 페이지에서는 이런 컨트롤에서 곡선을 탐색하고 편집하는 방법에 대해 설명합니다.
커브에 키 추가 및 이동
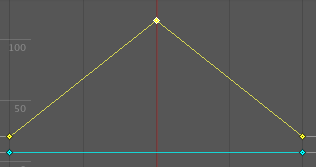
A key can be added to a curve by double-clicking on the curve at the point where the key should be placed. It is also possible to add a key by right-clicking on a curve and select Add Key from the context menu.
키 를 추가한 후에는 마우스를 사용해 여기저기로 드래그할 수 있습니다.
- 키 를 클릭하여 선택합니다. 선택한 키 를 마우스로 드래그합니다.
- 키 를 여기저기로 드래그하다가 그리드에 고정시키려면 Mac에서는 Command/Windows에서는 Control 을 길게 누릅니다.
키 를 한꺼번에 여러 개 선택할 수도 있습니다.
- 여러 키 를 한꺼번에 선택하려면 Shift 를 누른 상태에서 키를 클릭합니다.
- 선택한 키 를 선택 해제하려면 Shift 를 누른 상태에서 키를 다시 클릭합니다.
- 사각 영역 안에 있는 모든 키 를 선택하려면 빈 지점을 클릭하고 드래그하여 사각 선택 영역을 만듭니다.
- Shift 를 길게 눌러 기존에 선택된 키에 사각 선택 영역을 추가할 수도 있습니다.
키 를 선택하고 Delete 를 누르거나 범례를 오른쪽 마우스 단추로 클릭한 후 컨텍스트 메뉴에서 키 삭제(Delete Key) 를 선택하여 삭제할 수 있습니다.
키 편집
Unity 5.1에는 커브 에디터에서 키 값을 직접 편집하는 기능이 새로 추가되었습니다. 선택한 키를 Enter/Return 이나 컨텍스트 메뉴를 사용하여 편집하기 시작하고 Tab 을 사용하여 필드를 전환하고 Enter/Return 를 눌러 적용하고 Escape 를 눌러 편집을 취소할 수 있습니다.
커브 뷰(Curve View) 탐색
애니메이션 뷰(Animation View) 로 작업하는 경우 작업할 커브의 디테일을 쉽게 확대하거나, 축소하여 전체 그림을 볼 수 있습니다.
언제든 F 를 눌러 표시되는 커브나 선택된 키의 프레임을 선택하거나 키 전체를 선택할 수 있습니다.
줌(Zooming)
커브 뷰를 마우스의 스크롤 휠 또는 트랙패드의 줌 기능을 사용하거나 Alt 를 누른 상태에서 마우스로 오른쪽으로 드래그하여 줌 할 수 있습니다.
가로 또는 세로 축만 줌할 수 있습니다.
- 가로로 줌하려면 Mac에서 Command/Windows에서 Control 을 누른 상태에서 줌 합니다.
- 세로로 줌하려면 Shift 를 누른 상태에서 줌 합니다.
또한 스크롤바의 엔드 캡을 드래그하여 커브 뷰에 표시되는 영역을 늘이거나 줄일 수 있습니다.
이동(Panning)
마우스의 휠을 드래그하거나 Alt 를 누른 상태에서 마우스 왼쪽 단추를 클릭하고 드래그하여 커브 뷰를 이동(pan) 할 수 있습니다.
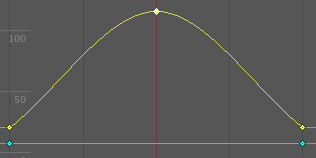
탄젠트 편집
A key has two tangents - one on the left for the ingoing slope and one on the right for the outgoing slope. The tangents control the shape of the curve between the keys. The Animation View have multiple tangent types that can be used to easily control the curve shape. The tangent types for a key can be chosen by right-clicking the key.
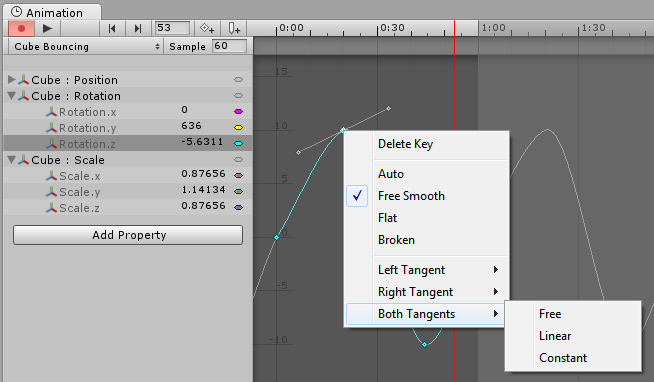
In order for animated values to change smoothly when passing a key, the left and right tangent must be co-linear. The following tangent types ensure smoothness:
- Auto: The tangents are automatically set so make the curve go smoothly through the key.
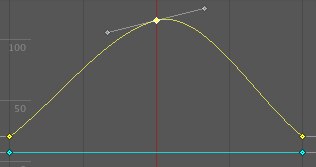
- Free Smooth: The tangents can be freely set by dragging the tangent handles. They are locked to be co-linear to ensure smoothness.
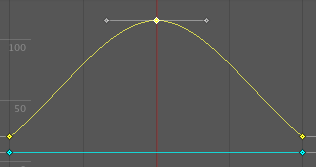
- Flat: The tangents are set to be horizontal. (This is a special case of Free Smooth.)
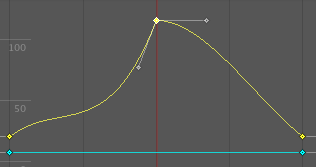
Sometimes smoothness is not desired. The left and right tangent can be set individually when the tangents are Broken. The left and right tangent can each be set to one of the following tangent types:
- Free: The tangent can be freely set by dragging the tangent handle.
- Linear: The tangent points towards the neighboring key. A linear curve segment can be made by setting the tangents at both ends to be Linear.
- Constant: The curve retains a constant value between two keys. The value of the left key determines the value of the curve segment.
