Positioning GameObjects
When building your games, you’ll place lots of different objects in your game world.
Translate, Rotate, and Scale
Use the Transform Tools in the Toolbar to Translate, Rotate, and Scale individual GameObjects. Each has a corresponding Gizmo that appears around the selected GameObject in the Scene View. You can use the mouse and manipulate any Gizmo axis to alter the Transform Component of the GameObject, or you can type values directly into the number fields of the Transform Component in the Inspector. Each of the three transform modes can be selected with a hotkey - W for Translate, E for Rotate, R for Scale and T for RectTransform. (The RectTransform is used for positioning UI elements rather than positioning standard GameObjects - see the UI section of the manual for further details.)
At the center of the Translate gizmo, there are three small squares that can be used to drag the object within a single plane (i.e. two axes can be moved at once while the third is kept still). If you have a three button mouse, you can click the middle button and drag to adjust the axis that was most recently moved (the arrow for this axis will change to yellow). If you hold shift while clicking and dragging in the center of the Translate Gizmo, the centre of the gizmo changes to a flat square, indicating that you can move the object around on a plane relative to the way the Scene View camera is facing.
With the rotation tool selected, you can change the object’s rotation by clicking and dragging the axes of the wireframe sphere gizmo that appears around it. As with the translation tool, the last axis you changed will be colored yellow and can be further adjusted by clicking the middle mouse button and dragging. Think of the red, green and blue circles as performing rotation around the red, green and blue axes that appear in the translate mode. (Red is the x-axis, green in the y-axis, and blue is the z-axis.) Finally, the outer-most circle can be used to rotate the object around the scene view z-axis. You can think of this as rotating in screen space.
The scaling tool lets you rescale the object evenly on all axes at once by clicking and dragging on the cube at the center of the gizmo. You can also scale the axes individually, but you should take care if you do this when there are child objects since the effect can look quite strange. Again, the last axis changed appears in yellow and can be adjusted by dragging with the middle mouse button.
Note that in 2D mode, the Z axis can’t be changed in the scene using the gizmos. However, it is useful for certain scripting techniques to use the Z axis for other purposes; you can still set the Z axis from the inspector in such cases.
For more information on transforming GameObjects, please view the Transform Component page.
Gizmo Display Toggles
The Gizmo Display Toggles are used to define the location of any Transform Gizmo.

For Position:
- Center will position the Gizmo at the center of the object’s rendered bounds.
- Pivot will position the Gizmo at the actual pivot point of a Mesh.
For Rotation:
- Local will keep the Gizmo’s rotation relative to the object’s.
- Global will clamp the Gizmo to world space orientation.
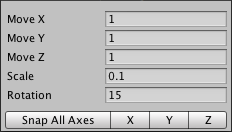
Unit Snapping
While dragging any Gizmo Axis using the Translate Tool, you can hold the Control key (Command on Mac) to snap to increments defined in the Snap Settings.
You can change the unit distance that is used for the unit snapping using the menu Edit->Snap Settings…
Surface Snapping
While dragging in the center using the Translate Tool, you can hold Shift and Control (Command on Mac) to snap the object to the intersection of any Collider. This makes precise positioning of objects incredibly fast.
Look-At Rotation
While using the Rotate Tool, you can hold Shift and Control (Command on Mac) to rotate the object towards a point on the surface of any Collider. This makes orientation of objects relative to one another simple.
Vertex Snapping
You can assemble your worlds more easily with a feature called Vertex Snapping. This feature is a really simple but powerful tool in Unity. It lets you take any vertex from a given mesh and with your mouse place that vertex in the same position as any vertex from any other mesh you choose.
With this you can assemble your worlds really fast. For example, you could align road sections precisely in a racing game or position power up items at the vertices of a mesh.
Using vertex snapping in Unity is simple. Just follow these steps:
- Select the mesh you want to manipulate and make sure the Transform Tool is active.
- Press and hold the V key to activate the vertex snapping mode.
- Move your cursor over the vertex on your mesh that you want to use as the pivot point.
- Hold down the left button once your cursor is over the desired vertex and drag your mesh next to any other vertex on another mesh.
- Release your mouse button and the V key when you are happy with the results.
- Shift-V acts as a toggle of this functionality.
- You can snap vertex to vertex, vertex to surface and pivot to vertex.