カスタマイズ
IMGUI コントロールのカスタマイズ
Unity の IMGUI システムは、主に開発者ツールの作成とインターフェースのデバッグ向けとしていますが、IMGUIはカスタマイズと多様なスタイルへと変更することができます。IMGUIシステムは、多くの詳細を含むコントロールの外観を微調整できます。コントロールの外観は、GUIStyles で決まります。デフォルトでは、GUIStyle を定義せずに、コントロールを作成する際に、Unity のデフォルトの GUIStyle が適用されます。このスタイルは、Unity の内部にあり、公開されたゲームでプロトタイピング、またはコントロールのスタイルを設定しないことを選択した場合に使用できます。
多くの各種 GUIStyles を連携させる際に、1 つの GUISkin 内ですべてのスタイルを定義できます。GUISkin は、GUIStyle の集合に過ぎません。
Style が GUI コントロールの見た目をどのように変えるか
GUIStyles は、Web ブラウザーに対して、カスケーディングスタイルシート (CSS) を模倣するために設計されています。スタイリングの個々の状態プロパティーの差別化や、内容や外観の分離多くの各種 CSS 方法が採用されています。
コントロールが内容を定義すると、Style が外観を定義します。これにより、通常の Button のように見える関数の Toggle のような組み合わせを作成できます。
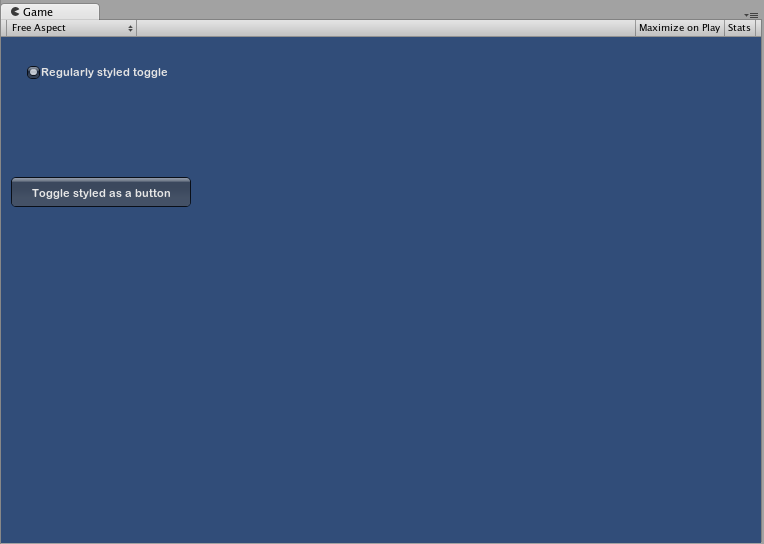
Skin と Style 間の差
前述のとおり、GUISkin は、GUIStyle の集合です。Style は GUI コントロールの外観を定義します。Style を使用したい場合は、Skin を使用する必要はありません。
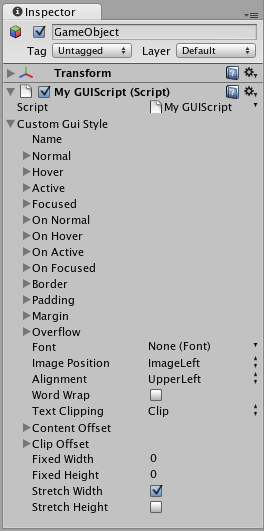
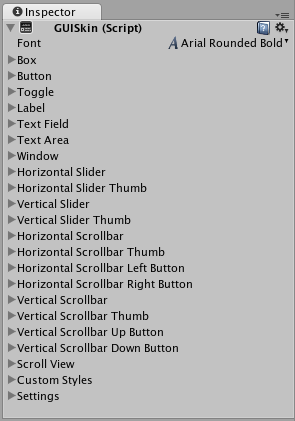 インスペクターに表示される 1 つの GUISkin - 複数の GUIStyle が含まれていることを確認してください
スタイルの取り扱い
GUI コントロール関数はすべて、オプションの最終パラメーター、コントロールの表示に使用する GUI スタイルを持っています。主お略すると、Unity のデフォルトの GUI スタイルが使用されます。これは、コントロールのタイプの名前を文字列として適用させることで機能します。そのため、GUI.Button() は、button スタイルを使用し、GUI.Toggle() は toggle スタイルを使用します。最終パラメーターとして、コントロールを指定することで、コントロールに対するデフォルトの GUI スタイルを無効にできます。
/* Override the default Control Style with a different style in the UnityGUI default Styles */


// JavaScript
function OnGUI () {
    // Make a label that uses the "box" GUIStyle.
    GUI.Label (Rect (0,0,200,100), "Hi - I'm a label looking like a box", "box");

    // Make a button that uses the "toggle" GUIStyle
    GUI.Button (Rect (10,140,180,20), "This is a button", "toggle");
}


// C#
using UnityEngine;
using System.Collections;

public class GUITest : MonoBehaviour {

    void OnGUI () {
        // Make a label that uses the "box" GUIStyle.
        GUI.Label (new Rect (0,0,200,100), "Hi - I'm a label looking like a box", "box");

        // Make a button that uses the "toggle" GUIStyle
        GUI.Button (new Rect (10,140,180,20), "This is a button", "toggle");
    }

}
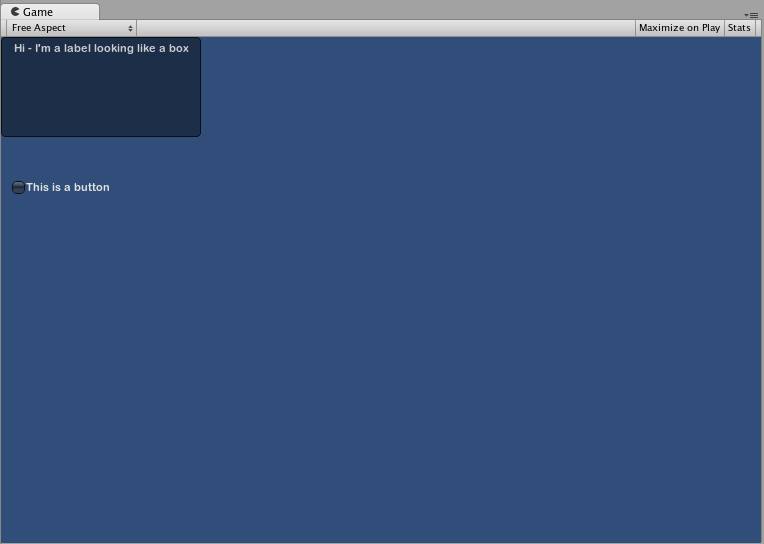
パブリック変数 GUIStyle の作成
パブリック GUIStyle 変数を宣言すると、スタイル内のすべての要素が Inspector に表示されます。ここで、各種変数をすべて編集できます。
/* Overriding the default Control Style with one you've defined yourself */


// JavaScript
var customButton : GUIStyle;

function OnGUI () {
    // Make a button. We pass in the GUIStyle defined above as the style to use
    GUI.Button (Rect (10,10,150,20), "I am a Custom Button", customButton);
}


// C#
using UnityEngine;
using System.Collections;

public class GUITest : MonoBehaviour {

    public GUIStyle customButton;

    void OnGUI () {
        // Make a button. We pass in the GUIStyle defined above as the style to use
        GUI.Button (new Rect (10,10,150,20), "I am a Custom Button", customButton);
    }

}
各種スタイル要素の変更
GUIStyle を宣言している場合、インスペクターでそのスタイルを編集できます。数多くの状態を定義し、どのタイプのコントロールにも適用できます。
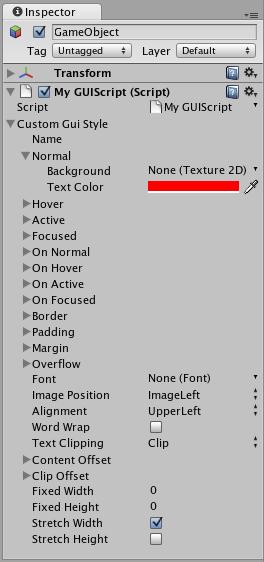
コントロールには、指定した Text Color を適用する前に、Background 色を割り当てる必要があります。
GUI スタイルの扱いに関する詳細については、GUI スタイル(IMGUI) ページを参照してください。
!!カメラの取り扱い
より複雑な GUI システムの場合、1 つの場所にスタイルの集合を保管する方がよいでしょう。これが GUISkin の動作です。GUI スキンは、複数の異なるスタイルを含み、主にすべての GUI コントロールへの完全な手直しを提供します。
GUI スキンの新規作成
GUI スキンを作成するには、メニューバーから Assets->Create->GUI Skin を選択します。これにより、Project フォルダーに GUI スキンが作成されます。インスペクター内のスキンによって定義されたすべての GUI スタイルを表示するよう選択します。
GUI へのスキンの適用
作成したスキンを使用するには、OnGUI() 関数内の GUI.skin を割り当てます。
/* Make a property containing a reference to the skin you want to use */


// JavaScript
var mySkin : GUISkin;

function OnGUI () {
    // Assign the skin to be the one currently used.
    GUI.skin = mySkin;

    // Make a button. This will get the default "button" style from the skin assigned to mySkin.
    GUI.Button (Rect (10,10,150,20), "Skinned Button");
}


// C#
using UnityEngine;
using System.Collections;

public class GUITest : MonoBehaviour {

    public GUISkin mySkin;

    void OnGUI () {
        // Assign the skin to be the one currently used.
        GUI.skin = mySkin;

        // Make a button. This will get the default "button" style from the skin assigned to mySkin.
        GUI.Button (new Rect (10,10,150,20), "Skinned Button");
    }

}
OnGUI() を 1 回呼び出すことで、好きなだけスキンを切り替えることができます。
/* Example of switching skins in the same OnGUI() call */


// JavaScript
var mySkin : GUISkin;

var toggle = true;

function OnGUI () {
    // Assign the skin to be the one currently used.
    GUI.skin = mySkin;

    // Make a toggle. This will get the "button" style from the skin assigned to mySkin.
    toggle = GUI.Toggle (Rect (10,10,150,20), toggle, "Skinned Button", "button");

    // Assign the currently skin to be Unity's default.
    GUI.skin = null;

    // Make a button. This will get the default "button" style from the built-in skin.
    GUI.Button (Rect (10,35,150,20), "Built-in Button");
}


// C#
using UnityEngine;
using System.Collections;

public class GUITest : MonoBehaviour {

    public GUISkin mySkin;
    private bool toggle = true;

    void OnGUI () {
        // Assign the skin to be the one currently used.
        GUI.skin = mySkin;

        // Make a toggle. This will get the "button" style from the skin assigned to mySkin.
        toggle = GUI.Toggle (new Rect (10,10,150,20), toggle, "Skinned Button", "button");

        // Assign the currently skin to be Unity's default.
        GUI.skin = null;

        // Make a button. This will get the default "button" style from the built-in skin.
        GUI.Button (new Rect (10,35,150,20), "Built-in Button");
    }

}
GUI のフォントサイズを変更する
以下の例では、コードから動的にフォントサイズを変更する方法を説明しています。
まず最初に Unity で新プロジェクトを作成します。次に Fontsize.cs という C# スクリプトファイルを作成し、以下のコードを書きます。
// C# example
using UnityEngine;

using System.Collections;

public class Fontsize : MonoBehaviour
{
    void OnGUI ()
    {
        //Set the GUIStyle style to be label
        GUIStyle style = GUI.skin.GetStyle ("label");

        //Set the style font size to increase and decrease over time
        style.fontSize = (int)(20.0f + 10.0f * Mathf.Sin (Time.time));

        //Create a label and display with the current settings
        GUI.Label (new Rect (10, 10, 200, 80), "Hello World!");
    }

}
スクリプトの変更を保存し、空の GameObject にアタッチすると、再生ボタンを押した直後から時間の経過とともにサイズの大きさが増減します。このフォントサイズの変更の仕方はフォントの大きさがスムーズに変更されないかもしれません。それはフォントサイズは int であり float ではないからです。
この例ではデフォルトのフォント( Arial )が読み込まれ、ダイナミックフォントとして設定されます。ダイナミックフォントではないフォントのサイズを変更することはできません。