Add a normal map or a mask map to a sprite in URP
To add surface detail such as bumps, grooves, and scratches to a 2D sprite in the Universal Render Pipeline (URP), add the following texture maps:
- A normal map to make details catch the light from a 2D light as if they represent real geometry. For more information, refer to Introduction to normal maps.
- A mask map to control which areas of the sprite receive light, to create highlights, rim lighting, and shadowing.
Note: Adding a normal map means Unity adds a depth pre-pass for each layer batch that renders a full-size render texture, which can reduce performance.
In 2D projects, normal maps and mask maps are called secondary textures of the sprite. You add them using the Secondary Textures overlay of the Sprite Editor window.

Note: The mask map texture you add as a secondary texture is different to the sprite maskA texture which defines which areas of an underlying image to reveal or hide. More info
See in Glossary you use to hide or reveal parts of a sprite.
Import a texture map
To import a texture map, follow these steps:
- Drag the texture map into the Project window to import it into your project.
- In the Inspector window, set the Texture Type to Normal Map for a normal map, or Default for a mask map.
- Disable sRGB (Color Texture).
To make sure the lighting works correctly, make sure your texture map lines up with the sprite texture. Unity samples texture maps using the same uv coordinates it uses to sample the sprite texture.

Add the texture map to a sprite
Add the normal map or mask map as a Secondary Texture to the sprite. Follow these steps:
Make sure the Sprite Renderer component of the sprite uses a material that supports texture maps, for example the default
Sprite-Lit-Defaultmaterial. For more information, refer to Make a GameObject compatible with 2D lights in URP.Select the original texture of the sprite in the Project window, then select Open Sprite Editor.
-
Select the Secondary Textures tab from the dropdown.
Unity displays the Secondary Textures overlay in the bottom-right corner of the Sprite Editor window.
In the Secondary Textures overlay, select the Add (+) button to add a new secondary texture.
-
Select the Name dropdown, then select _NormalMap for a normal map, or _MaskTex for a mask map.
Note: The dropdown might also include names used by other Unity packages you installed, even if you have since uninstalled the packages.
To select your normal map or mask map, drag it from the Project window to the Texture field, or select the picker (⊙).
Select Apply.
To display the secondary texture in the Sprite Editor window, select it in the Secondary Textures overlay. To display the sprite texture again, select anywhere outside of the overlay.
Configure a 2D light to use the texture map
To check the effect of the texture map on the sprite texture under a 2D light, follow these steps:
- Add a 2D light to the scene.
- Select the light in the Hierarchy window to open its Inspector window.
- To enable the normal map, in the Normal Maps section, set Use Normal Map to Fast or Accurate.
- To enable the mask map, in the Blending section, set Blend Style to Multiply with Mask (R) or Additive with Mask (R).
Configure lighting of a normal map
To configure the quality of the normal map effect or change the distance between the light and the lit sprite, refer to Light 2D component reference for URP.
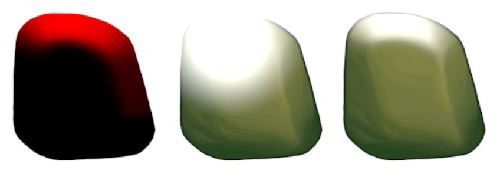
The following examples show the effects of changing the Distance values.

Additional resources
- Secondary textures - Lit sprites and 2D VFX tutorial on the Unity YouTube channel
- 2D lighting for pixel art on the Unity Learn website