- Unity User Manual (2019.3)
- グラフィックス
- ライティング
- グローバルイルミネーション
- ライトマッピング
- プログレッシブ CPU ライトマッパー
- ライトマッピング - はじめに
ライトマッピング - はじめに
このページでは、Unity のライトマッピングについて概要を説明します。ライトマッピングは、シーンのサーフェスの明るさを事前計算し、チャートやライトマップに結果を保存して後で使用するための処理です。
Unity uses a system called the Progressive Lightmapper, which bakes lightmaps for your Scene based on how your Scene is set up within Unity, taking into account Meshes, Materials, Textures, and Lights. Lightmapping is an integral part of the rendering engine; when your lightmaps are created, GameObjects automatically use them.
ライトマッピング関連の特定の設定については、グローバルイルミネーション を参照してください。
シーンの準備とライトマップのベイク
Lighting ウィンドウを開くには、Window > Rendering > Lighting Settings の順に選択します。 ライトマップを適用したいメッシュが、ライトマッピングに適切な UV を持つようにしてください。これを行う最も簡単な方法は、メッシュインポート設定 を開き、Generate Lightmap UVs を有効にします。
次に、ライトマップの解像度を制御するために、Lightmapping Settings セクションに移動し、Lightmap Resolution の値を調整します。
ノート: ライトマップテクセルの使い方を理解するには、シーンビュー の小さな Shaded デバッグシーンの可視化モード を Baked Lightmap に切り替え、Show Resolution にチェックします。
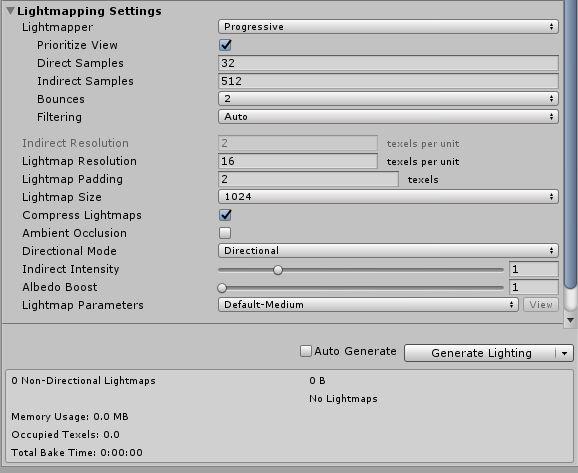
In the Mesh Renderer and Terrain components of your GameObjects, enable the Contribute GI property. This tells Unity that those GameObjects don’t move or change, so Unity can add them to a lightmap. In the Mesh Renderer component, you can also use the Scale In Lightmap parameter to adjust the resolution of your lightmap’s static Mesh or Terrain.
Light Explorer でライトの設定を調整することもできます。

シーンのライトマップを生成するには、以下の手順を行います。
Lighting ウィンドウ の Scene タブの一番下にある Generate Lighting をクリックします (または、Auto Generate が有効になっていることを確認します)。
Unity エディターのステータスバーの右下にプログレスバーが表示されます。
ベイクが完了したら、ベイクしたライトマップすべてを Lighting ウィンドウの Global Maps と Object Maps タブで確認できます。
ライトマッピングが完了すると、Unity のシーンビューとゲームビューは自動的に更新されます。
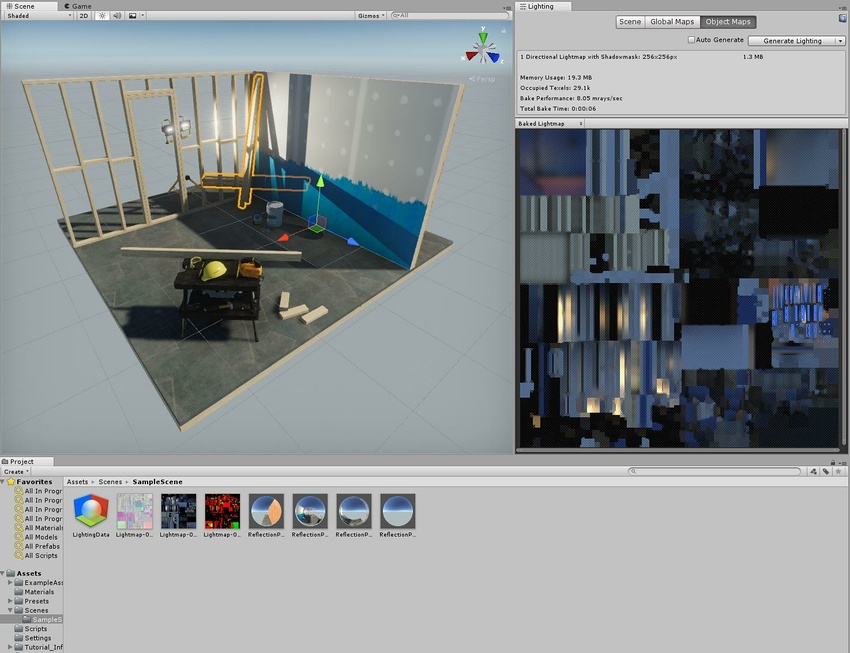
To see the UV chart of the Mesh, click on a GameObject that has Contribute GI enabled, then navigate to the Inspector window and select the Object Maps tab. Here, you can switch between different light map visualization modes. When you manually generate lighting, Unity adds Lighting Data Assets, baked lightmaps and Reflection Probes to the Assets folder.
ベイク設定の調整
シーンの最終的な見た目は、ライティングの設定とベイクの設定によって異なります。ライト品質を向上させるための基本的な設定例を見てみましょう。
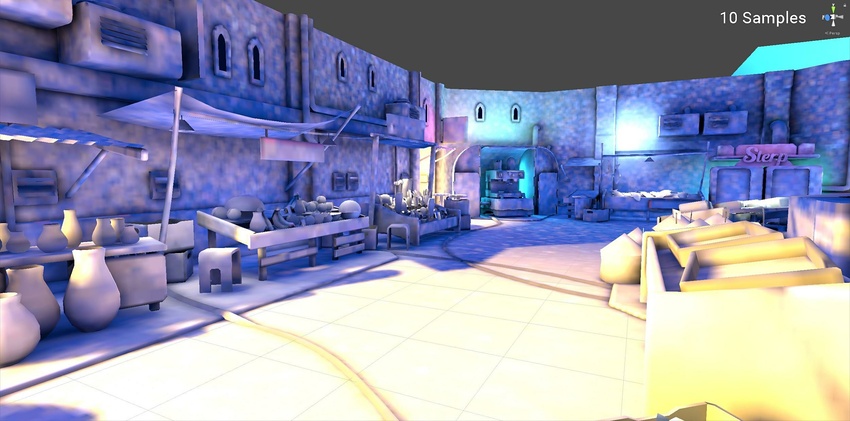
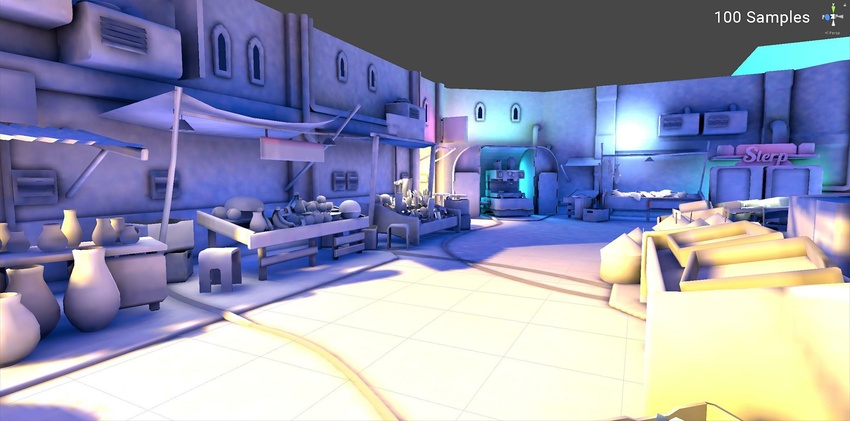
Sample count Progressive Lightmapper generates color values resulting from a single ray in order to remove noise. These color values are called samples. There are two settings that control the number of samples the Progressive Lightmapper uses for direct and indirect lighting calculations: Direct Samples and Indirect Samples. To find these, open the Lighting window (Window > Rendering > Lighting Settings), and go to Lightmapping Settings > Lightmapper.
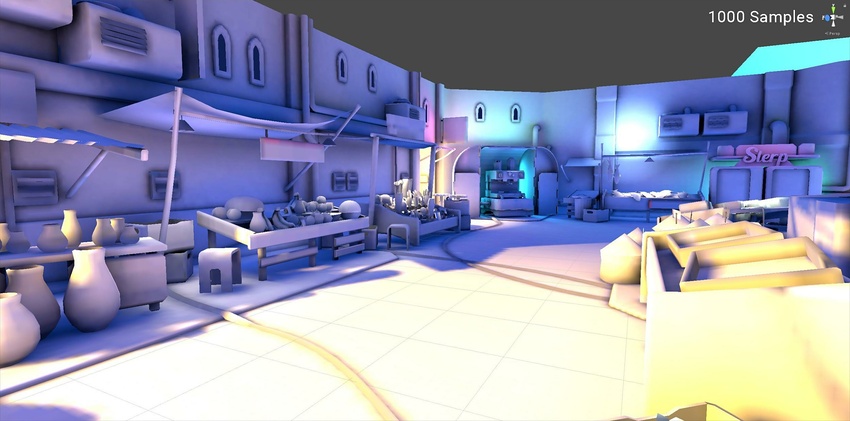
サンプル値を高くするとノイズが減り、ライトマップの品質を向上させることができますが、ベイク時間も長くなります。以下の画像は、サンプル数が多いと、フィルタリングを使用せずにライトマップの品質が向上し、ノイズの少ない結果を生成することを示しています。
環境ライティング
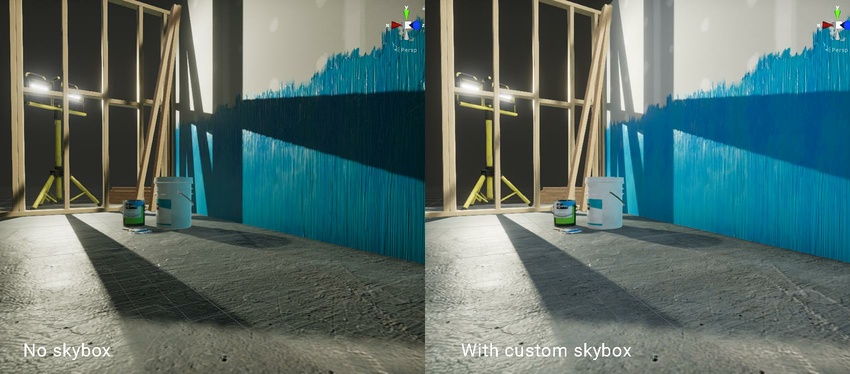
すべての 光源 に加えて、環境ライティング もグローバルイルミネーションに貢献します。デフォルトの Procedural Skybox の代わりにカスタムのスカイボックスマテリアルを割り当て、強度を調整できます。以下の画像は、シーン内で Environment Lighting の有無でライティングがどのように変化し、よりソフトな結果をもたらすかを示しています。光源は両方のシーンで同じに設定されています。Unity は アセットストアで、いくつかのカスタム HDRI アセットを提供しています。
フィルタリング
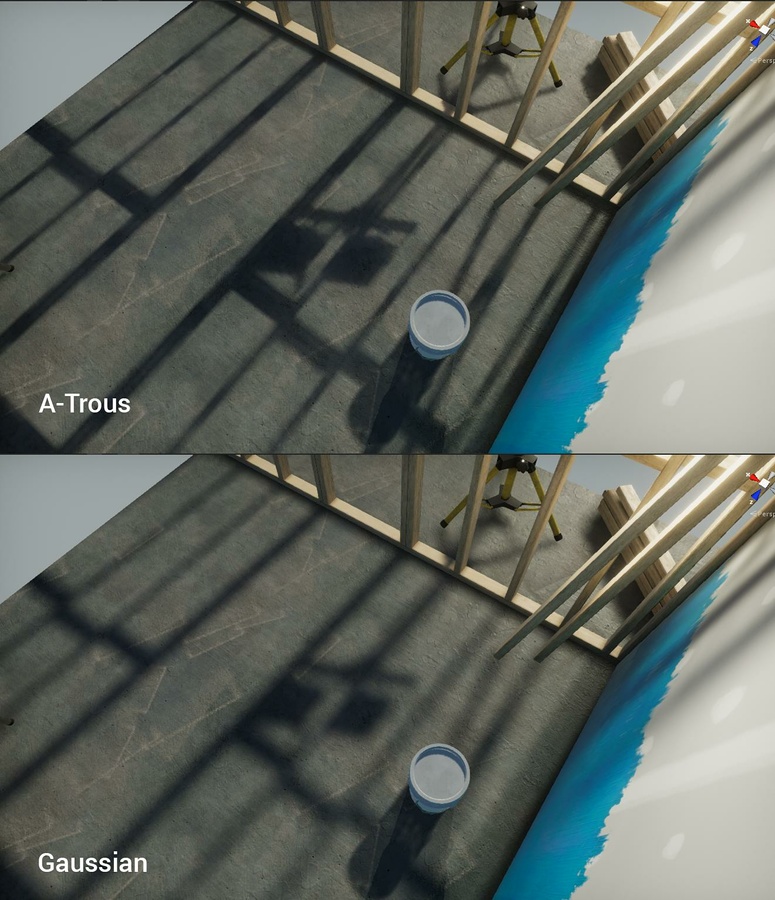
フィルタリングを使うと、ノイズのある結果をぼかすことができます。プログレッシブライトマッパーは Gaussian と A-Trous の 2 種類のフィルタリングを提供します。 Advanced 設定を有効にすると、これらのフィルタを個別に Direct、Indirect、AmbientActlusion に適用できます。詳細は、プログレッシブライトマッパー を参照してください。
2018–03–28 修正されたページ
プログレッシブライトマッパーは2018.1 で追加 NewIn20181