XR Plug-in Management settings
Understand the settings you can configure with XRAn umbrella term encompassing Virtual Reality (VR), Augmented Reality (AR) and Mixed Reality (MR) applications. Devices supporting these forms of interactive applications can be referred to as XR devices. More info
See in Glossary Plug-inA set of code created outside of Unity that creates functionality in Unity. There are two kinds of plug-ins you can use in Unity: Managed plug-ins (managed .NET assemblies created with tools like Visual Studio) and Native plug-ins (platform-specific native code libraries). Glossary Plug-inA set of code created outside of Unity that creates functionality in Unity. There are two kinds of plug-ins you can use in Unity: Managed plug-ins (managed .NET assemblies created with tools like Visual Studio) and Native plug-ins (platform-specific native code libraries). More info
See in Glossary Management.
The XR Plug-in Management section of the Project Settings window contains the settings you can use to configure XR in your Unity project. Use this section to Choose XR provider plug-ins and Configure settings for each XR platform your project targets. To open the XR Plug-in management section, go to Edit > Project Settings > XR Plug-in Management.
The following sections describe the XR Plug-in Management Settings, and how to interpret XR configuration issues using the Project validation system.
Settings reference
You can use the XR Plug-in Management section to Enable a provider.
Refer to the following image and table to understand the key regions of the section that you can use to enable XR providers:
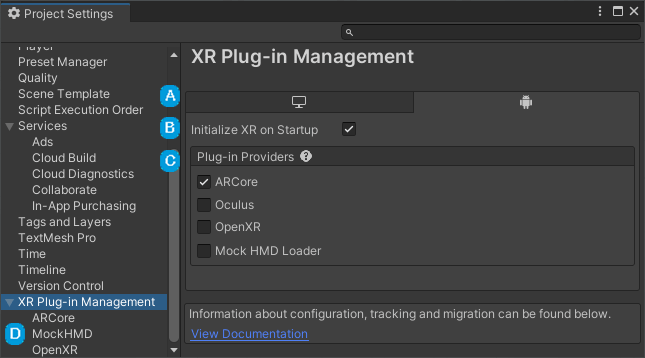
The XR Plug-in Management settings:
| Label | Setting | Purpose |
|---|---|---|
| Build target tabs | A tab is shown for each platform build target installed for the current Unity Editor. You can add additional platform support modules with the Unity Hub. | |
| Initialize XR on Startup | Whether the game or application starts in XR mode immediately. If disabled, then your application logic must initialize XR at the appropriate time. For example, your app might start with a normal desktop display and then swap to XR on demand. Refer to Load XR plug-ins for more information. | |
| Plug-in Providers | The list of known XR provider plug-ins. This list contains the plug-ins officially supported by Unity or its strategic partners, and any third-party provider plug-ins you have installed with the Package Manager. | |
| XR Plug-in Management menu | Tabs to manage provider plug-in settings, and validate your project. Refer to XR Plug-in Management menu reference for more information. |
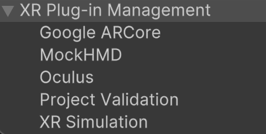
XR Plug-in Management menu reference
For each plug-in provider you enable in the plug-ins section , a new menu item appears in the left-hand menu, underneath XR Plug-in Management. You can open these provider sections to configure provider-specific settings, as described in Provider plug-in settings.
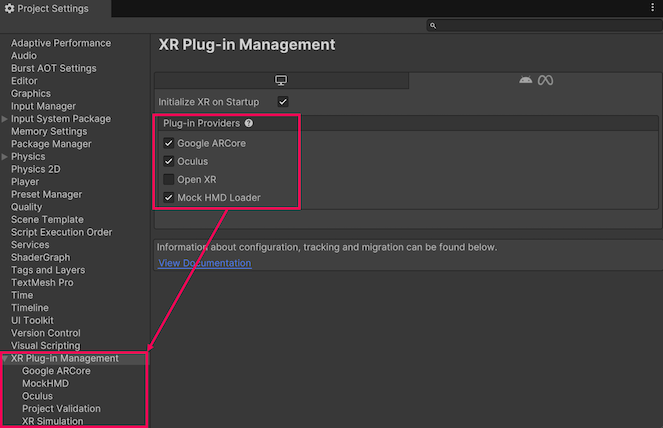
This menu also provides options to validate your project and to configure XR simulation in your project, as outlined in the following image and table:
| Item | Description |
|---|---|
| Provider plug-in settings | The settings for each installed XR provider plug-in appear in their own pages within the XR Plug-in Management section. For information about the available settings for a specific plug-in, refer to that plug-in’s documentation, available from Provider plug-ins. |
| Project Validation | Displays the results of project validation checks for the plug-ins you have enabled. To view the checks, select the Project Validation page inside the XR Plug-in Management section of your Project SettingsA broad collection of settings which allow you to configure how Physics, Audio, Networking, Graphics, Input and many other areas of your project behave. More info See in Glossary. For more information, refer to Project validation. |
| XR Simulation settings | The ARAugmented Reality More info See in Glossary Foundation package provides an XR Simulation feature, which lets you test AR ScenesA Scene contains the environments and menus of your game. Think of each unique Scene file as a unique level. In each Scene, you place your environments, obstacles, and decorations, essentially designing and building your game in pieces. Glossary Foundation package provides an XR Simulation feature, which lets you test AR ScenesA Scene contains the environments and menus of your game. Think of each unique Scene file as a unique level. In each Scene, you place your environments, obstacles, and decorations, essentially designing and building your game in pieces. More info See in Glossary in the Unity Editor. Visit XR Simulation project settings for a description of these settings and options. |
Provider plug-in settings
The settings that you can configure for your target platform depends on the provider plug-in. To learn about settings for a specific provider, refer to the documentation of the individual plug-in, which you can access from XR packages.
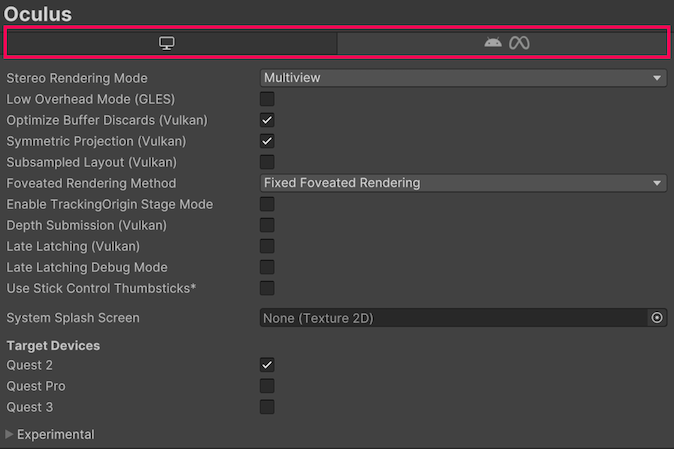
If a plug-in supports more than one build target, its settings page includes a tab so that you can configure the settings for each target independently. For example:
Project validation reference
The project validation system helps you avoid common scene and project configuration issues for the XR packages you have installed. The XR packages you have installed can include rules for the validation system. The system evaluates these rules when you make a build and whenever you have the Project Validation section open.
To open the Project Validation system, go to your Project Settings (menu: Edit > Project Settings) and then select Project Validation in the XR Plug-in Management menu. The project validation system checks these rules per platform build target. Some rules might examine the current scene to verify that the project settings support features used in that scene.

| Property | Description |
|---|---|
| Platform tabs | The validation checks for each platform are grouped by platform. You can select a platform tab to view the validation checks for that platform. |
| Issue list | The list of issues found in the project when evaluating the rules. Each issue has a severity level, description, and action button. |
| Show all | Select to display all issues, regardless of severity. Issues marked with a green check indicate validation checks that passed and don’t require any action. Successful checks are only displayed when you enable Show all. |
| Ignore build errors | Select to ignore build errors. This option can sometimes be useful when debugging build problems. |
| Fix all | Click to correct all issues that have a fix available. |
Tip: If the issue has scene objects associated with it, you can click on the message to select or highlight these objects in the Unity Editor.
Severity level
The status icons to the left of an individual validation issue indicate the status and severity of the issue.
| Status | Description |
|---|---|
| Validation passed because the project and scene are either set up correctly, or the rule isn’t applicable. Successful checks are hidden in the project validation issue list unless you enable the Show all option. | |
| Validation failed, but does not block building the project. You can safely ignore these if you have set up your project differently than recommended. | |
| Validation failed and blocks building the project. You can’t ignore these issues. You must fix them to build the project. |
Fix and Edit buttons
The Fix button automatically fixes the issue in your project or scene. The Edit button takes you to the appropriate place in the Unity Editor where you can correct the issue in your project. Both the Fix and Edit buttons provide a tooltip explaining the steps to manually correct the issue.