Edit Animation curves
There are several different features and windows in the Unity Editor which use Curves to display and edit data. The methods you can use to view and manipulate curves is largely the same across all these areas, although there are some exceptions.
-
The Animation Window uses curves to display and edit the values of animated properties over time in an Animation ClipAnimation data that can be used for animated characters or simple animations. It is a simple “unit” piece of motion, such as (one specific instance of) “Idle”, “Walk” or “Run”. More info
See in Glossary.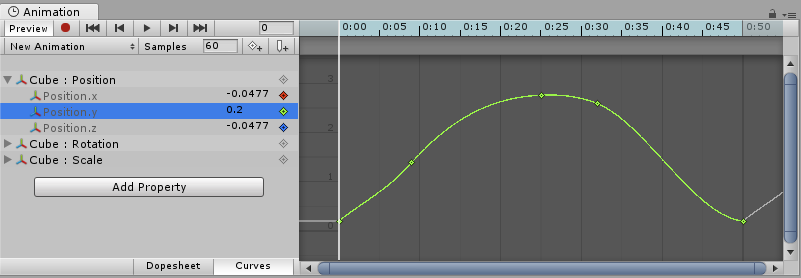
The Animation Window. -
Script components can have member variables of type Animation Curve that can be used for all kinds of things. Clicking on those in the InspectorA Unity window that displays information about the currently selected GameObject, asset or project settings, allowing you to inspect and edit the values. More info
See in Glossary will open up the Curve Editor.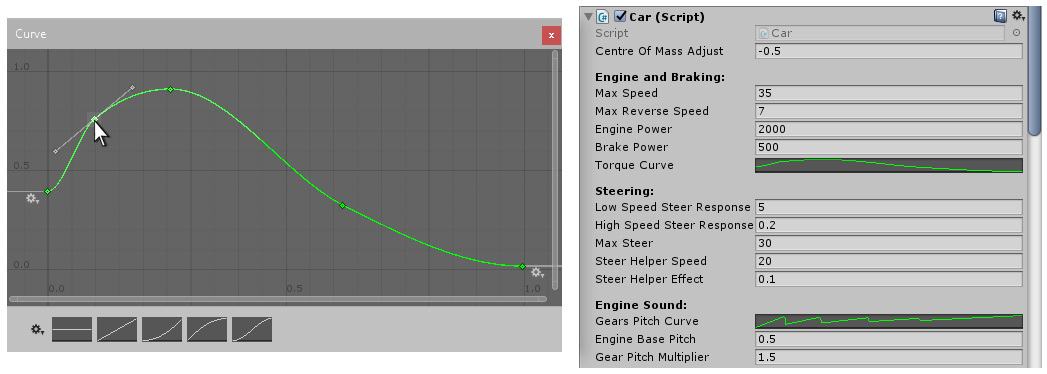
The Curve Editor. -
The Audio SourceA component which plays back an Audio Clip in the scene to an audio listener or through an audio mixer. More info
See in Glossary component uses curves to control roll-off and other properties as a function of distance to the Audio Source.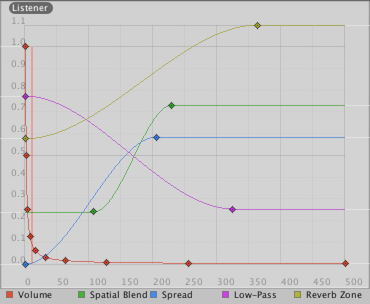
Distance function curves in the AudioSource component in the Inspector. -
The Particle SystemA component that simulates fluid entities such as liquids, clouds and flames by generating and animating large numbers of small 2D images in the scene. More info
See in Glossary uses curves to vary particleA small, simple image or mesh that is emitted by a particle system. A particle system can display and move particles in great numbers to represent a fluid or amorphous entity. The effect of all the particles together creates the impression of the complete entity, such as smoke. More info
See in Glossary properties over time.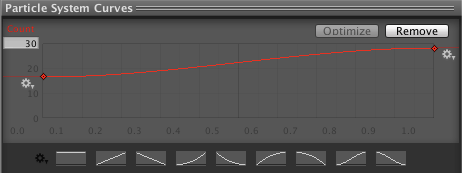
Particle System curves editor.
While these controls have subtle differences, the curves can be edited in exactly the same way in all of them. This page explains how to navigate and edit curves in those controls.
Add and Move Keys on a Curve
You can add a key a curve by double-clicking on the curve at the point where you want to add the key. You can also right-click on a curve and selecting Add Key from the context menu. Once added, a key can be moved with the mouse:
- Click a key to select it. Drag the selected key with the mouse.
- To snap the key to the grid while dragging it around, hold down Command on Mac / Control on Windows while dragging.
It is also possible to select multiple keys at once:
- To select multiple keys at once, hold down Shift while clicking the keys.
- To deselect a selected key, click on it again while holding down Ctrl.
- To select all keys within a rectangular area, click on an empty spot and drag to form the rectangle selection.
- The rectangle selection can also be added to existing selected keys by holding down Shift.
Keys can be deleted by selecting them and pressing Delete, or by right-clicking on them and selecting Delete Key from the context menu.
Edit Keys
Use Enter/Return or context menu to start editing selected keys, Tab to switch between fields, Enter/Return to commit, and Escape to cancel editing.
Navigating the Curve View
When working with the Animation View you can easily zoom in on details of the curves you want to work with or zoom out to get the full picture. You can always press F to frame-select the shown curves or selected keys in their entirely.
Zooming
You can zoomA camera control that lets you scale the view on your screen. To zoom a camera in the Unity Editor, press Alt + right click and drag. More info
See in Glossary the Curve View using the scroll-wheel of your mouse, the zoom functionality of your trackpad, or by holding Alt while right-dragging with your mouse. You can zoom on only the horizontal or vertical axis:
- zoom while holding down Command on Mac / Control on Windows to zoom horizontally.
- zoom while holding down Shift to zoom vertically.
Furthermore, you can drag the end caps of the scrollbars to shrink or expand the area shown in the Curve View.
Panning
You can pan the Curve View by middle-dragging with your mouse or by holding Alt while left-dragging with your mouse.
Editing Tangents
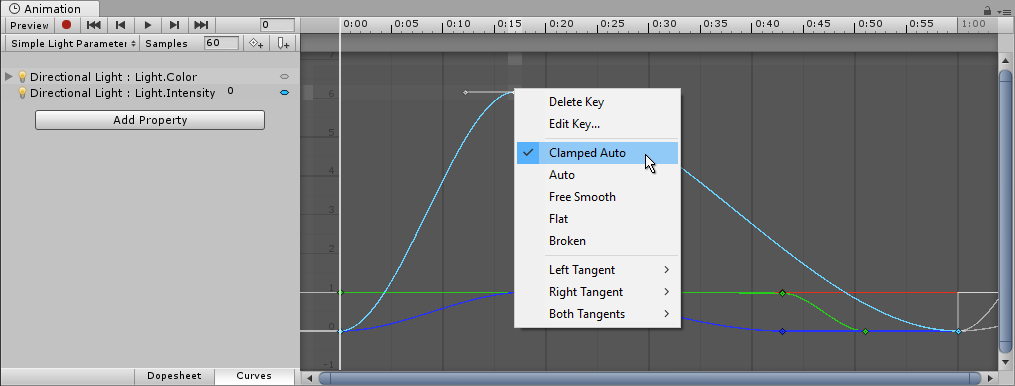
A key has two tangents: one on the left for the incoming slope and one on the right for the outgoing slope. The tangents control the shape of the curve between the keys. You can select from a number of different tangent types to control how your curve leaves one key and arrives at the next key. Right-click a key to select the tangent type for that key.
For animated values to change smoothly when passing a key, the left and right tangent must be co-linear. The following tangent types ensure smoothness:
-
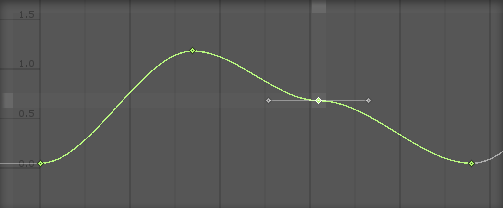
Clamped Auto: This is the default tangent mode. The tangents are automatically set to make the curve pass smoothly through the key. When editing the key’s position or time, the tangent adjusts to prevent the curve from “overshooting” the target value. If you manually adjust the tangents of a key in Clamped Auto mode, it is switched to Free Smooth mode. In the example below, the tangent automatically goes into a slope and levels out while the key is being moved:
Clamped Auto mode levels the tangents as you move the key. -
Auto: This is a Legacy tangent mode, and remains an option to be backward compatible with older projects. Unless you have a specific reason to use this mode, use the default Clamped Auto. When a key is set to this mode, the tangents are automatically set to make the curve pass smoothly through the key. However, there are two differences compared with Clamped Auto mode:
- The tangents do not adjust automatically when the key’s position or time is edited; they only adjust when initially setting the key to this mode.
- When Unity calculates the tangent, it does not take into account avoiding “overshoot” of the target value of the key.
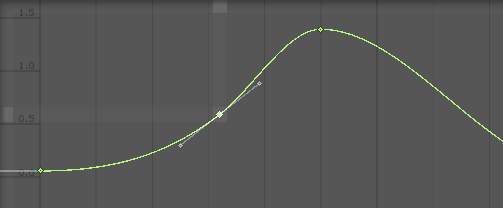
Auto mode levels the tangents when you select the mode. -
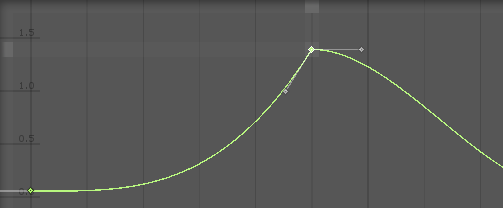
Free Smooth: Drag the tangent handles to freely set the tangents. They are locked to be co-linear to ensure smoothness.
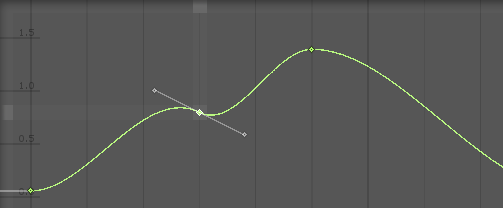
Free Smooth mode locks tangents as co-linear. -
Flat: The tangents are set to be horizontal (this is a special case of Free Smooth).
Flat mode flattens the tangents horizontally.
Sometimes you might not want the curve to be smooth when passing through a key. To create sharp changes in the curve, choose one of the Broken tangent modes. When using broken tangents, the left and right tangent can be set individually. Each of the left and right tangents can be set to one of the following types:
-
Broken - Free: Drag the tangent handle to freely set the tangents.
Free mode sets tangent handles individually. -
Broken - Linear: The tangent points towards the neighboring key. To make a linear curve segment, set the tangents at both ends to be Linear. In the example below, all three keys have been set to Broken - Linear, to achieve straight lines from key to key.
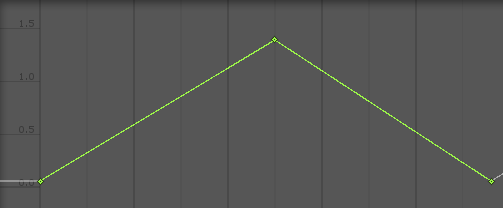
Linear mode draws straight lines for each tangent. -
Broken - Constant: The curve retains a constant value between two keys. The value of the left key determines the value of the curve segment.
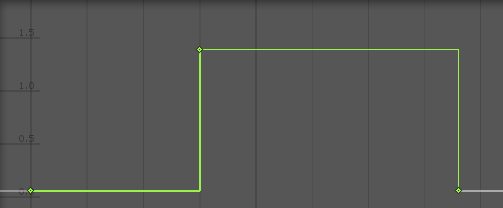
Constant mode keeps a constant value between each key.