- Unity ユーザーマニュアル
- グラフィックス
- グラフィックスの概要
- Terrain エンジン
- Terrain Layers
Terrain Layers
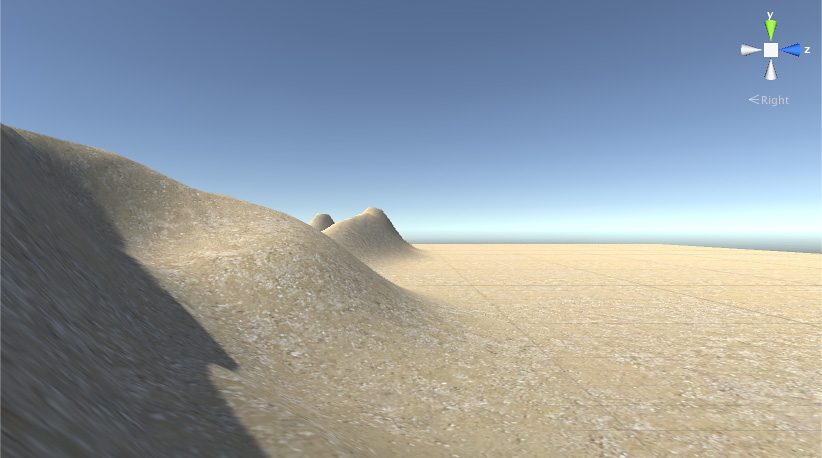
To create coloration and fine detail on a Terrain, add texture to its surface. Since Terrain objects are typically large, it is standard practice to use a texture that repeats seamlessly, and tile it over the surface. The repeated texture generally isn’t noticeable from a character’s viewpoint, which is close to the ground.
Although one texture always serves as the background layer over the landscape, you can paint areas with additional textures to simulate different ground surfaces such as grass, desert, or snow. For example, to create a gradual transition between grassy countryside and a sandy beach, apply textures with variable opacity.

A Terrain Layer is a container for information that defines a given surface for Terrain. It holds data such as textures and other properties, which the Terrain Material uses to render the Terrain surfaces. Because Terrain Layers are Assets, you can easily reuse them on multiple Terrain tiles.
Creating Terrain Layers
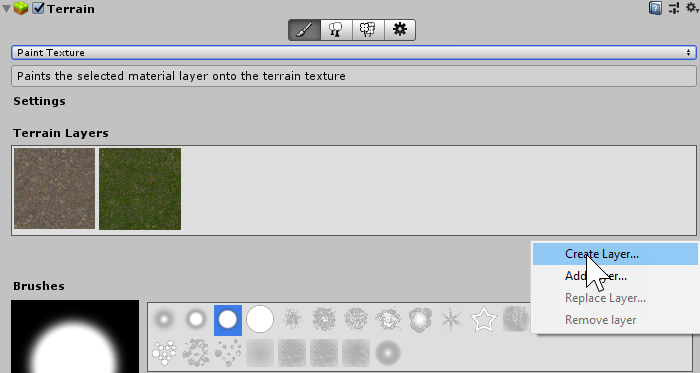
To create a Terrain Layer directly from the Terrain Inspector, click the paintbrush icon in the toolbar at the top of the Terrain Inspector, and select Paint Texture from the drop-down menu. At the bottom of the Terrain Layers section, click the Edit Terrain Layers button, and choose Create Layer.

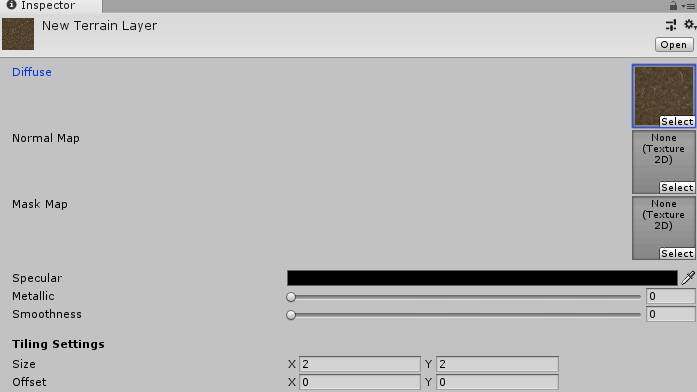
Clicking Create Layer opens the Select Texture2D window, where you choose the image to use as the Diffuse channel of the Terrain Layer. To assign a Normal Map or Mask Map texture to your Terrain Layer, select the corresponding Terrain Layer in the Project view, and use its Inspector window.
Alternatively, to create a Terrain Layer Asset, right-click the Project window, and select Create > Terrain Layer from the context menu. Then, configure the various settings in the Inspector window for your new Terrain Layer.
See Performance for information about how the number of Terrain Layers affects rendering performance. Even assigned Terrain Layers that you do not actually paint onto the Terrain tile might impact the rendering performance.
Adding Terrain Layers
Initially, a Terrain has no Terrain Layers assigned to it. By default, it uses a checkerboard texture until you add a Terrain Layer.
After you create a Terrain Layer in your project, click the Edit Terrain Layers button and select Add Layer to bring up the Select TerrainLayer window. Double-click on a Terrain Layer in this window to add it to your Terrain.
Terrain Layer settings
Depending on the material that is set in Terrain Settings, as well as the Render Pipeline that is currently in use, you might see different options, settings, and UI here.

The available options for the Built-in Renderer and Terrain Material include:
- Diffuse texture
- Normal Map texture
- Normal Scale
- Mask Map texture
- Channel Remapping ranges
- Specular color
- Metallic value
- Smoothness value
- Tiling Settings
Diffuse
The Diffuse texture represents the base color texture/channels of the Terrain Layer.
Normal Map
The Normal Map texture contains the normal information for your Terrain Layer, and Unity uses this information in lighting calculations. If you do not assign a normal map texture and enable instancing in Terrain Settings, the Terrain uses the normals generated from the Terrain heightmap. If you assign a normal map texture and enable instancing, Unity uses the normal map texture instead of the normals generated from the heightmap. If you disable instancing on the Terrain, the built-in Terrain Material uses normals generated from the Terrain geometry, even if you assign a normal map texture on the Terrain Layer.
Normal Scale
If you assign a Normal Map texture, a new field called Normal Scale appears in the Terrain Layer settings. This value acts as a scaling factor for the normal values present in the Normal Map. A value of 0 means that the normals stored in the Normal Map have a scale of 0, while a value of 1 means that the normals are at full scale or influence.

Mask Map
The TerrainLit shader, which is part of the High Definition Render Pipeline (HDRP), uses this Mask Map texture data. Custom Terrain shaders might also use this texture for user-defined purposes.
For the HDRP TerrainLit Shader, the RGBA channels of the Mask Map texture correspond to:
- R — Metallic
- G — Ambient Occlusion
- B — Height
- A — Smoothness (Diffuse Alpha becomes Density)
Channel Remapping
If you assign a Mask Map texture, Channel Remapping appears. Click the triangle next to Channel Remapping to expand the menu, which shows Min and Max values for the Mask Map RGBA channels. Unity uses these ranges to remap values in each channel of the Mask Map texture.

Specular
The specular highlight color of the Terrain Layer.
Metallic
The overall metallic value of the Terrain Layer, which ranges from zero to one.
Smoothness
The overall smoothness value of the Terrain Layer, which ranges from zero to one.
Tiling Settings
The tiling settings that apply to all textures the Terrain Layer uses:
- Size — The size of the textures in Terrain space, and how often the textures tile.
- Offset — A base offset that Unity applies to the sample location for each texture in the Terrain Layer.
Texture Painting
Unity applies the first Terrain Layer you add to the entire landscape. If you add multiple Terrain Layers, use the Paint Texture tool to apply subsequent textures to your Terrain.
If you add a new Terrain tile without any Terrain Layers, and paint on it, the system automatically adds the selected Terrain Layer to that new Terrain tile. Since this is the first added Terrain Layer, that texture becomes the base layer, and fills the entire Terrain tile.
Under Brushes in the Terrain Inspector, there is a box that displays the available Brushes, along with the Brush Size and Opacity options underneath. See Creating and Editing Terrains for more information about these tools.
Performance
The number of Terrain Layers you assign to a Terrain tile might impact the performance of the renderer.
The Built-In Renderer and Lightweight Render Pipeline each support four Terrain Layers per texture pass, with no limit on the number of passes. This means that although you are allowed to use as many Terrain Layers as you want, each pass increases the time spent rendering the Terrain. For maximum performance, limit each of your Terrain tiles to four Terrain Layers.
If you’re using the High Definition Render Pipeline, you are allowed to add up to eight Terrain Layers per Terrain tile, and the system renders them in a single pass. No additional passes are possible. If you add more than eight Terrain Layers, they appear in the Unity Editor, but are ignored at runtime.
2019–01–29 編集レビュー を行って修正されたページ
Updated functionality in 2018.3