- Unity User Manual (2017.2)
- Unity を使用する
- 高度なゲーム開発
- プラグイン
- マネージド プラグイン
マネージド プラグイン
通常、スクリプトはプロジェクトにソースファイルとして保持され、ソースが変更されたときに Unity によりコンパイルされます。しかし外部コンパイラを用いてスクリプトを ダイナミックリンクライブラリ (DLL) としてコンパイルすることもできます。結果の DLL は次にプロジェクトに追加して、それに含まれるクラスは通常のスクリプトと同様にオブジェクトにアタッチできます。
一般的に DLL よりもスクリプトで作業をしたほうが簡単です。しかし、DLL 形式で提供されたサードパーティ製 Mono コードをアクセスしないといけない場合があります。自身のコードを開発するとき、Unity によりサポートされないコンパイラを使用できる場合があり(例えば F# )、コードを DLL としてコンパイルし Unity プロジェクトに追加することができます。さらに、ソースコードを提供することなく Unity コードを提供したい場合があり(例えば Asset Store プロダクトなど)、その場合に DLL はこれを実現する簡単な方法です。
DLL の作成
DLL を作成するには、最初に適切なコンパイラーが必要です。.NET コードを生成するすべてのコンパイラーが Unity で動作するというわけではないため、大量の作業に着手する前にコンパイラーをなんらかのコードでテストしておくことが賢明です。もし、DLL に Unity API に依存するコードがまったく含まれていない場合は、適切なコンパイラー設定を使用してそのコードを簡単に DLL にコンパイルすることができます。もし Unity API を使用したい場合、Unity 自体の DLL をコンパイラーで利用可能にする必要があります。Mac ではこれらはアプリケーションバンドルに含まれます (コンテキストメニューから Show Package Contents コマンドを使用することでバンドルの内部構造が見れます。Unity アプリケーションを右クリックか Ctrl を押しながらクリックします)。
Unity DLL へのパスは通常、
/Applications/Unity/Unity.app/Contents/Frameworks/Managed/
であり、2 つの DLL は UnityEngine.dll 、 UnityEditor.dll と名前がついています。
Windows では、DLL は Unity アプリケーションのフォルダーにあります。パスは通常、以下の通りです。
C:\Program Files\Unity\Editor\Data\Managed
そして、DLL のファイル名は Mac OS 向けと同じです。
DLL をコンパイルするときの正確なオプションは使用されるコンパイラにより幅があります。例えば Mono C# コンパイラ、すなわち mcs、のコマンドラインは Mac OS では次のように見えます。
mcs -r:/Applications/Unity/Unity.app/Contents/Frameworks/Managed/UnityEngine.dll -target:library ClassesForDLL.cs
ここで、-r オプションはビルドに含めるべきライブラリへのパスを指定し、この場合は UnityEngine ライブラリです。-target オプションによりどのビルドが必要であるか指定し、“library” という文字列は DLL ビルドを選択するために用いられています。最後に、コンパイルするソースファイルは ClassesForDLL.cs です(このファイルがカレントの作業フォルダーにあることが前提ですが、必要であればファイルをフルパス指定できます)。すべてがうまく行く前提で、結果の DLL ファイルはソースフォルダーと同じ場所に表示さます。
DLL の使用
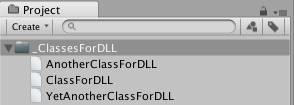
いったんコンパイルされると、DLL は他のすべてのアセットと同様に、Unity プロジェクトにドラッグアンドドロップできます。DLL アセットには三角形マークがあり、これをクリックして開くとライブラリの中のクラスを表示します。MonoBehaviour から派生するクラスは通常のスクリプトと同様にゲームオブジェクト上にドラッグアンドドロップできます。MonoBehaviour 以外のクラスは他のスクリプトから通常の方法で直接使用できます。

MonoDevelop と Visual Studio の手順ガイド
このセクションでは MonoDevelop と Visual Studioを用いて簡単な DLL サンプルをビルドして統合する方法を学びます。このセクションではさらに DLL のデバッグセッションを準備する方法も説明します。
プロジェクトのセットアップ
まず、Monodevelop か Visual Studio で新規プロジェクトを作成します。Monodevelop では File > New > Solution で C# > Library を選択し、Visual Studio では File > New > Project から Visual C# > Class Library を選択します。
新規ライブラリの情報を入力します。
- Name は名前空間です (この例では “DLLTest” という名前を使用)。
- Location はプロジェクトの親フォルダーです。
- Solution name はプロジェクトフォルダーです。
次に、Unity DLL の参照を追加しなければいけません。Monodevelop では、ソリューションブラウザーで コンテキストメニュー を開き(右クリック)、Edit references を選択し、.Net Assembly tab > File System > select file のオプションを選択します。Visual Studio では、ソリューションエクスプローラーでコンテキストメニューを開き(右クリック)、Add Reference を選択し、Browse > Browse > select file のオプションを選択します。
この段階で、必要な DLL ファイルを選択できるようになります。Mac OSX ではファイルは以下の場所にあります。
Applications/Unity.app/Contents/Frameworks/Managed/UnityEngine.dll
Windows では、パスは以下のとおりになります。
Program Files\Unity\Editor\Data\Managed\UnityEngine.dll
コード
このサンプルでは、ソリューションブラウザーでクラスの名前を “MyUtilities” にリネームしたうえ、次のコードと置き換えます。
using System;
using UnityEngine;

namespace DLLTest {

    public class MyUtilities {

        public int c;

        public void AddValues(int a, int b) {
            c = a + b;
        }

        public static int GenerateRandom(int min, int max) {
            System.Random rand = new System.Random();
            return rand.Next(min, max);
        }
    }
}
最後にプロジェクトをビルドして DLL ファイルとそのデバッグシンボルを生成します。
DLL を Unity で使用する
このサンプルでは <project folder>/bin/Debug/DLLTest.dll として作成したものを Unity プロジェクトへコピーし、C# スクリプトとして “Test” を Assets フォルダーに作成し、次のコードと置き換えます:
using UnityEngine;
using System.Collections;
using DLLTest;

public class Test : MonoBehaviour {

     void Start () {
        MyUtilities utils = new MyUtilities();
        utils.AddValues(2, 3);
        print("2 + 3 = " + utils.c);
     }

     void Update () {
        print(MyUtilities.GenerateRandom(0, 100));
     }
}
最後にスクリプトをシーン上のオブジェクトにアタッチして(すなわち Main Camera )、シーンを実行します。出力結果は Console ウィンドウで見られます。
DLL のデバッグセッションをセットアップ
まず、DLL のデバッグシンボルを準備する必要があります。Monodevelop では、<project folder>/bin/Debug/DLLTest.dll.mdb を Assets/Plugins フォルダーにコピーします。
Program Files\Unity\Editor\Data\Mono\lib\mono\2.0\pdb2mdb.exe
コマンドプロンプトの Visual Studio では、\\bin\\Debug\\DLLTest.pdb をパラメーターとしてパスして上記を実行します。そのときに、変換された <project folder>/bin/Debug/DLLTest.dll.mdb を Assets/Plugins フォルダーにコピーします。
次に、“Test” スクリプトを MonoDevelop 上で開きます。Unity デバッガーが有効になっていることを確認してください。これは Tools メニュー (Windows) と MonoDevelop-Unity メニュー (MacOS) で行えます。( Add-in Manager > Installed タブ > Unity > Mono Soft Debugger Support for Unity を選択 > Enable )
この設定が完了すれば、Unity 上で DLL を使用しているコードを通常の方法でデバッグできます。デバッグに関する詳細は スクリプティングツール の項を参照してください。