The Inspector window
Projects in the Unity Editor are made up of multiple GameObjectsThe fundamental object in Unity scenes, which can represent characters, props, scenery, cameras, waypoints, and more. A GameObject’s functionality is defined by the Components attached to it. More info
See in Glossary that contain scriptsA piece of code that allows you to create your own Components, trigger game events, modify Component properties over time and respond to user input in any way you like. More info
See in Glossary, sounds, Meshes, and other graphical elements such as Lights. The Inspector window (sometimes referred to as “the Inspector”) displays detailed information about the currently selected GameObject, including all attached componentsA functional part of a GameObject. A GameObject can contain any number of components. Unity has many built-in components, and you can create your own by writing scripts that inherit from MonoBehaviour. More info
See in Glossary and their properties, and allows you to modify the functionality of GameObjects in your SceneA Scene contains the environments and menus of your game. Think of each unique Scene file as a unique level. In each Scene, you place your environments, obstacles, and decorations, essentially designing and building your game in pieces. More info
See in Glossary.
Inspecting GameObjects
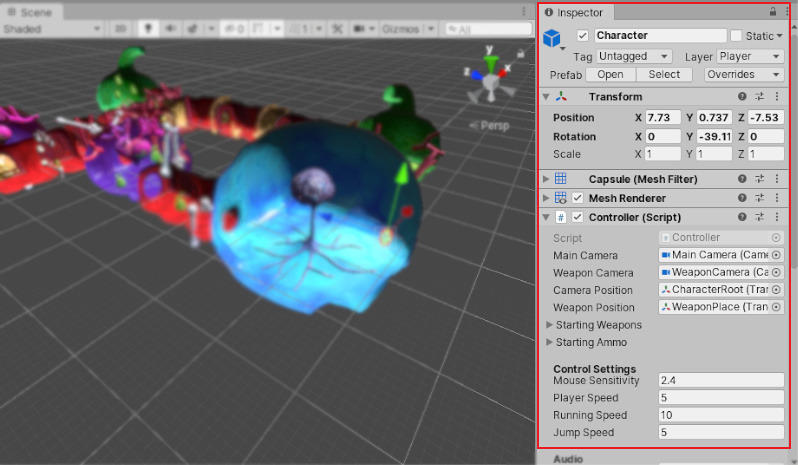
Use the Inspector to view and edit the properties and settings of almost everything in the Unity Editor, including physical game items such as GameObjects, Assets, and Materials, as well as in-Editor settings and preferences.
When you select a GameObject in either the Hierarchy or Scene viewAn interactive view into the world you are creating. You use the Scene View to select and position scenery, characters, cameras, lights, and all other types of Game Object. More info
See in Glossary, the Inspector shows the properties of all components and Materials of that GameObject. Use the Inspector to edit the settings of these components and Materials.
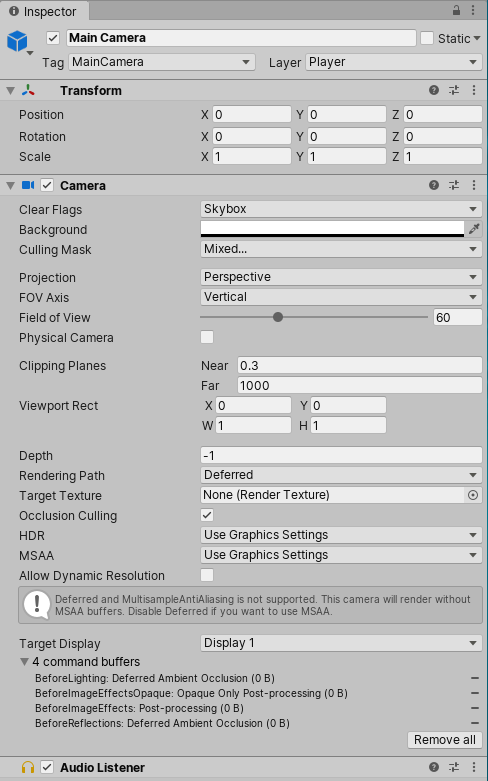
The image above shows the Inspector with the Main CameraA component which creates an image of a particular viewpoint in your scene. The output is either drawn to the screen or captured as a texture. More info
See in Glossary GameObject selected. In addition to the GameObject’s Position, Rotation, and Scale values, all the properties of the Main Camera are available to edit.
Inspecting script variables
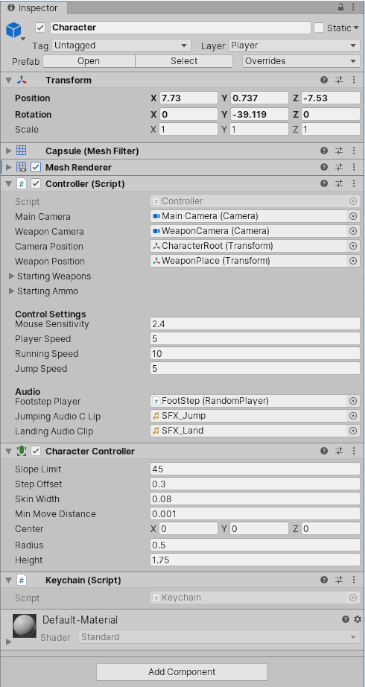
When GameObjects have custom script components attached, the Inspector displays the public variables of that script. You can edit these variables as settings in the same way you can edit the settings of the Editor’s built-in components. This means that you can set parameters and default values in your scripts easily without modifying the code.
Inspecting Assets
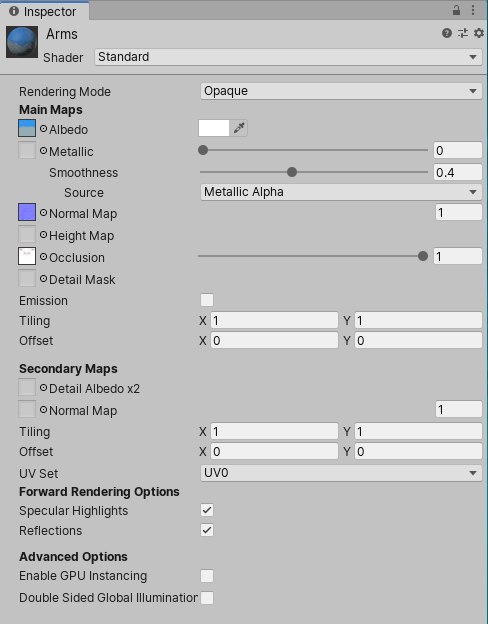
When an AssetAny media or data that can be used in your game or project. An asset may come from a file created outside of Unity, such as a 3D Model, an audio file or an image. You can also create some asset types in Unity, such as an Animator Controller, an Audio Mixer or a Render Texture. More info
See in Glossary is selected in your Project windowA window that shows the contents of your Assets folder (Project tab) More info
See in Glossary, the Inspector shows you the settings related to how that Asset is imported and used at run time (when your game is running either in the Editor or your published build).
Each type of Asset has a different selection of settings. The images below demonstrate some examples of the Inspector displaying the import settings for other Asset types:
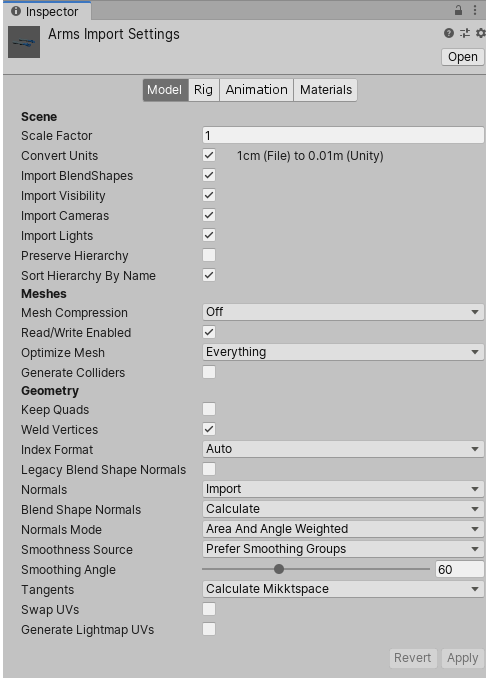
The Model tab of the Model Import Settings window:
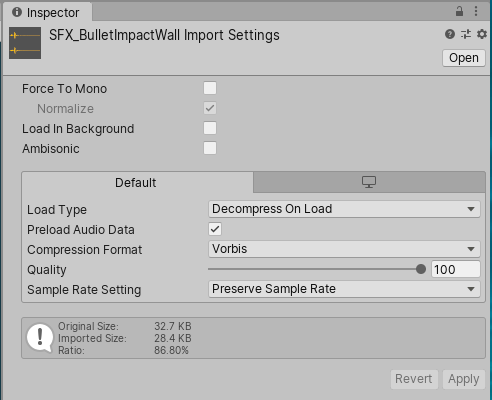
The Audio Clip Import Settings window:
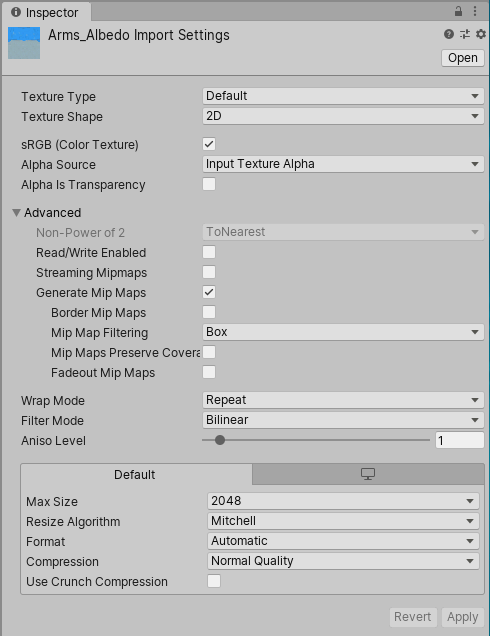
The Texture Import Setting window:
Prefabs
If you have a Prefab selected, some additional options are available in the Inspector window.
For more information, see documentation on PrefabsAn asset type that allows you to store a GameObject complete with components and properties. The prefab acts as a template from which you can create new object instances in the scene. More info
See in Glossary.
Project settings
When you select any of the Project Settings categories (menu: Editor > Project SettingsA broad collection of settings which allow you to configure how Physics, Audio, Networking, Graphics, Input and many other areas of your project behave. More info
See in Glossary), these settings are displayed in the Inspector window. For more information, see documentation on Project Settings.
Icons and labels
You can assign custom icons to GameObjects and scripts. These display in the Scene view along with built-in icons for GameObjects such as Lights and Cameras.
For more about icons and labels, see Unity documentation on assigning icons.
Re-ordering components
To reorder components in the Inspector window, drag-and-drop their headers from one position to another. When you drag a component header, a blue insertion marker appears. This shows you where the component should go when you drop the header. Alternatively, right-click the component to open the Context menu and select Move Up or Move Down:
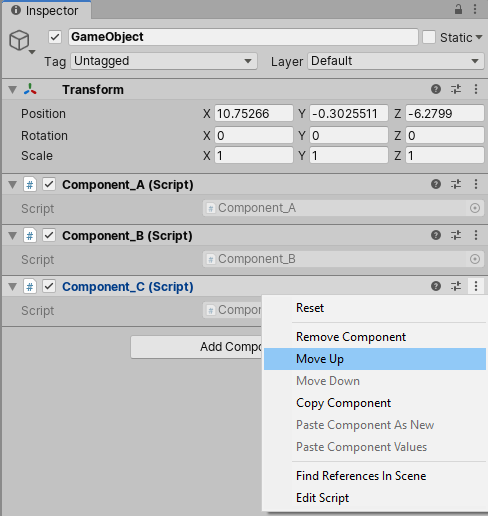
You can only reorder components on a GameObject. You can’t move components between different GameObjects.
You can also drag and drop script Assets directly into the position you want them to appear.
When you select multiple GameObjects, the Inspector displays all of the components that the selected GameObjects have in common. To reorder all of these common components at once, multi-select the GameObjects, then drag-and-drop the components into a new position in the Inspector.
The order you give to components in the Inspector window is the order you need to use when querying components in your user scripts. If you query the components programmatically, you’ll get the order you see in the Inspector.
- Component drag and drop added in Unity 5.6