Surface Shader examples
The Surface ShadersA streamlined way of writing shaders for the Built-in Render Pipeline. More info
See in Glossary examples on this page show you how to use the built-in lighting models. For examples on how to implement custom lighting models, see Surface Shader Lighting Examples.
In the Built-in Render Pipelne, Surface Shaders are a streamlined way of writing shadersA program that runs on the GPU. More info
See in Glossary that interact with lighting.
Render pipeline compatibility
| Feature name | Built-in Render Pipeline | Universal Render Pipeline (URP) | High Definition Render Pipeline (HDRP) | Custom SRP |
|---|---|---|---|---|
| Surface Shaders | Yes | No For a streamlined way of creating Shader objects in URP, see Shader Graph. |
No For a streamlined way of creating Shader objects in HDRP, see Shader Graph. |
No |
Simple shader example
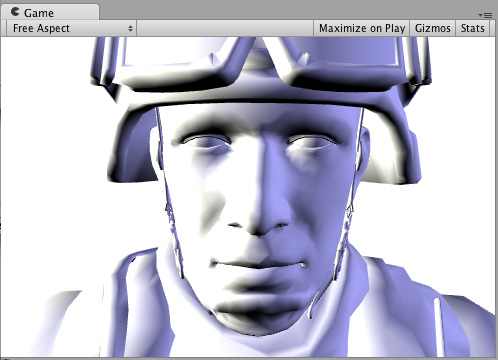
We’ll start with a very simple Shader and build up on that. Here’s a Shader that sets the surface color to “white”. It uses the built-in Lambert (diffuse) lighting model.
  Shader "Example/Diffuse Simple" {
    SubShader {
      Tags { "RenderType" = "Opaque" }
      CGPROGRAM
      #pragma surface surf Lambert
      struct Input {
          float4 color : COLOR;
      };
      void surf (Input IN, inout SurfaceOutput o) {
          o.Albedo = 1;
      }
      ENDCG
    }
    Fallback "Diffuse"
  }
Here’s how it looks like on a model with two Lights set up:
Texture
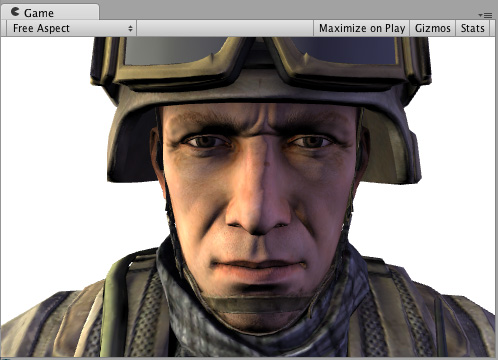
An all-white object is quite boring, so let’s add a Texture. We’ll add a Properties block to the Shader, so we get a Texture selector in our Material.
  Shader "Example/Diffuse Texture" {
    Properties {
      _MainTex ("Texture", 2D) = "white" {}
    }
    SubShader {
      Tags { "RenderType" = "Opaque" }
      CGPROGRAM
      #pragma surface surf Lambert
      struct Input {
          float2 uv_MainTex;
      };
      sampler2D _MainTex;
      void surf (Input IN, inout SurfaceOutput o) {
          o.Albedo = tex2D (_MainTex, IN.uv_MainTex).rgb;
      }
      ENDCG
    }
    Fallback "Diffuse"
  }

Normal mapping
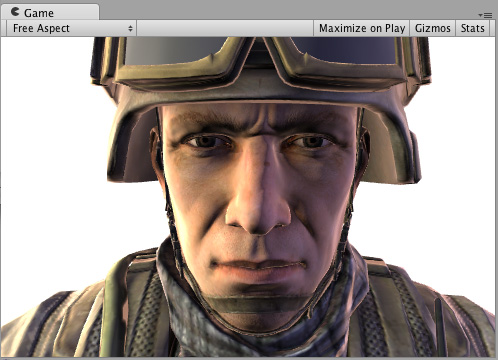
Let’s add some normal mapping:
  Shader "Example/Diffuse Bump" {
    Properties {
      _MainTex ("Texture", 2D) = "white" {}
      _BumpMap ("Bumpmap", 2D) = "bump" {}
    }
    SubShader {
      Tags { "RenderType" = "Opaque" }
      CGPROGRAM
      #pragma surface surf Lambert
      struct Input {
        float2 uv_MainTex;
        float2 uv_BumpMap;
      };
      sampler2D _MainTex;
      sampler2D _BumpMap;
      void surf (Input IN, inout SurfaceOutput o) {
        o.Albedo = tex2D (_MainTex, IN.uv_MainTex).rgb;
        o.Normal = UnpackNormal (tex2D (_BumpMap, IN.uv_BumpMap));
      }
      ENDCG
    }
    Fallback "Diffuse"
  }
Rim Lighting
Now, try to add some Rim Lighting to highlight the edges of a GameObjectThe fundamental object in Unity scenes, which can represent characters, props, scenery, cameras, waypoints, and more. A GameObject’s functionality is defined by the Components attached to it. More info
See in Glossary. We’ll add some emissive light based on the angle between surface normal and view direction. For that, we’ll use the built-in viewDir Surface Shader variable.
  Shader "Example/Rim" {
    Properties {
      _MainTex ("Texture", 2D) = "white" {}
      _BumpMap ("Bumpmap", 2D) = "bump" {}
      _RimColor ("Rim Color", Color) = (0.26,0.19,0.16,0.0)
      _RimPower ("Rim Power", Range(0.5,8.0)) = 3.0
    }
    SubShader {
      Tags { "RenderType" = "Opaque" }
      CGPROGRAM
      #pragma surface surf Lambert
      struct Input {
          float2 uv_MainTex;
          float2 uv_BumpMap;
          float3 viewDir;
      };
      sampler2D _MainTex;
      sampler2D _BumpMap;
      float4 _RimColor;
      float _RimPower;
      void surf (Input IN, inout SurfaceOutput o) {
          o.Albedo = tex2D (_MainTex, IN.uv_MainTex).rgb;
          o.Normal = UnpackNormal (tex2D (_BumpMap, IN.uv_BumpMap));
          half rim = 1.0 - saturate(dot (normalize(IN.viewDir), o.Normal));
          o.Emission = _RimColor.rgb * pow (rim, _RimPower);
      }
      ENDCG
    }
    Fallback "Diffuse"
  }
Detail Texture
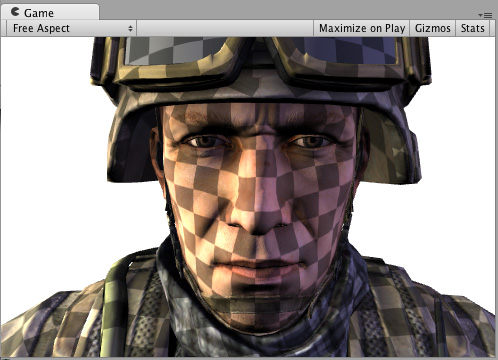
For a different effect, let’s add a Detail Texture that is combined with the base Texture. A Detail Texture usually uses the same UVs but different Tiling in the Material, so we need to use different input UV coordinates.
  Shader "Example/Detail" {
    Properties {
      _MainTex ("Texture", 2D) = "white" {}
      _BumpMap ("Bumpmap", 2D) = "bump" {}
      _Detail ("Detail", 2D) = "gray" {}
    }
    SubShader {
      Tags { "RenderType" = "Opaque" }
      CGPROGRAM
      #pragma surface surf Lambert
      struct Input {
          float2 uv_MainTex;
          float2 uv_BumpMap;
          float2 uv_Detail;
      };
      sampler2D _MainTex;
      sampler2D _BumpMap;
      sampler2D _Detail;
      void surf (Input IN, inout SurfaceOutput o) {
          o.Albedo = tex2D (_MainTex, IN.uv_MainTex).rgb;
          o.Albedo *= tex2D (_Detail, IN.uv_Detail).rgb * 2;
          o.Normal = UnpackNormal (tex2D (_BumpMap, IN.uv_BumpMap));
      }
      ENDCG
    }
    Fallback "Diffuse"
  }
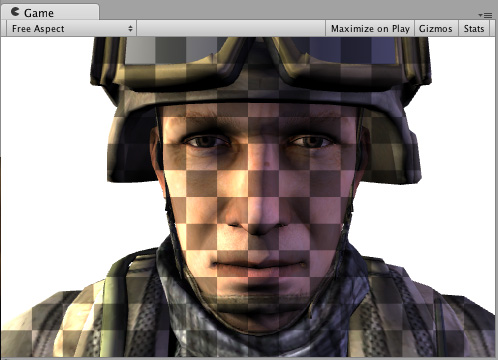
Using a Texture checker does not always make much practical sense, but in this example it is used to illustrate what happens:
Detail Texture in Screen Space
A Detail Texture in screen space does not make practical sense for a soldier head model, but here it is used to illustrate how a built-in screenPos input might be used:
  Shader "Example/ScreenPos" {
    Properties {
      _MainTex ("Texture", 2D) = "white" {}
      _Detail ("Detail", 2D) = "gray" {}
    }
    SubShader {
      Tags { "RenderType" = "Opaque" }
      CGPROGRAM
      #pragma surface surf Lambert
      struct Input {
          float2 uv_MainTex;
          float4 screenPos;
      };
      sampler2D _MainTex;
      sampler2D _Detail;
      void surf (Input IN, inout SurfaceOutput o) {
          o.Albedo = tex2D (_MainTex, IN.uv_MainTex).rgb;
          float2 screenUV = IN.screenPos.xy / IN.screenPos.w;
          screenUV *= float2(8,6);
          o.Albedo *= tex2D (_Detail, screenUV).rgb * 2;
      }
      ENDCG
    }
    Fallback "Diffuse"
  }
The normal mapping has been removed from the Shader above, just to make it shorter:
Cubemap Reflection
Here’s a Shader that does cubemapped reflection using built-in worldRefl input. It’s very similar to built-in Reflective/Diffuse Shader:
  Shader "Example/WorldRefl" {
    Properties {
      _MainTex ("Texture", 2D) = "white" {}
      _Cube ("Cubemap", CUBE) = "" {}
    }
    SubShader {
      Tags { "RenderType" = "Opaque" }
      CGPROGRAM
      #pragma surface surf Lambert
      struct Input {
          float2 uv_MainTex;
          float3 worldRefl;
      };
      sampler2D _MainTex;
      samplerCUBE _Cube;
      void surf (Input IN, inout SurfaceOutput o) {
          o.Albedo = tex2D (_MainTex, IN.uv_MainTex).rgb * 0.5;
          o.Emission = texCUBE (_Cube, IN.worldRefl).rgb;
      }
      ENDCG
    }
    Fallback "Diffuse"
  }
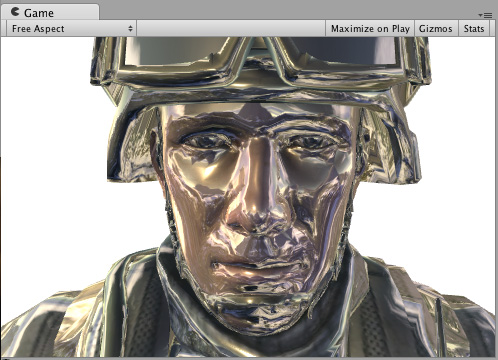
Because it assigns the reflection color as Emission, we get a very shiny soldier:
If you want to do reflections that are affected by normal mapsA type of Bump Map texture that allows you to add surface detail such as bumps, grooves, and scratches to a model which catch the light as if they are represented by real geometry. More info
See in Glossary, it needs to be slightly more involved: INTERNAL_DATA needs to be added to the Input structure, and WorldReflectionVector function used to compute per-pixel reflection vector after you’ve written the Normal output.
  Shader "Example/WorldRefl Normalmap" {
    Properties {
      _MainTex ("Texture", 2D) = "white" {}
      _BumpMap ("Bumpmap", 2D) = "bump" {}
      _Cube ("Cubemap", CUBE) = "" {}
    }
    SubShader {
      Tags { "RenderType" = "Opaque" }
      CGPROGRAM
      #pragma surface surf Lambert
      struct Input {
          float2 uv_MainTex;
          float2 uv_BumpMap;
          float3 worldRefl;
          INTERNAL_DATA
      };
      sampler2D _MainTex;
      sampler2D _BumpMap;
      samplerCUBE _Cube;
      void surf (Input IN, inout SurfaceOutput o) {
          o.Albedo = tex2D (_MainTex, IN.uv_MainTex).rgb * 0.5;
          o.Normal = UnpackNormal (tex2D (_BumpMap, IN.uv_BumpMap));
          o.Emission = texCUBE (_Cube, WorldReflectionVector (IN, o.Normal)).rgb;
      }
      ENDCG
    }
    Fallback "Diffuse"
  }
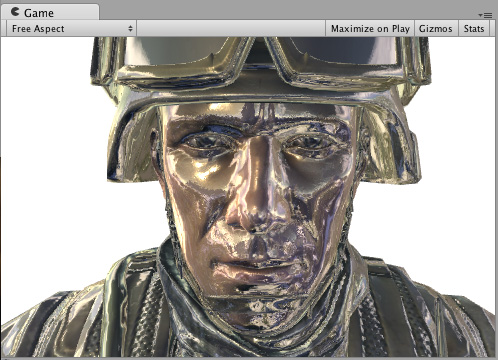
Here’s a normal-mapped shiny soldier:
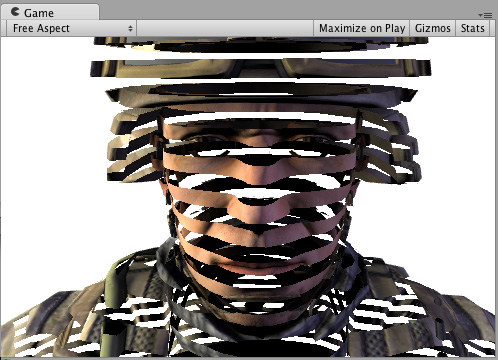
Slices via World Space Position
Here’s a Shader that “slices” the GameObject by discarding pixelsThe smallest unit in a computer image. Pixel size depends on your screen resolution. Pixel lighting is calculated at every screen pixel. More info
See in Glossary in nearly horizontal rings. It does this by using the clip() Cg/HLSL function based on the world position of a pixel. We’ll use the built-in worldPos Surface Shader variable.
  Shader "Example/Slices" {
    Properties {
      _MainTex ("Texture", 2D) = "white" {}
      _BumpMap ("Bumpmap", 2D) = "bump" {}
    }
    SubShader {
      Tags { "RenderType" = "Opaque" }
      Cull Off
      CGPROGRAM
      #pragma surface surf Lambert
      struct Input {
          float2 uv_MainTex;
          float2 uv_BumpMap;
          float3 worldPos;
      };
      sampler2D _MainTex;
      sampler2D _BumpMap;
      void surf (Input IN, inout SurfaceOutput o) {
          clip (frac((IN.worldPos.y+IN.worldPos.z*0.1) * 5) - 0.5);
          o.Albedo = tex2D (_MainTex, IN.uv_MainTex).rgb;
          o.Normal = UnpackNormal (tex2D (_BumpMap, IN.uv_BumpMap));
      }
      ENDCG
    }
    Fallback "Diffuse"
  }
Normal Extrusion with Vertex Modifier
It is possible to use a “vertex modifier” function that will modify the incoming vertex data in the vertex ShaderA program that runs on each vertex of a 3D model when the model is being rendered. More info
See in Glossary. This can be used for things like procedural animation and extrusion along normals. Surface Shader compilation directive vertex:functionName is used for that, with a function that takes inout appdata_full parameter.
Here’s a Shader that moves vertices along their normals by the amount specified in the Material:
  Shader "Example/Normal Extrusion" {
    Properties {
      _MainTex ("Texture", 2D) = "white" {}
      _Amount ("Extrusion Amount", Range(-1,1)) = 0.5
    }
    SubShader {
      Tags { "RenderType" = "Opaque" }
      CGPROGRAM
      #pragma surface surf Lambert vertex:vert
      struct Input {
          float2 uv_MainTex;
      };
      float _Amount;
      void vert (inout appdata_full v) {
          v.vertex.xyz += v.normal * _Amount;
      }
      sampler2D _MainTex;
      void surf (Input IN, inout SurfaceOutput o) {
          o.Albedo = tex2D (_MainTex, IN.uv_MainTex).rgb;
      }
      ENDCG
    }
    Fallback "Diffuse"
  }
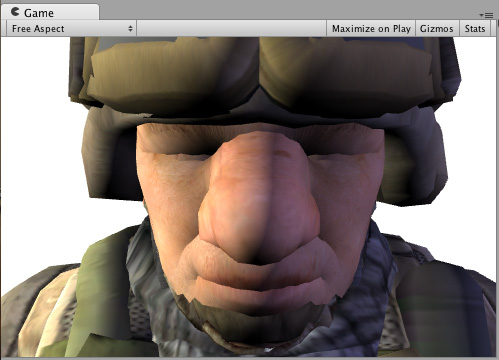
Moving vertices along their normals makes a fat soldier:
Custom data computed per-vertex
Using a vertex modifier function, it is also possible to compute custom data in a vertex Shader, which then will be passed to the Surface Shader function per-pixel. The same compilation directive vertex:functionName is used, but the function should take two parameters: inout appdata_full and out Input. You can fill in any Input member that is not a built-in value there.
Note: Custom Input members used in this way must not have names beginning with ‘uv’ or they won’t work properly.
The example below defines a custom float3 customColor member, which is computed in a vertex function:
  Shader "Example/Custom Vertex Data" {
    Properties {
      _MainTex ("Texture", 2D) = "white" {}
    }
    SubShader {
      Tags { "RenderType" = "Opaque" }
      CGPROGRAM
      #pragma surface surf Lambert vertex:vert
      struct Input {
          float2 uv_MainTex;
          float3 customColor;
      };
      void vert (inout appdata_full v, out Input o) {
          UNITY_INITIALIZE_OUTPUT(Input,o);
          o.customColor = abs(v.normal);
      }
      sampler2D _MainTex;
      void surf (Input IN, inout SurfaceOutput o) {
          o.Albedo = tex2D (_MainTex, IN.uv_MainTex).rgb;
          o.Albedo *= IN.customColor;
      }
      ENDCG
    }
    Fallback "Diffuse"
  }
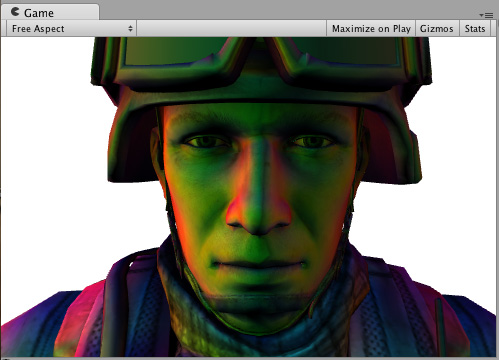
In this example customColor is set to the absolute value of the normal:
More practical uses could be computing any per-vertex data that is not provided by built-in Input variables; or optimizing Shader computations. For example, it’s possible to compute Rim lighting at the GameObject’s vertices, instead of doing that in the Surface Shader per-pixel.
Final Color Modifier
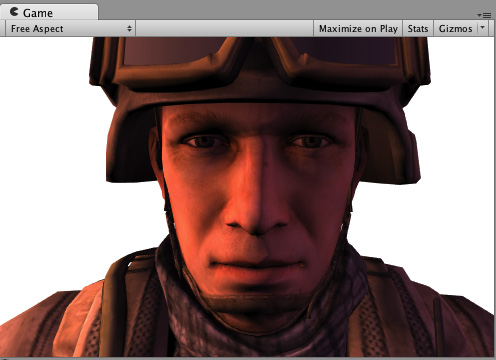
It is possible to use a “final color modifier” function that will modify the final color computed by the Shader.The Surface Shader compilation directive finalcolor:functionName is used for this, with a function that takes Input IN, SurfaceOutput o, inout fixed4 color parameters.
Here’s a simple Shader that applies tint to the final color. This is different from just applying tint to the surface Albedo color: this tint will also affect any color that comes from LightmapsA pre-rendered texture that contains the effects of light sources on static objects in the scene. Lightmaps are overlaid on top of scene geometry to create the effect of lighting. More info
See in Glossary, Light ProbesLight probes store information about how light passes through space in your scene. A collection of light probes arranged within a given space can improve lighting on moving objects and static LOD scenery within that space. More info
See in Glossary and similar extra sources.
  Shader "Example/Tint Final Color" {
    Properties {
      _MainTex ("Texture", 2D) = "white" {}
      _ColorTint ("Tint", Color) = (1.0, 0.6, 0.6, 1.0)
    }
    SubShader {
      Tags { "RenderType" = "Opaque" }
      CGPROGRAM
      #pragma surface surf Lambert finalcolor:mycolor
      struct Input {
          float2 uv_MainTex;
      };
      fixed4 _ColorTint;
      void mycolor (Input IN, SurfaceOutput o, inout fixed4 color)
      {
          color *= _ColorTint;
      }
      sampler2D _MainTex;
      void surf (Input IN, inout SurfaceOutput o) {
           o.Albedo = tex2D (_MainTex, IN.uv_MainTex).rgb;
      }
      ENDCG
    }
    Fallback "Diffuse"
  }
Custom Fog with Final Color Modifier
A common case for using final color modifier (see above) would be implementing completely custom Fog in forward renderingThe process of drawing graphics to the screen (or to a render texture). By default, the main camera in Unity renders its view to the screen. More info
See in Glossary. Fog needs to affect the final computed pixel Shader color, which is exactly what the finalcolor modifier does.
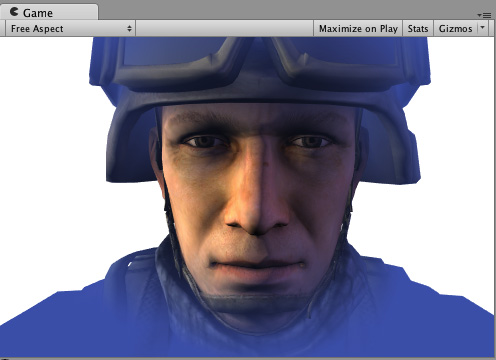
Here’s a Shader that applies fog tint based on the distance from screen center. This combines the vertex modifier with the custom vertex data (fog) and the final color modifier. When used in the forward renderingA rendering path that renders each object in one or more passes, depending on lights that affect the object. Lights themselves are also treated differently by Forward Rendering, depending on their settings and intensity. More info
See in Glossary additive pass, the Fog needs to fade to black. This example handles that and performs a check for UNITY_PASS_FORWARDADD.
  Shader "Example/Fog via Final Color" {
    Properties {
      _MainTex ("Texture", 2D) = "white" {}
      _FogColor ("Fog Color", Color) = (0.3, 0.4, 0.7, 1.0)
    }
    SubShader {
      Tags { "RenderType" = "Opaque" }
      CGPROGRAM
      #pragma surface surf Lambert finalcolor:mycolor vertex:myvert
      struct Input {
          float2 uv_MainTex;
          half fog;
      };
      void myvert (inout appdata_full v, out Input data)
      {
          UNITY_INITIALIZE_OUTPUT(Input,data);
          float4 hpos = UnityObjectToClipPos(v.vertex);
          hpos.xy/=hpos.w;
          data.fog = min (1, dot (hpos.xy, hpos.xy)*0.5);
      }
      fixed4 _FogColor;
      void mycolor (Input IN, SurfaceOutput o, inout fixed4 color)
      {
          fixed3 fogColor = _FogColor.rgb;
          #ifdef UNITY_PASS_FORWARDADD
          fogColor = 0;
          #endif
          color.rgb = lerp (color.rgb, fogColor, IN.fog);
      }
      sampler2D _MainTex;
      void surf (Input IN, inout SurfaceOutput o) {
           o.Albedo = tex2D (_MainTex, IN.uv_MainTex).rgb;
      }
      ENDCG
    }
    Fallback "Diffuse"
  }
Linear Fog
Shader "Example/Linear Fog" {
  Properties {
    _MainTex ("Base (RGB)", 2D) = "white" {}
  }
  SubShader {
    Tags { "RenderType"="Opaque" }
    LOD 200

    CGPROGRAM
    #pragma surface surf Lambert finalcolor:mycolor vertex:myvert
    #pragma multi_compile_fog

    sampler2D _MainTex;
    uniform half4 unity_FogStart;
    uniform half4 unity_FogEnd;

    struct Input {
      float2 uv_MainTex;
      half fog;
    };

    void myvert (inout appdata_full v, out Input data) {
      UNITY_INITIALIZE_OUTPUT(Input,data);
      float pos = length(UnityObjectToViewPos(v.vertex).xyz);
      float diff = unity_FogEnd.x - unity_FogStart.x;
      float invDiff = 1.0f / diff;
      data.fog = clamp ((unity_FogEnd.x - pos) * invDiff, 0.0, 1.0);
    }
    void mycolor (Input IN, SurfaceOutput o, inout fixed4 color) {
      #ifdef UNITY_PASS_FORWARDADD
        UNITY_APPLY_FOG_COLOR(IN.fog, color, float4(0,0,0,0));
      #else
        UNITY_APPLY_FOG_COLOR(IN.fog, color, unity_FogColor);
      #endif
    }

    void surf (Input IN, inout SurfaceOutput o) {
      half4 c = tex2D (_MainTex, IN.uv_MainTex);
      o.Albedo = c.rgb;
      o.Alpha = c.a;
    }
    ENDCG
  }
  FallBack "Diffuse"
}
Decals
Decals are commonly used to add details to Materials at run time (for example, bullet impacts). They are especially useful in deferred rendering, because they alter the GBuffer before it is lit, therefore saving on performance.
In a typical scenario, Decals should be rendered after the opaque objects and should not be shadow casters, as seen in the ShaderLabUnity’s language for defining the structure of Shader objects. More info
See in Glossary “Tags” in the example below.
Shader "Example/Decal" {
  Properties {
    _MainTex ("Base (RGB)", 2D) = "white" {}
  }
  SubShader {
    Tags { "RenderType"="Opaque" "Queue"="Geometry+1" "ForceNoShadowCasting"="True" }
    LOD 200
    Offset -1, -1

    CGPROGRAM
    #pragma surface surf Lambert decal:blend

    sampler2D _MainTex;

    struct Input {
      float2 uv_MainTex;
    };

    void surf (Input IN, inout SurfaceOutput o) {
        half4 c = tex2D (_MainTex, IN.uv_MainTex);
        o.Albedo = c.rgb;
        o.Alpha = c.a;
      }
    ENDCG
    }
}