URP の互換性モードでの全画面転送の実行例
このページの例では、全画面転送を実行するカスタムレンダラー機能を作成する方法を示します。
ノート:Unity は、今後は、レンダーグラフ API を使用しないレンダリングパスの開発や改善を行うことはありません。新しいグラフィックス機能を開発する場合は、代わりにレンダーグラフ API を使用してください。このページの手順を使用するには、URP の Graphics 設定 (Project Settings > Graphics) で Compatibility Mode (Render Graph Disabled) を有効にしてください。
例の概要
この例では、以下のソリューションを実装します。
カスタムレンダラー機能 がカスタム レンダーパス を呼び出します。
この レンダーパス は、不透明なテクスチャを、現在のレンダラーの カメラのカラーターゲット に転送します。レンダーパスはコマンドバッファを使用して、両目のフルスクリーンメッシュを描画します。
この例には、レンダリングの GPU 面を実行する シェーダー が含まれています。このシェーダーは、XR サンプラーマクロを使用してカラーバッファをサンプリングします。
必要条件
この例の前提条件は以下のとおりです。
- Scriptable Render Pipeline Settings プロパティが URP アセットを参照している (Project Settings > Graphics > Scriptable Render Pipeline Settings)。
例のシーンとゲームオブジェクトの作成
この例のステップを実行するために、以下のゲームオブジェクトが含まれる新しいシーンを作成します。
-
キューブを作成します。メインカメラからキューブがはっきりと見えるようにします。
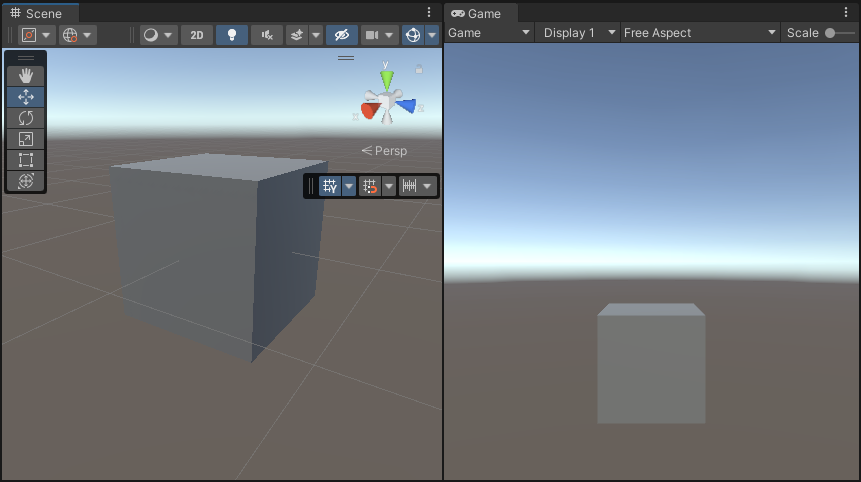
これで、この例のステップの実行に必要なシーンを用意できました。
実装例
このセクションは、例のシーンとゲームオブジェクトの作成 セクションの説明のとおりにシーンが作成されていることを前提としています。
以下のステップに従って、カスタム レンダーパス を使用する カスタムレンダラー機能 を作成します。
-
新しい C# スクリプトを作成します。
ColorBlitRendererFeature.csという名前を付けます。このスクリプトは、カスタム Renderer Feature を実装します。using UnityEngine; using UnityEngine.Rendering; using UnityEngine.Rendering.Universal; internal class ColorBlitRendererFeature : ScriptableRendererFeature { public Shader shader; [Range(0f, 1f)] public float intensity = 1f; Material m_Material; ColorBlitPass m_RenderPass; // Use this method to add one or more Render Passes into the rendering sequence of the renderer with the EnqueuePass method. public override void AddRenderPasses(ScriptableRenderer renderer, ref RenderingData renderingData) { if (m_Material == null) return; if (renderingData.cameraData.cameraType != CameraType.Game) return; m_RenderPass.SetIntensity(intensity); renderer.EnqueuePass(m_RenderPass); } // Use the Create method to initialize the resources. This method only runs in the first frame. // Use the Dispose method to clean up the resources before the renderer feature is disabled. public override void Create() { m_Material = CoreUtils.CreateEngineMaterial(shader); m_RenderPass = new ColorBlitPass(m_Material); } protected override void Dispose(bool disposing) { CoreUtils.Destroy(m_Material); } } -
新しい C# スクリプトを作成します。
ColorBlitPass.csという名前を付けます。このスクリプトは、カスタム転送ドローコールを実行するカスタムレンダーパスを実装します。このレンダーパスで AddBlitPass を使用して転送処理を実行します。
ノート:
cmd.Blitメソッドは URP XR 統合との互換性に問題があるため、URP XR プロジェクトでは使用しないでください。cmd.Blitを使用すると、XR シェーダーキーワードが暗示的に有効または無効になり、XR SPI レンダリングが停止する可能性があります。using UnityEngine; using UnityEngine.Rendering.RenderGraphModule; using UnityEngine.Rendering; using UnityEngine.Rendering.Universal; using UnityEngine.Rendering.RenderGraphModule.Util; public class ColorBlitPass : ScriptableRenderPass { private const string k_PassName = "ColorBlitPass"; private Material m_Material; private float m_Intensity; private static readonly int k_IntensityID = Shader.PropertyToID("_Intensity"); public ColorBlitPass(Material mat) { m_Material = mat; renderPassEvent = RenderPassEvent.BeforeRenderingPostProcessing; } public void SetIntensity(float intensity) { m_Intensity = intensity; } // Use the RecordRenderGraph method to configure the input and output parameters for the AddBlitPass method and execute the AddBlitPass method. public override void RecordRenderGraph(RenderGraph renderGraph, ContextContainer frameData) { var resourceData = frameData.Get<UniversalResourceData>(); // The following line ensures that the render pass doesn't blit // from the back buffer. if (resourceData.isActiveTargetBackBuffer) { Debug.LogError($"Skipping render pass. ColorBlitRendererFeature requires an intermediate ColorTexture, we can't use the BackBuffer as a texture input."); return; } var source = resourceData.activeColorTexture; // Define the texture descriptor for creating the destination render graph texture. var destinationDesc = renderGraph.GetTextureDesc(source); destinationDesc.name = $"CameraColor-{k_PassName}"; destinationDesc.clearBuffer = false; destinationDesc.depthBufferBits = 0; // Create the texture. TextureHandle destination = renderGraph.CreateTexture(destinationDesc); // The AddBlitPass method adds the render graph pass that blits from the source to the destination texture. RenderGraphUtils.BlitMaterialParameters para = new(source, destination, m_Material, 0); para.material.SetFloat(k_IntensityID, m_Intensity); renderGraph.AddBlitPass(para, passName: k_PassName); // Use the destination texture as the camera texture to avoid the extra blit from the destination texture back to the camera texture. resourceData.cameraColor = destination; } } -
転送処理を実行するシェーダーを作成します。シェーダーファイルに
ColorBlit.shaderという名前を付けます。vertex 関数はフルスクリーンクアッドの位置を出力します。fragment 関数はカラーバッファをサンプリングし、値color * float4(0, _Intensity, 0, 1)をレンダーターゲットに返します。Shader "ColorBlit" { SubShader { Tags { "RenderType"="Opaque" "RenderPipeline" = "UniversalPipeline"} ZWrite Off Cull Off Pass { Name "ColorBlitPass" HLSLPROGRAM #include "Packages/com.unity.render-pipelines.universal/ShaderLibrary/Core.hlsl" #include "Packages/com.unity.render-pipelines.core/Runtime/Utilities/Blit.hlsl" #pragma vertex Vert #pragma fragment Frag float _Intensity; float4 Frag(Varyings input) : SV_Target { // This function handles the different ways XR platforms handle texture arrays. UNITY_SETUP_STEREO_EYE_INDEX_POST_VERTEX(input); // Sample the texture using the SAMPLE_TEXTURE2D_X_LOD function float2 uv = input.texcoord.xy; half4 color = SAMPLE_TEXTURE2D_X_LOD(_BlitTexture, sampler_LinearRepeat, uv, _BlitMipLevel); // Modify the sampled color return half4(0, _Intensity, 0, 1) * color; } ENDHLSL } } } -
ColorBlitRendererFeatureをユニバーサルレンダラーアセットに追加します。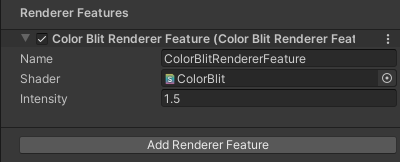
レンダラー機能の追加 レンダラー機能を追加する方法の詳細については、レンダラー機能をレンダラーに追加する方法 のページを参照してください。
この例では、Intensity プロパティを 1.5 に設定します。
-
以下のようなビューが表示されます。
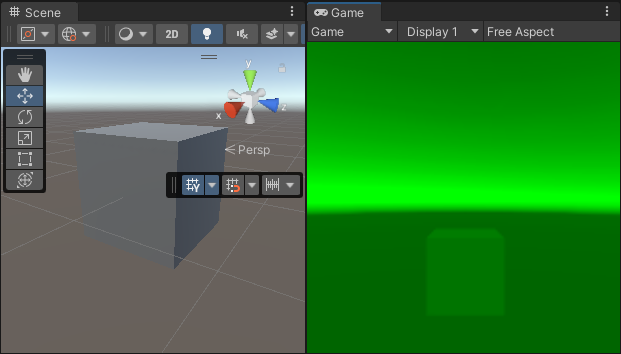
最終的なシーンとゲームビュー ノート: この例を XR で可視化するために、XR SDK を使用するようにプロジェクトを設定します。MockHMD XR プラグインをプロジェクトに追加 します。Render Mode プロパティを Single Pass Instanced に設定します。
これでこの例は完成です。
追加リソース
互換性モードでの転送処理の実行の詳細については、URP 14 (Unity 2022) ドキュメントのテクスチャの使用に関するセクション を参照してください。