Handles.DrawBezier
public static function DrawBezier(startPosition:
Vector3,
endPosition: Vector3,
startTangent: Vector3,
endTangent: Vector3,
color: Color,
texture: Texture2D,
width: float):
void;
Description
Draw textured bezier line through start and end points with the given tangents. To get an anti-aliased effect use a texture that is 1x2 pixels with one transparent white pixel and one opaque white pixel. The bezier curve will be swept using this texture.
Note: Use HandleUtility.GetHandleSize where you might want to have constant screen-sized handles.

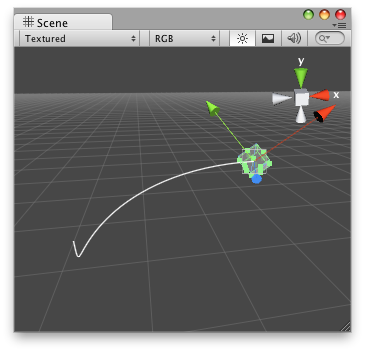
Bezier Line in the Scene View.
	// Draws a red bezier curve from (0,0,0) to the transform's position

	@CustomEditor (BezierScript)
	class DrawBezierHandle extends Editor {

		function OnSceneGUI() {
			var width : float = HandleUtility.GetHandleSize(Vector3.zero) * 0.1;
	    	Handles.DrawBezier(target.transform.position,
    					Vector3.zero,
    					Vector3.up,
    					-Vector3.up,
    					Color.red,
    					null,
    					width);
	    }
	}
And the script attached to this Handle:
	//BezierScript.js

	Debug.Log("I have a bezier curve handle attached!");