在 URP 中实现与 HDR 输出兼容的自定义叠加
本页面演示如何创建可实现以下操作的可编程渲染器功能:
- 将一个摄像机的输出合成到另一个摄像机上。
- 应用色调映射使自定义覆盖与__ HDR__高动态范围
See in Glossary 输出的效果保持一致。
这包括根据帧顺序将色调映射应用于覆盖的着色器。
请参阅可编程渲染器功能简介和可编程渲染通道简介以了解更多信息。
此示例可分为以下部分:
- 先决条件
- 设置场景
- 创建自定义覆盖渲染通道
- 实现 RecordRenderGraph 方法
- 创建自定义覆盖渲染器功能
- 创建自定义覆盖着色器
- 完成自定义覆盖
- 完整代码示例
- 自定义覆盖渲染通道代码
- 自定义覆盖渲染器功能代码
- 自定义覆盖着色器代码
先决条件
此示例假设以下条件:
- Unity 项目使用 URP 作为活动渲染管线。
- 项目已设置为 HDR 渲染,具有以下设置:
- 活动 URP 资源的分级模式设置为高动态范围。
- 活动 URP 资源启用了 HDR。
- 项目设置启用了 HDR 输出。
设置场景
要使示例正常运行,必须首先设置示例场景,如以下说明所示。
创建一个立方体游戏对象并将其位置设置为场景中的原点(X:0,Y:0,Z:0)。
对齐
Main Camera,使立方体清晰可见。创建一个新相机并将其命名为叠加摄像机。
将叠加摄像机放置在
Main Camera的右侧并将其对齐,使立方体清晰可见。在检视器窗口中将叠加摄像机 Background Type 属性设置为 Solid Color。
将叠加摄像机背景的颜色设置为 RGBA 值为
0, 0, 0, 0的透明黑色。-
创建一个渲染纹理并将其命名为 OverlayRenderTexture。要创建渲染纹理,转到资产 (Assets) > 创建 (Create) > 渲染 (Rendering) > 渲染纹理 (Render Texture)。
注意:为了实现更好的 HDR 精度,请使用带符号的浮点格式作为渲染纹理格式。为此,请选择渲染纹理,然后在检视器窗口中将颜色格式更改为带有
_SFLOAT后缀的格式。 将覆盖渲染纹理分配给叠加摄像机的 Output Texture 属性。为此,请在检视器中打开
Overlay Camera,然后转到输出 (Output) > 输出纹理 (Output Texture),然后从资源列表中选择 OverlayRenderTexture。为叠加摄像机创建新的通用渲染器资源并将其命名为 OverlayRenderer。为此,转到资源 (Assets) > 创建 (Create)> 渲染 (Rendering) > URP 通用渲染器 (URP Universal Renderer)。
选择活动 URP 资源,然后在检视器窗口中转到 渲染 (Rendering) > 渲染器列表 (Renderer List) > +。选择 OverlayRenderer。这样即可将覆盖渲染器添加到渲染器列表中。
选择叠加摄像机,然后在检视器窗口中转到 渲染 (Rendering) > 渲染器 (Renderer)。选择 OverlayRenderer。这会将叠加摄像机设置为使用覆盖渲染器。
现在,场景可用于创建具有可编程渲染器功能的自定义覆盖。
创建自定义覆盖渲染通道
要创建与 HDR 输出兼容的自定义覆盖,必须使用可编程渲染通道来创建覆盖。HDR 输出在后期处理过程中将色调映射应用于主摄像机的输出。因此,主摄像机和叠加摄像机的输出具有不同的色调映射。然后,此渲染通道在后期处理之后出现,以将色调映射应用于叠加摄像机的输出。
要为此示例创建渲染通道,请执行以下步骤:
创建一个 C# 脚本并将其命名为
CustomOverlayRenderPass。在脚本中,删除 Unity 在
CustomOverlayRenderPass类中插入的代码。-
添加以下
using指令。using UnityEngine; using UnityEngine.Rendering; using UnityEngine.Rendering.Universal; using UnityEngine.Rendering.RenderGraphModule; -
创建一个继承自
ScriptableRenderPass类并具有属性[SupportedOnRenderer(typeof(UniversalRendererData) -->的新CustomOverlayRenderPass类。[SupportedOnRenderer(typeof(UniversalRendererData))] --> public class CustomOverlayRenderPass : ScriptableRenderPass { } -
将属性
Material passMaterial和RTHandle passOverlayTexture添加到渲染通道,如下所示。[SupportedOnRenderer(typeof(UniversalRendererData))] --> public class CustomOverlayRenderPass : ScriptableRenderPass { Material passMaterial; RTHandle overlayTextureHandle; } -
创建一个构造函数方法,该方法将材质作为参数并将其分配给
passMaterial。此方法还为渲染通道创建性能分析采样器,并将其设置为在AfterRenderingPostProcessing事件中运行。public CustomOverlayRenderPass(Material material) { passMaterial = material; profilingSampler = new ProfilingSampler(nameof(CustomOverlayRenderPass)); renderPassEvent = RenderPassEvent.AfterRenderingPostProcessing; } -
为渲染通道添加
Setup方法。使用此方法和参数可从覆盖纹理创建RTHandle,如下所示。在使用RTHandle时,允许RenderPassAPI 与覆盖渲染纹理交互。public void Setup(Texture overlayTex) { if (overlayTextureHandle != overlayTex) { overlayTextureHandle?.Release(); overlayTextureHandle = RTHandles.Alloc(overlayTex); } } -
实现
Dispose方法可在销毁渲染通道时释放覆盖纹理。public void Dispose() { overlayTextureHandle?.Release(); } -
创建两个结构,其中一个命名为
CopyData,另一个命名为PassData,其中包含的属性如下所示。这些结构包含 URP 实现渲染通道所需的关键属性。struct CopyData { public TextureHandle source; } struct PassData { public TextureHandle source; public TextureHandle overlayTexture; public TextureHandle internalLut; public Vector4 lutParams; public Material material; } -
添加
RecordRenderGraph方法,如下所示。public override void RecordRenderGraph(RenderGraph renderGraph, ContextContainer frameData) { }
实现 RecordRenderGraph 方法
在 CustomOverlayRenderPass 类的 RecordRenderGraph 方法中添加以下步骤中的代码。
-
从帧数据获取后期处理、资源和摄像机数据。
UniversalPostProcessingData postProcessingData = frameData.Get<UniversalPostProcessingData>(); UniversalResourceData resourceData = frameData.Get<UniversalResourceData>(); UniversalCameraData cameraData = frameData.Get<UniversalCameraData>(); -
从资源数据获取活动颜色纹理。
TextureHandle activeCameraColor = resourceData.activeColorTexture; -
创建一个纹理来存储活动摄像机颜色目标。
RenderTextureDescriptor colorCopyDescriptor = cameraData.cameraTargetDescriptor; colorCopyDescriptor.depthBufferBits = (int) DepthBits.None; TextureHandle copiedColor = UniversalRenderer.CreateRenderGraphTexture(renderGraph, colorCopyDescriptor, "_CustomCameraColorCopy", false); -
创建一个
RasterRenderPass以将活动摄像机颜色目标复制到纹理中。该副本将用于处理混合。using (var builder = renderGraph.AddRasterRenderPass<CopyData>("Custom Overlay Render Pass - Copy Camera", out var passData)) { passData.source = activeCameraColor; builder.UseTexture(passData.source, AccessFlags.Read); builder.SetRenderAttachment(copiedColor, 0, AccessFlags.WriteAll); builder.SetRenderFunc((CopyData data, RasterGraphContext context) => { Blitter.BlitTexture(context.cmd, data.source, new Vector4(1, 1, 0, 0), 0.0f, false); }); } -
创建另一个
RasterRenderPass,使用自定义材质将覆盖纹理复制到活动摄像机颜色目标。这是您在本指南的这一部分中添加的代码其余部分的容器。using (var builder = renderGraph.AddRasterRenderPass<PassData>("Custom Overlay Render Pass - Blit Overlay", out var passData)) { } -
设置渲染通道对覆盖纹理进行__ blit__“位块传输 (Bit Block Transfer)”的简写。blit 操作是将数据块从内存中的一个位置传输到另一个位置的过程。
See in Glossary 所需的属性,如下所示。using (var builder = renderGraph.AddRasterRenderPass<PassData>("Custom Overlay Render Pass - Blit Overlay", out var passData)) { passData.material = passMaterial; builder.SetRenderAttachment(activeCameraColor, 0, AccessFlags.Write); passData.source = copiedColor; builder.UseTexture(passData.source, AccessFlags.Read); } -
将纹理导入渲染图系统,然后将纹理设置为输入。
passData.overlayTexture = renderGraph.ImportTexture(passOverlayTexture); builder.UseTexture(passData.overlayTexture, AccessFlags.Read); -
检查后期处理和 HDR 颜色分级。如果 HDR 输出的配置正确,请将 HDR 使用的内部颜色 LUT 纹理设置为输入,并将其参数传递给着色器。
if (postProcessingData.gradingMode == ColorGradingMode.HighDynamicRange && cameraData.postProcessEnabled) { passData.internalLut = resourceData.internalColorLut; builder.UseTexture(passData.internalLut, AccessFlags.Read); int lutHeight = postProcessingData.lutSize; int lutWidth = lutHeight * lutHeight; float postExposure = 1.0f; ColorAdjustments colorAdjustments = VolumeManager.instance.stack.GetComponent<ColorAdjustments>(); if (colorAdjustments != null) { postExposure = Mathf.Pow(2.0f, colorAdjustments.postExposure.value); } passData.lutParams = new Vector4(1f / lutWidth, 1f / lutHeight, lutHeight - 1f, postExposure); }注意:如果禁用后期处理,则会在此渲染通道之后应用 HDR 颜色转换,并且摄像机输出的预期颜色空间为默认 Rec709。此示例中的代码在此处使用
if语句来防止此渲染通道在应用 HDR 之前更改叠加摄像机的输出。 -
在着色器上设置一个关键字以启用色调映射,并添加命令将覆盖纹理 blit 到活动摄像机颜色目标。
builder.SetRenderFunc((PassData data, RasterGraphContext context) => { data.material.SetTexture("_OverlayTexture", data.overlayTexture); bool tonemappingActive = data.internalLut.IsValid(); CoreUtils.SetKeyword(data.material, "TONEMAPPING", tonemappingActive); if (tonemappingActive) { data.material.SetTexture("_InternalLut", data.internalLut); data.material.SetVector("_InternalLut_Params", data.lutParams); } Blitter.BlitTexture(context.cmd, data.source, new Vector4(1, 1, 0, 0), data.material, 0); });
这样就完成了 CustomOverlayRenderPass 脚本,并准备好通过可编程渲染器功能将其添加到渲染器中。
有关本节的完整代码,请参阅自定义覆盖渲染通道代码。
创建自定义覆盖可编程渲染器功能
要将 CustomOverlayRenderPass 添加到渲染器,必须按以下步骤创建可编程渲染器功能。
创建一个 C# 脚本并将其命名为
CustomOverlayRendererFeature。在脚本中,删除 Unity 在
CustomOverlayRendererFeature类中插入的代码。-
添加以下
using指令。using UnityEngine; using UnityEngine.Rendering; using UnityEngine.Rendering.Universal; -
设置继承自
ScriptableRendererFeature类的新CustomOverlayRendererFeature类。public class CustomOverlayRendererFeature : ScriptableRendererFeature { } -
添加以下属性即可包含渲染通道所需的资源和数据。
public class CustomOverlayRendererFeature : ScriptableRendererFeature { public Shader hdrShader; public RenderTexture passOverlayTexture; Material passMaterial; CustomOverlayRenderPass overlayRenderPass = null; } -
创建
AddRenderPasses方法,并仅在 Game 视图中应用覆盖层时应用此方法,并将覆盖层应用于摄像机堆栈中的最后一个摄像机。public override void AddRenderPasses(ScriptableRenderer renderer, ref RenderingData renderingData) { if (renderingData.cameraData.cameraType != CameraType.Game || !renderingData.cameraData.resolveFinalTarget) return; } -
在
if语句之后,将覆盖纹理传递给覆盖渲染通道并将渲染通道排入队列。public override void AddRenderPasses(ScriptableRenderer renderer, ref RenderingData renderingData) { if (renderingData.cameraData.cameraType != CameraType.Game || !renderingData.cameraData.resolveFinalTarget) return; overlayRenderPass.Setup(passOverlayTexture); renderer.EnqueuePass(overlayRenderPass); } -
添加
Create方法,并创建一个CustomOverlayRenderPass的实例,实例中包含一个新的材质,该材质使用hdrShader。public override void Create() { passMaterial = CoreUtils.CreateEngineMaterial(hdrShader); overlayRenderPass = new CustomOverlayRenderPass(passMaterial); } -
实现
Dispose方法可在应用渲染通道后释放渲染器功能创建的资源。protected override void Dispose(bool disposing) { CoreUtils.Destroy(passMaterial); overlayRenderPass.Dispose(); }
有关本节的完整代码,请参阅自定义覆盖可编程渲染器功能代码。
创建自定义覆盖着色器
CustomOverlayRendererFeature 创建的材质需要自定义着色器来处理覆盖层和 HDR 输出更改。以下步骤演示如何创建能够执行此操作的着色器。
创建新的着色器并命名为
CustomOverlayBlit。-
删除 Unity 自动生成的着色器代码并设置着色器的轮廓,如下所示。
Shader "Custom/CustomOverlayBlit" { SubShader { Tags{ "RenderPipeline" = "UniversalPipeline" } Pass { ZWrite Off ZTest Always Blend Off Cull Off HLSLPROGRAM #pragma target 2.0 #pragma editor_sync_compilation #pragma vertex Vert #pragma fragment Frag #pragma multi_compile_local_fragment _ TONEMAPPING #include "Packages/com.unity.render-pipelines.universal/ShaderLibrary/Core.hlsl" #include "Packages/com.unity.render-pipelines.core/Runtime/Utilities/Blit.hlsl" #include "Packages/com.unity.render-pipelines.core/ShaderLibrary/Color.hlsl" TEXTURE2D(_InternalLut); TEXTURE2D_X(_OverlayTexture); float4 _InternalLut_Params; #define LutParams _InternalLut_Params.xyz #define PostExposure _InternalLut_Params.w ENDHLSL } } } 创建名称为
ApplyTonemapping且返回类型为half3的方法。此方法应具有以下参数:half3 input、TEXTURE2D_PARAM(lutTex, lutSampler)、float3 lutParams、float exposure。-
在
ApplyTonemapping方法中,将input乘以exposure值,然后对修改后的input进行saturate。half3 ApplyTonemapping(half3 input, TEXTURE2D_PARAM(lutTex, lutSampler), float3 lutParams, float exposure) { input *= exposure; float3 inputLutSpace = saturate(LinearToLogC(input)); } -
通过
ApplyLut2D来应用色调映射更改并返回结果。half3 ApplyTonemapping(half3 input, TEXTURE2D_PARAM(lutTex, lutSampler), float3 lutParams, float exposure) { input *= exposure; float3 inputLutSpace = saturate(LinearToLogC(input)); return ApplyLut2D(TEXTURE2D_ARGS(lutTex, lutSampler), inputLutSpace, lutParams); } -
创建标准
Frag方法,如下所示。将此方法放在HLSLPROGRAM中,但要放在ApplyTonemapping方法之后。half4 Frag(Varyings input) : SV_Target { } -
在
Frag方法中,检索原始摄像机颜色和叠加颜色。half4 Frag(Varyings input) : SV_Target { half4 color = FragBlit(input, sampler_LinearClamp); half4 overlay = SAMPLE_TEXTURE2D_X(_OverlayTexture, sampler_LinearClamp, input.texcoord); } -
创建一个
if语句来检查着色器是否必须应用色调映射。如果着色器必须应用色调映射,请使用ApplyTonemapping方法将其应用于覆盖层。half4 Frag(Varyings input) : SV_Target { half4 color = FragBlit(input, sampler_LinearClamp); half4 overlay = SAMPLE_TEXTURE2D_X(_OverlayTexture, sampler_LinearClamp, input.texcoord); #if TONEMAPPING overlay.rgb = ApplyTonemapping(overlay.rgb, TEXTURE2D_ARGS(_InternalLut, sampler_LinearClamp), LutParams, PostExposure); #endif } -
将覆盖层与原始摄像机颜色混合并返回结果。
half4 Frag(Varyings input) : SV_Target { half4 color = FragBlit(input, sampler_LinearClamp); half4 overlay = SAMPLE_TEXTURE2D_X(_OverlayTexture, sampler_LinearClamp, input.texcoord); #if TONEMAPPING overlay.rgb = ApplyTonemapping(overlay.rgb, TEXTURE2D_ARGS(_InternalLut, sampler_LinearClamp), LutParams, PostExposure); #endif color.rgb = color.rgb * (1.0 - overlay.a) + overlay.rgb * overlay.a; return color; }
着色器现已完成,可在 CustomOverlayRenderPass 和 CustomOverlayRendererFeature 脚本中使用。
要查看本节的完整代码,请参阅自定义覆盖着色器代码。
完成自定义覆盖
要完成自定义覆盖,必须设置已创建的脚本,才能将其效果应用于场景中的渲染器。以下步骤演示了如何执行此操作。
- 查找并选择活动 URP 资源使用的主渲染器。
- 在检视器窗口中,选择添加渲染器功能 (Add Renderer Feature) > 自定义覆盖渲染器功能 (Custom Overlay Renderer Feature) 来添加
CustomOverlayRendererFeature脚本。 - 将
CustomOverlayBlit着色器分配给自定义覆盖可编程渲染器功能的 Shader 属性。 - 将
OverlayRenderTexture分配给自定义覆盖可编程渲染器功能的 Overlay Texture 属性。
自定义覆盖现已完成,应在播放模式下显示在主摄像机输出的上方。覆盖层的色调映射方式应与主摄像机输出相同,不得有明显差异。这应当类似于下面的截屏。
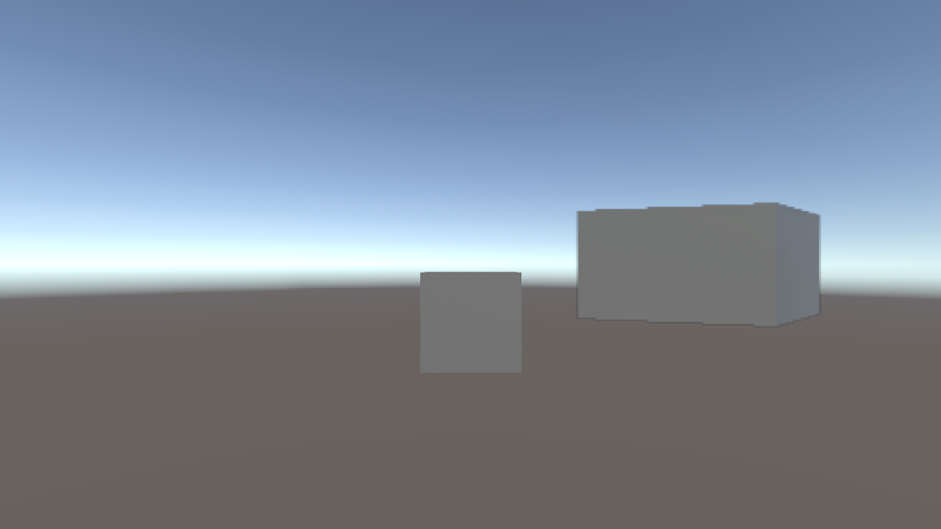
Game 视图中间的立方体,以另一个角度的立方体作为覆盖层,经过色调映射以匹配 HDR 输出。
注意:最终结果可能会因叠加摄像机的位置而异。
完整代码示例
自定义覆盖渲染通道代码
以下是示例中可编程渲染通道的完整代码示例。
using UnityEngine;
using UnityEngine.Rendering;
using UnityEngine.Rendering.Universal;
using UnityEngine.Rendering.RenderGraphModule;
[SupportedOnRenderer(typeof(UniversalRendererData))] -->
public class CustomOverlayRenderPass : ScriptableRenderPass
{
Material passMaterial;
RTHandle overlayTextureHandle;
public CustomOverlayRenderPass(Material material)
{
passMaterial = material;
profilingSampler = new ProfilingSampler(nameof(CustomOverlayRenderPass));
// The render pass is executed after post processing, so the main camera target has been tonemapped but not the overlay texture
renderPassEvent = RenderPassEvent.AfterRenderingPostProcessing;
}
public void Setup(Texture overlayTex)
{
//Create an RTHandle from the overlay texture, to import it into the render graph system
if (overlayTextureHandle != overlayTex)
{
overlayTextureHandle?.Release();
overlayTextureHandle = RTHandles.Alloc(overlayTex);
}
}
public void Dispose()
{
    overlayTextureHandle?.Release();
}
class CopyData
{
public TextureHandle source;
}
class PassData
{
public TextureHandle source;
public TextureHandle overlayTexture;
public TextureHandle internalLut;
public Vector4 lutParams;
public Material material;
}
public override void RecordRenderGraph(RenderGraph renderGraph, ContextContainer frameData)
{
UniversalPostProcessingData postProcessingData = frameData.Get<UniversalPostProcessingData>();
UniversalResourceData resourceData = frameData.Get<UniversalResourceData>();
UniversalCameraData cameraData = frameData.Get<UniversalCameraData>();
TextureHandle activeCameraColor = resourceData.activeColorTexture;
// Create a texture to copy the active camera color target into
RenderTextureDescriptor colorCopyDescriptor = cameraData.cameraTargetDescriptor;
colorCopyDescriptor.depthBufferBits = (int) DepthBits.None;
TextureHandle copiedColor = UniversalRenderer.CreateRenderGraphTexture(renderGraph, colorCopyDescriptor, "_CustomCameraColorCopy", false);
// Copy the active camera color target into the texture
using (var builder = renderGraph.AddRasterRenderPass<CopyData>("Custom Overlay Render Pass - Copy Camera", out var passData))
{
    passData.source = activeCameraColor;
    builder.UseTexture(passData.source, AccessFlags.Read);
    builder.SetRenderAttachment(copiedColor, 0, AccessFlags.WriteAll);

    builder.SetRenderFunc((CopyData data, RasterGraphContext context) =>
    {
        Blitter.BlitTexture(context.cmd, data.source, new Vector4(1, 1, 0, 0), 0.0f, false);
    });
}
using (var builder = renderGraph.AddRasterRenderPass<PassData>("Custom Overlay Render Pass - Blit Overlay", out var passData))
{
passData.material = passMaterial;
builder.SetRenderAttachment(activeCameraColor, 0, AccessFlags.Write);
passData.source = copiedColor;
builder.UseTexture(passData.source, AccessFlags.Read);
// Import the overlay texture that will be copied onto the camera color, and set it as an input
passData.overlayTexture = renderGraph.ImportTexture(overlayTextureHandle);
builder.UseTexture(passData.overlayTexture, AccessFlags.Read);
// If post-processing is enabled on the main camera, apply the tonemapping to the overlay texture as well
// If post processing is disabled, the HDR color conversion will be applied after this render pass and the expected colorspace for the cameras output is the default Rec709
if (postProcessingData.gradingMode == ColorGradingMode.HighDynamicRange && cameraData.postProcessEnabled)
{
// Import the internal color LUT texture used for HDR color grading and tonemapping
// This includes any HDR color conversion URP needs for the display, so the output of the camera is in the display's color gamut
passData.internalLut = resourceData.internalColorLut;
builder.UseTexture(passData.internalLut, AccessFlags.Read);
// Pass LUT parameters to the shader
int lutHeight = postProcessingData.lutSize;
int lutWidth = lutHeight * lutHeight;
float postExposure = 1.0f;
ColorAdjustments colorAdjustments = VolumeManager.instance.stack.GetComponent<ColorAdjustments>();
if (colorAdjustments != null)
{
postExposure = Mathf.Pow(2.0f, colorAdjustments.postExposure.value);
}
passData.lutParams = new Vector4(1f / lutWidth, 1f / lutHeight, lutHeight - 1f, postExposure);
}
builder.SetRenderFunc((PassData data, RasterGraphContext context) =>
{
// Pass parameters to the shader
data.material.SetTexture("_OverlayTexture", data.overlayTexture);
// Set a keyword on the shader to enable tonemapping
bool tonemappingActive = data.internalLut.IsValid();
CoreUtils.SetKeyword(data.material, "TONEMAPPING", tonemappingActive);
if (tonemappingActive)
{
data.material.SetTexture("_InternalLut", data.internalLut);
data.material.SetVector("_InternalLut_Params", data.lutParams);
}
// Blit the overlay texture onto the camera color
Blitter.BlitTexture(context.cmd, data.source, new Vector4(1, 1, 0, 0), data.material, 0);
});
}
}
}
自定义覆盖可编程渲染器功能代码
以下是示例中可编程渲染器功能的完整代码示例。
using UnityEngine;
using UnityEngine.Rendering;
using UnityEngine.Rendering.Universal;
public class CustomOverlayRendererFeature : ScriptableRendererFeature
{
public Shader hdrShader;
public RenderTexture passOverlayTexture;
Material passMaterial;
CustomOverlayRenderPass overlayRenderPass = null;
public override void AddRenderPasses(ScriptableRenderer renderer, ref RenderingData renderingData)
{
// Render the overlay onto the main camera during Game view rendering only, for the last camera in the camera stack
if (renderingData.cameraData.cameraType != CameraType.Game || !renderingData.cameraData.resolveFinalTarget)
return;
// Pass the overlay texture at runtime in case it changes
overlayRenderPass.Setup(passOverlayTexture);
// Enqueue the render pass to be executed
renderer.EnqueuePass(overlayRenderPass);
}
public override void Create()
{
// Create a blit material from the given shader
passMaterial = CoreUtils.CreateEngineMaterial(hdrShader);
// Create the render pass
overlayRenderPass = new CustomOverlayRenderPass(passMaterial);
}
protected override void Dispose(bool disposing)
{
// Destroy the render pass resources
CoreUtils.Destroy(passMaterial);
overlayRenderPass.Dispose();
}
}
自定义覆盖着色器代码
以下是示例中着色器的完整代码示例。
Shader "Custom/CustomOverlayBlit"
{
    SubShader
    {
        Tags{ "RenderPipeline" = "UniversalPipeline" }

        Pass
        {
            ZWrite Off ZTest Always Blend Off Cull Off

            HLSLPROGRAM
                #pragma target 2.0
                #pragma editor_sync_compilation
                #pragma vertex Vert
                #pragma fragment Frag
                #pragma multi_compile_local_fragment _ TONEMAPPING

                #include "Packages/com.unity.render-pipelines.universal/ShaderLibrary/Core.hlsl"
                #include "Packages/com.unity.render-pipelines.core/Runtime/Utilities/Blit.hlsl"
                #include "Packages/com.unity.render-pipelines.core/ShaderLibrary/Color.hlsl"

                TEXTURE2D(_InternalLut);
                TEXTURE2D_X(_OverlayTexture);

                float4 _InternalLut_Params;

                #define LutParams _InternalLut_Params.xyz
                #define PostExposure _InternalLut_Params.w

                half3 ApplyTonemapping(half3 input, TEXTURE2D_PARAM(lutTex, lutSampler), float3 lutParams, float exposure)
                {
                    input *= exposure;
                    float3 inputLutSpace = saturate(LinearToLogC(input)); // LUT space is in LogC
                    return ApplyLut2D(TEXTURE2D_ARGS(lutTex, lutSampler), inputLutSpace, lutParams);
                }

                half4 Frag(Varyings input) : SV_Target
                {
                    // Get the original camera color
                    half4 color = FragBlit(input, sampler_LinearClamp);

                    // Get the overlay color
                    half4 overlay = SAMPLE_TEXTURE2D_X(_OverlayTexture, sampler_LinearClamp, input.texcoord);

                    // Tonemap the overlay
                    #if TONEMAPPING
                    overlay.rgb = ApplyTonemapping(overlay.rgb, TEXTURE2D_ARGS(_InternalLut, sampler_LinearClamp), LutParams, PostExposure);
                    #endif

                    // Blend overlay and color
                    color.rgb = color.rgb * (1.0 - overlay.a) + overlay.rgb * overlay.a;
                    return color;
                }

            ENDHLSL
        }
    }
}