- Unity User Manual (2020.2 beta)
- パッケージ
- Unity の Package Manager
- Package Manager ウィンドウ
- パッケージの追加と削除
- Asset Store パッケージのインポート
Asset Store パッケージのインポート
Package Manager ウィンドウで Asset Store パッケージをインポートできます。
Package Manager ウィンドウを開きます。
-
パッケージスコープのドロップダウンから My アセットを選択します 。

スコープを My Assets に切り替えます。 リストビューには、購入したすべての Asset Store パッケージが表示されます。
If a large number of Asset Store packages appear in the My Assets list, you can search for a specific Asset Store package by name or version number.
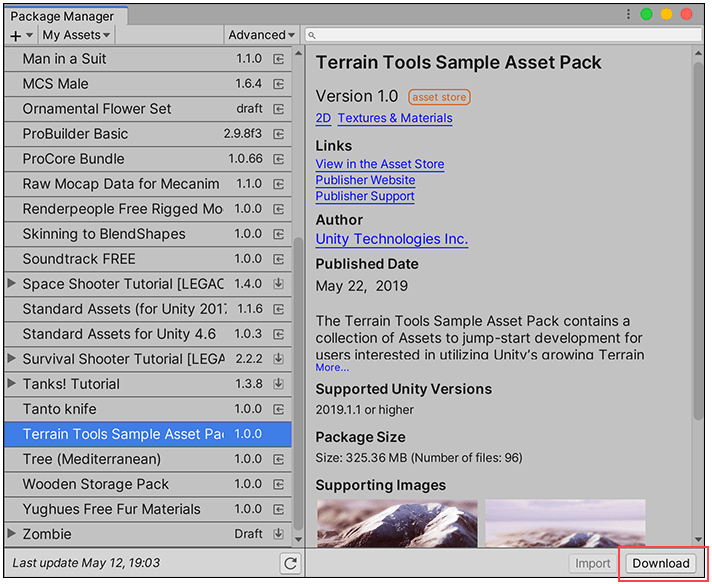
Select the Asset Store package you want to import from the list of packages. The Asset Store package information appears in the details view.
-
Click the Download button if it’s enabled. If you haven’t downloaded the Asset Store package to this computer or device before, the Import button is disabled, and you need to download the Asset Store package first.

詳細ビューの右下にある Download ボタン While the Asset Store package downloads to your computer, a progress bar appears beside the Import button. A Cancel button replaces the Download button you clicked.

ダウンロード中のプログレスバー ダウンロードが完了すると、Import ボタンが有効になり、 Download ボタンが無効になります。
-
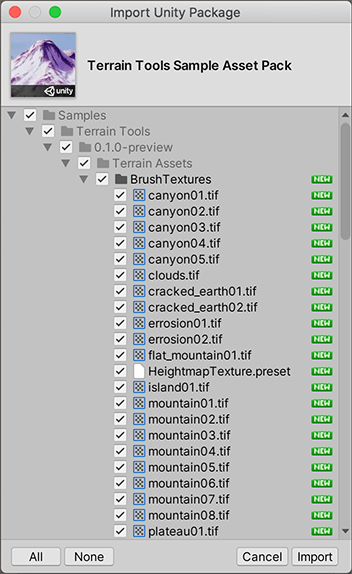
Click the Import button to import the selected Asset Store package.
Import Unity Package ウィンドウに、 パッケージですでに選択され、インストールの準備ができているすべての項目が表示されます。

Import Unity Package ダイアログボックスの新規インストール項目 -
インポートしない項目を選択解除し、Import をクリックします。
Unity はインポートした Asset Store パッケージのコンテンツを
Assetsフォルダーに保存します。そのため、Project ウィンドウからアクセスできるようになります。
- My Assets フィルターは Unity 2019.3 で追加NewIn20193