LOD Tool
To create levels of detail (LODs) for your assets after import, use the LOD Tool. Automate LOD workflows in your Unity project as with the Rule Engine.
An LOD is an optimized version of a mesh that is rendered at a specific distance, for performance optimization purposes. The further the viewer is from the model, the less details need to be rendered.
The LOD process is the main element that is used by the LOD Tool.
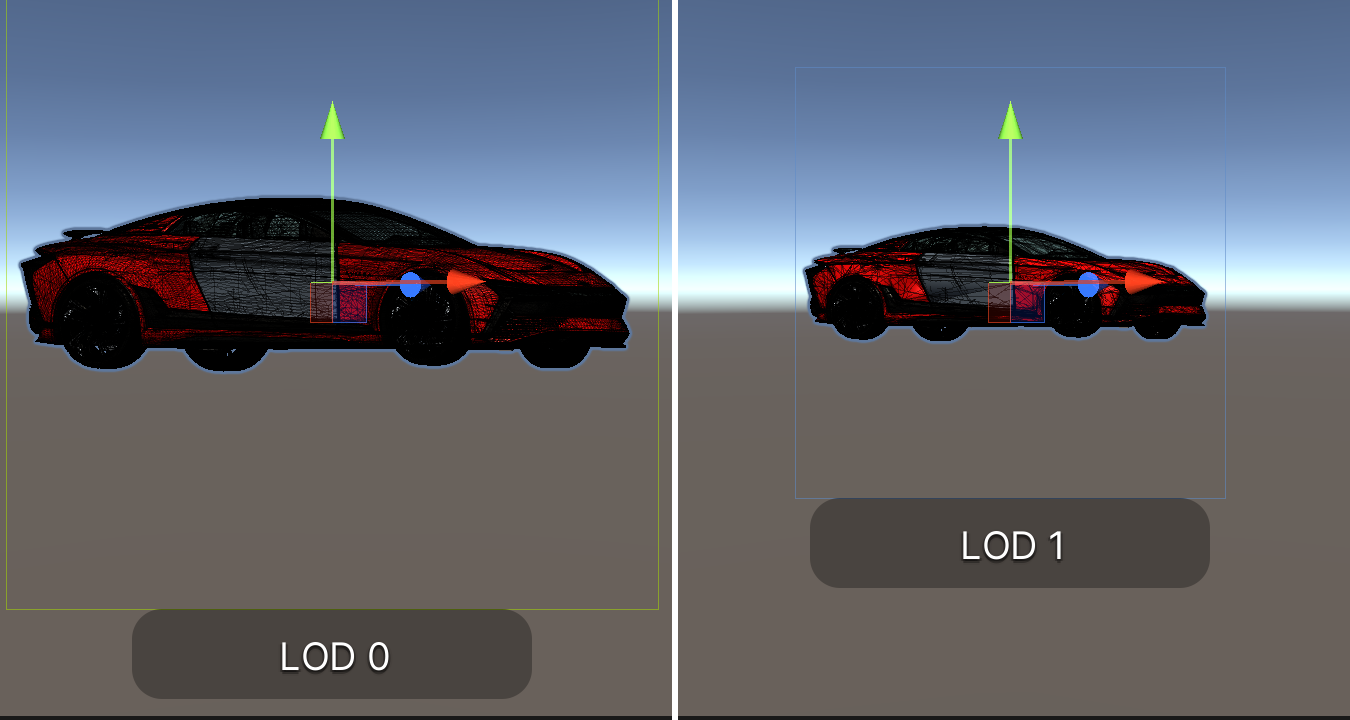
This example illustrates how you can use decimation for LODs, to optimize performance while preserving visual quality:
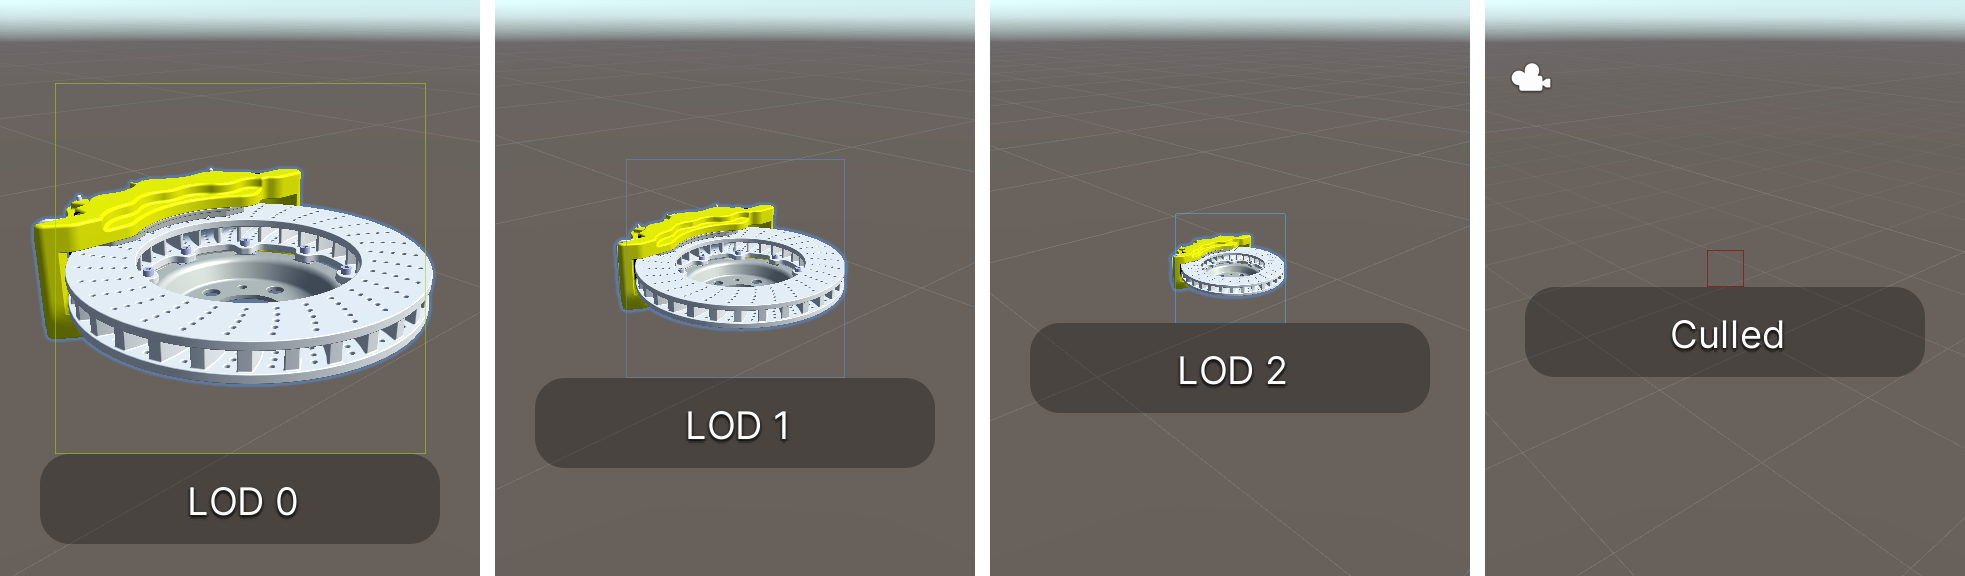
This model has three LODs:
| LOD | Decimation | Triangles | Scale at which the LOD is used |
|---|---|---|---|
| LOD 0 | None | 99.688 | Down to 60% of its original size |
| LOD 1 | 66% | 60.402 | From 59% to 30% of its original size |
| LOD 2 | 33% | 30.200 | From 29% to 10% of its original size |
The model isn't rendered below 10% of its original size.
Generate LODs
To generate LODs, follow these steps:
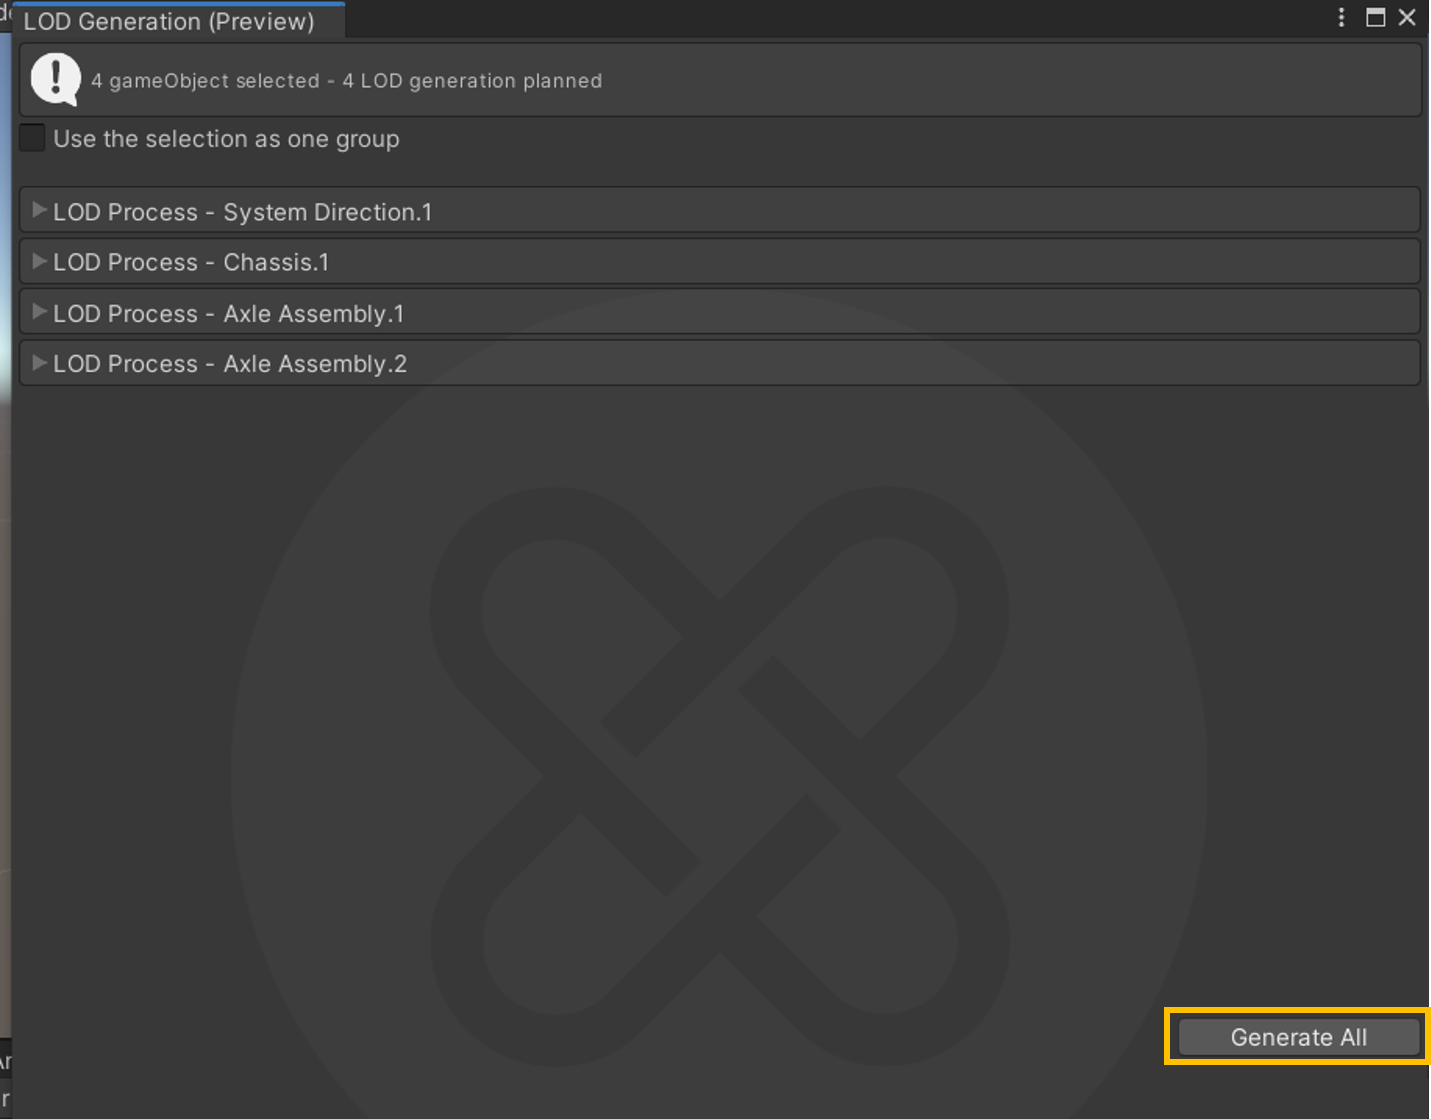
From the Pixyz menu, choose LOD > LOD Generation (Preview).
The LOD Tool includes a built-in LOD process, but you can select a custom LOD process.
From the Hierarchy pane, select GameObjects.
To process several GameObjects simultaneously, select Use the selection as one group in the LOD Generation (Preview) window.
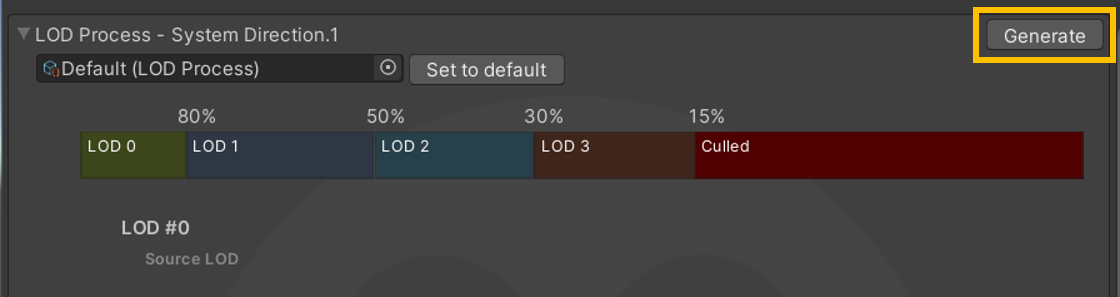
To display the details of the LOD process, expand it.
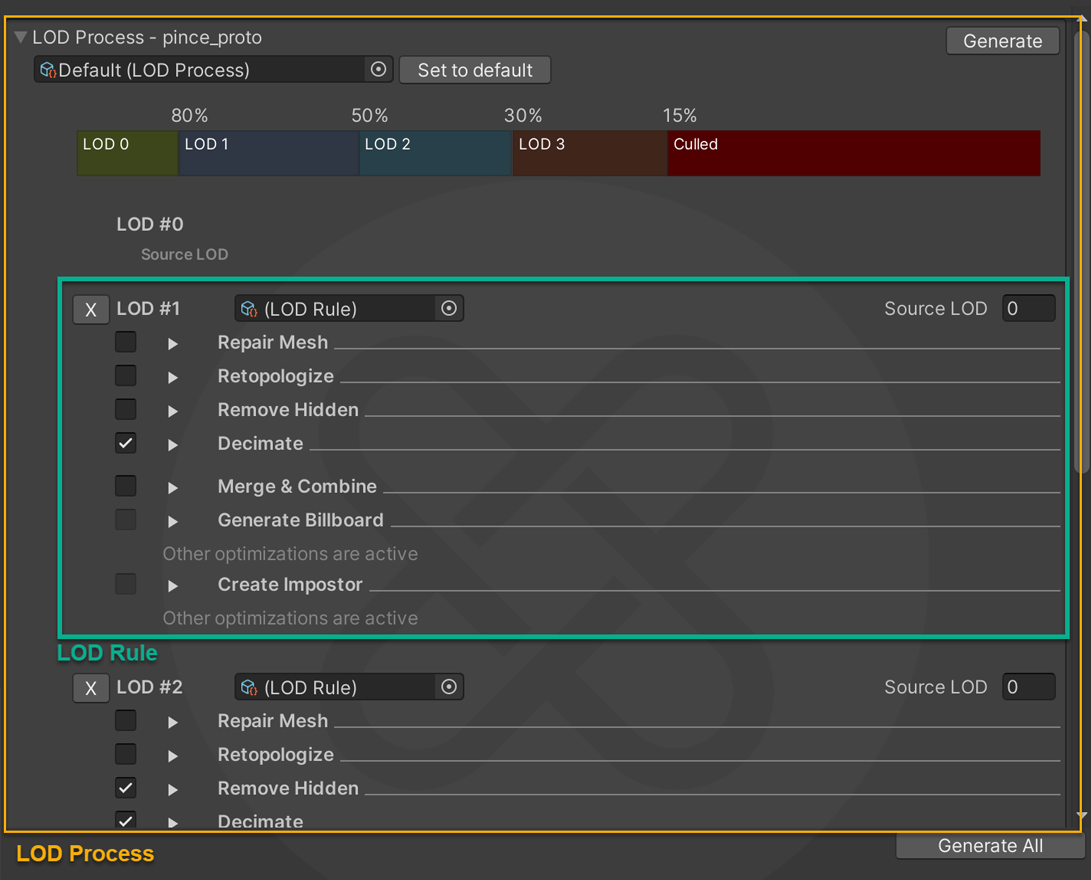
The built-in LOD process comprises three LODs before culling.
Select Generate. Alternatively, to run multiple LOD processes at once, select Generate All.
Automate LOD workflows
To automate LOD workflows, create custom LOD processes that you can reuse in your project. LOD processes can include built-in LOD rules and custom LOD rules.
Create an LOD process
To create an LOD process, follow these steps:
From the Pixyz menu, choose LOD > Create New LODProcess.
To add an LOD and apply a processing rule to it, select an LOD rule in the Add custom rule field. Alternatively, drag and drop it to this field.
To adjust the threshold percentage for each transition between two LODs, use the LOD banner.

The first LOD is LOD 0 and isn't optimized. All other LODs are optimized based on LOD 0.
When the camera moves forward or backward, it switches to the next LOD at the specified threshold percentage. For example, for a threshold percentage of 71, the camera switches to the next LOD when the GameObject is displayed at 71% of its original size.
Culling represents the state where the GameObject is so far that it isn't displayed.

Create a processing rule for an LOD
To create a processing rule for an LOD, follow these steps:
From the Pixyz menu, choose LOD > Create New LODRule.
Choose the algorithms and set the parameters as with the Toolbox:
For example, you can adjust the decimation ratio for each LOD. This value is the quality percentage of the LOD compared to LOD 0. For example, to achieve a quality of 80% compared to LOD 0, specify
80. To skip decimation, specify80.
After you have created LOD rules, add them to your LOD processes.
Additional resources
- Levels of detail (Unity documentation)
- LOD Group component (Unity documentation)