Get started
To help you get started with Live Systems Data SDK package, this page provides steps to set up a sample end-to-end project. This page isn't a tutorial, but instead helps you set up required settings you can later use to build more complex projects.
This sample project implements a basic scenario in which a single simulated device produces telemetry data, which is processed by Live Systems Data services and delivered to a client that’s built in Unity. The facility simulator instance that generates the telemetry data is already configured and hosted in the Live Systems Data services. The client that you configure in this sample project uses the Live Systems Data SDK package to consume the telemetry data, but has no 3D models associated or visualization. During Play mode, the Unity Editor’s Inspector window displays setting values that confirm whether you successfully completed a step.
Note: Though the Telemetry history service is in the sample, it's not currently supported or configured in this page.
This page includes resources, which you can access either during or after a step, with additional information about the systems related to each component.
To successfully set up this sample, follow these sections in order:
- Overview
- Prerequisites
- Install the Live Systems Data SDK sample
- Open the project
- Open the Environment settings
- Run the project
- Main components
- Troubleshooting
Overview
The sample project in this page implements the following components found in a typical Live Systems Data client solution:
- Environment settings: A collection of addresses and IDs used to connect the Live Systems Data client to an external data source.
- Login controller: Handles connection and behavior for the Unity Cloud Identity package, which includes retrieving user information and access tokens.
- Configuration service: Retrieves configurable data, which includes device summaries and time series plots.
- Device service: Retrieves a list of
DeviceResourceobjects and converts it to a list ofLiveDeviceobjects. TheLiveDevicelist is returned as a whole or you can request individualLiveDeviceobjects by their ID. - Notification service: Receives notifications from the Live Client.
- Facility service: Retrieves facility information from the Live Client.
Note: Although this page refers to the different components as services, they're client-side configurations for the corresponding component in the Live Systems Data services platform.
It should take you less than one hour to go through this page, after which you'll have a project that runs end-to-end and teaches you about the Live Systems Data SDK package.
Prerequisites
Before you get started, make sure you have the following:
- A Unity project with installed Live Systems Data SDK packages
- A valid Unity ID
A valid Unity Industrial Collection (UIC) license
Tip: For more information about using the UIC license, refer to the UIC onboarding guide.
- An application identifier
- A Unity Cloud scene associated with your Unity ID
Install the Live Systems Data SDK sample
To install the How To Use Services sample, follow these steps:
- In the Unity Editor, go to Window > Package Manager > Packages: In Project > Digital Twins Live SDK.
Expand the Samples section and select Import next to How To Use Services.
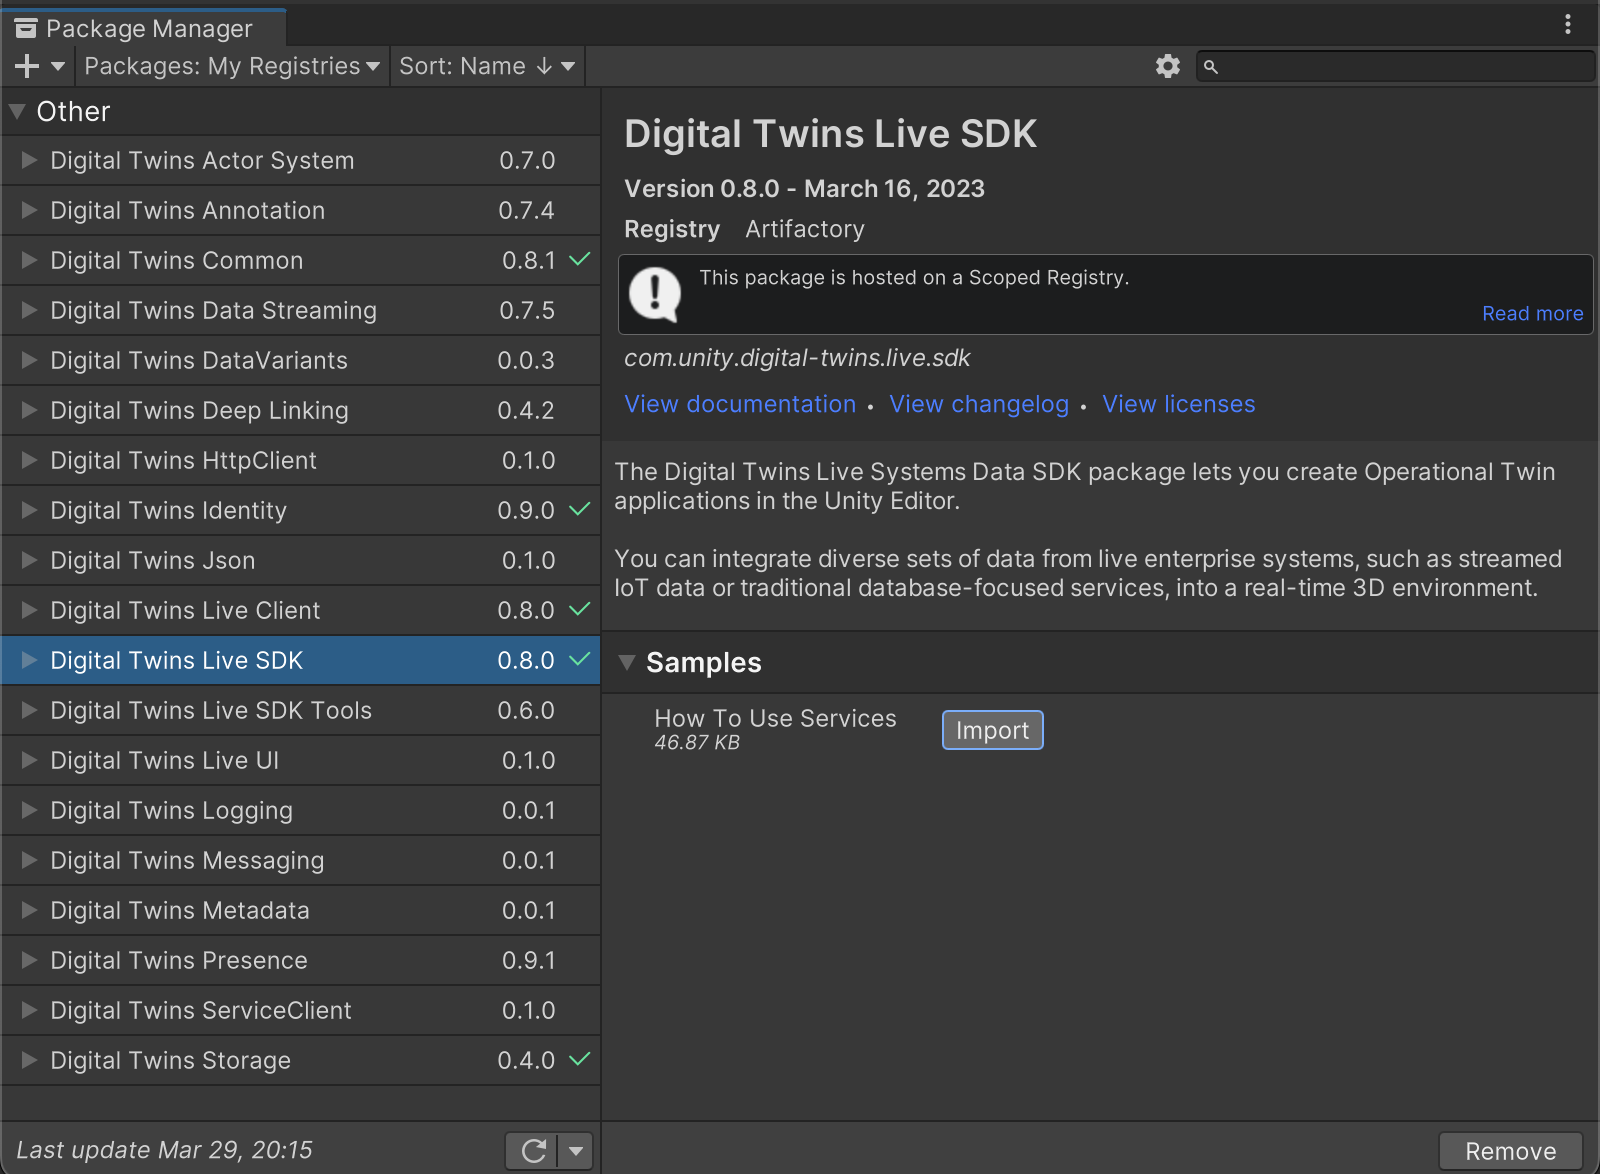
Result:
- The sample loads and compiles in the Unity Editor. No errors should appear in the Console window.
You can find the imported How To Use Services sample in your
Assets/Samples/Digital Twins Live SDK/<package-version>directory.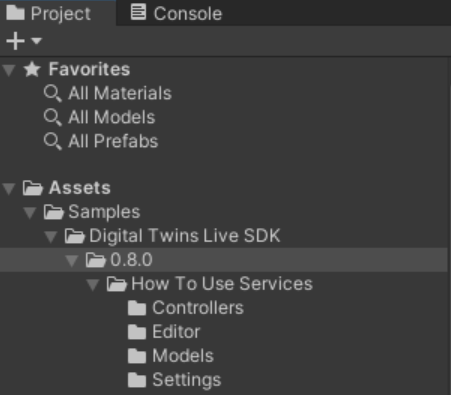
Open the project
In the Main components section, you use the sample service in the project.
Note: Though the Telemetry history service is in the sample, it's not currently supported or configured in this page.
To open the project, follow these steps:
- In the Project window, go to the
Assets/Samples/Digital Twins Live SDK/<package-version>/How To Use Services/HowToUseServices.unityfile to open the How To Use Services sample. Confirm that you have the following GameObjects in your Hierarchy window:
- Services
- Login
- Configuration
- Device
- Notification
- Facility
- DeviceGameObject
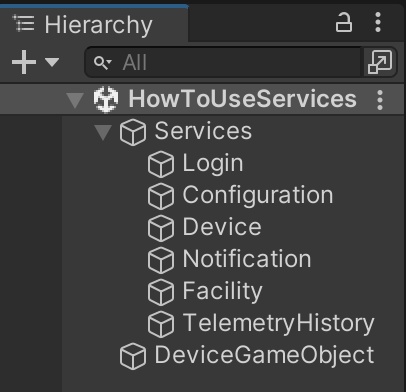
- Services
Each GameObject provides access to a specific aspect of the configuration and lets you validate whether the corresponding service is working correctly.
Open the Environment settings
To open and edit the EnvironmentSettings script, follow these steps:
- In the Project window, go to the
Assets/Samples/Digital Twins Live SDK/<package-version>/How To Use Services/Settingsfolder. - Select EnvironmentSettings to change its values in the Inspector window.
- Select the Services GameObject in the Hierarchy window.
Result: The Inspector window displays the ServicesController for your GameObject, which has links to default objects for your Environment Settings.
Run the project
Most of the main components require access to the Inspector window in the Unity Editor, so use this sample project only in Play mode.
To run the project in Play mode, follow these steps:
- Select Play in your Unity project.
- Make sure that the scene is running and that you have successfully logged in. Keep the project in Play mode while you use the Main components.
Result:
- A browser window launches that prompts you to log in with your Unity ID account. After you successfully login, you're requested to return to the running project and you can dismiss the prompt.
The Game view display includes the
No cameras renderingmessage, but is otherwise blank because there are no cameras in the project.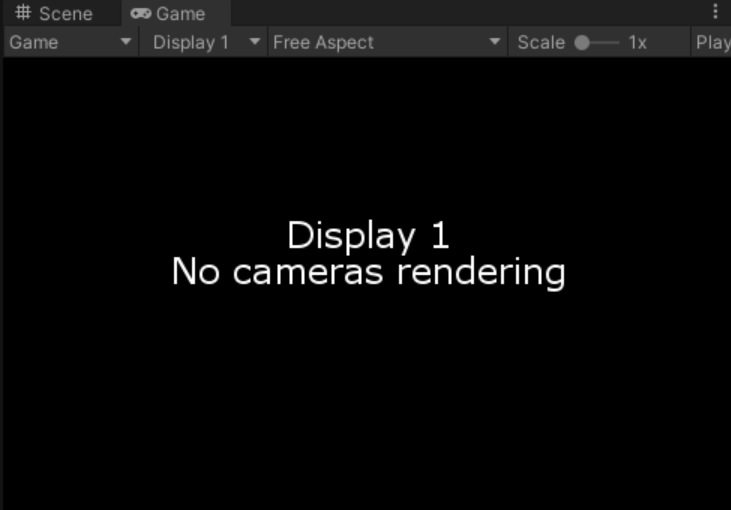
Main components
The sample project is configured to connect to the Live Systems Data service and consume the telemetry that the Facilities Simulator instance produces. This section outlines where to set these configurations in the project and how to confirm that they’re working correctly.
Though this page isn't a coding tutorial, you can find more information about the scripts and sample code in Take it further.
Login controller
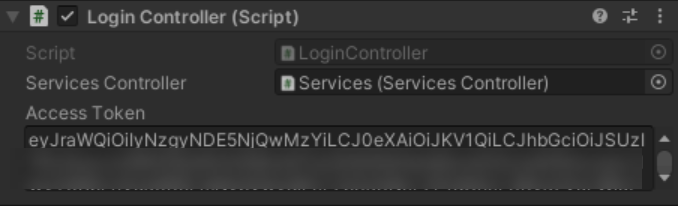
Once the project is running, the login controller holds the access token that authenticates the user with the Live System Data services.
To check the login controller information, go to HowToUseServices > Services > Login in the Hierarchy window.
Result: The Inspector window displays the access token information associated with the current login session (refer to the following screenshot).
Note: To access the LoginController script, go to the Assets/Samples/Digital Twins Live SDK/<package-version>/How To Use Services/Controllers folder.
Configuration service
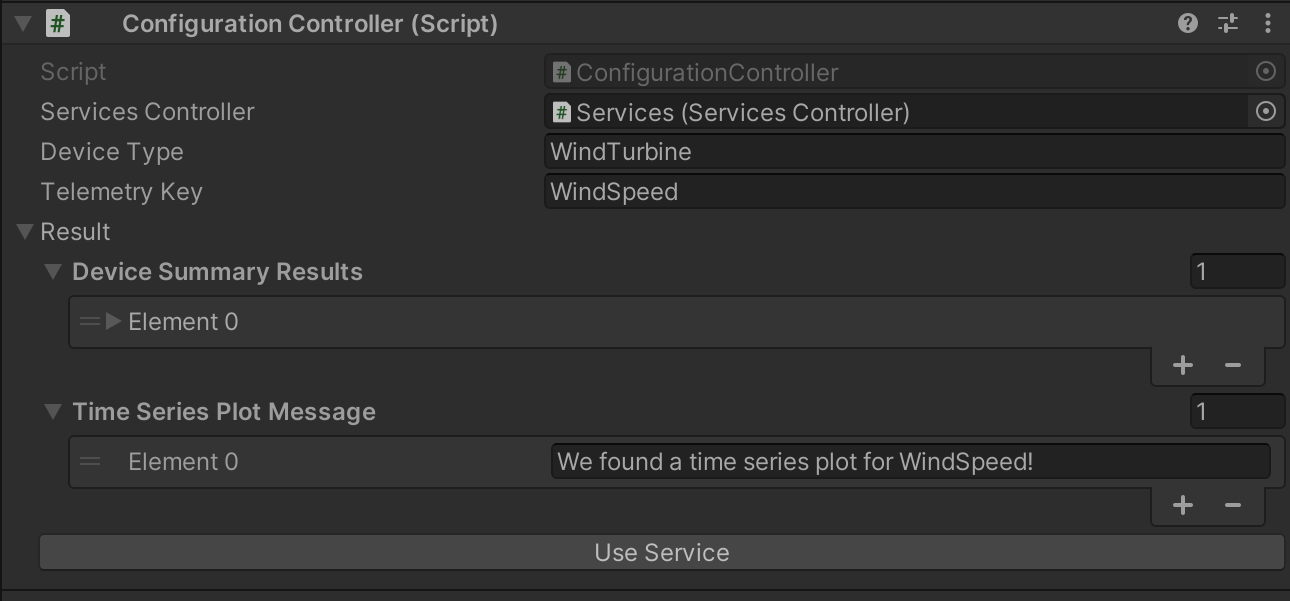
To use the configuration service, follow these steps:
- Go to HowToUseServices > Services > Configuration in the Hierarchy window.
- Select Use Service in the Inspector window. If your Device Type and Telemetry Key have valid parameters, your Result field is populated.
Result: The Result field displays the retrieved Device Summary Results and the Time Series Plot Message. You might need to expand the Result field to check the list of results (refer to the following screenshot).
Note: To access the ConfigurationController script, go to the Assets/Samples/Digital Twins Live SDK/<package-version>/How To Use Services/Controllers folder.
Device service
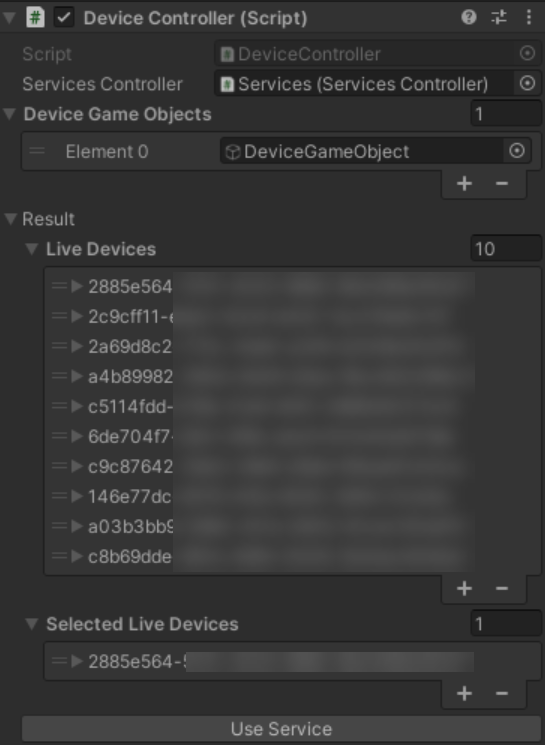
To use the device service, follow these steps:
- Go to HowToUseServices > Services > Device in the Hierarchy window.
- Select Use Service in the Inspector window.
Result:
The Result field displays the retrieved Live Devices and the Selected Live Devices. You might need to expand the Result field to check the list of results (refer to the following screenshot).
The first
LiveDeviceyou retrieve is associated with a GameObject in the scene that represents the device's 3D model, which you can access by expanding the first Live Device entry in the Result field (refer to the following screenshot for an example).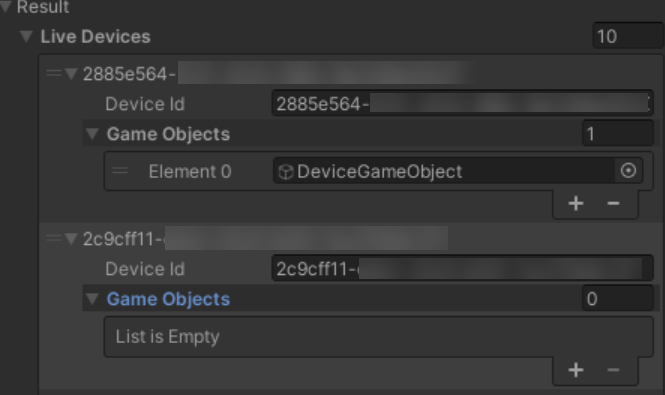
Note: To access the DeviceController script, go to the Assets/Samples/Digital Twins Live SDK/<package-version>/How To Use Services/Controllers folder.
Notification service
To use the notification service, follow these steps:
- Go to HowToUseServices > Services > Notification in the Hierarchy window.
- Select Use Service in the Inspector window.
Result:
The Result field displays the complete
NotificationServiceResult. You might need to expand the Result field to check the list of results (refer to the following screenshot).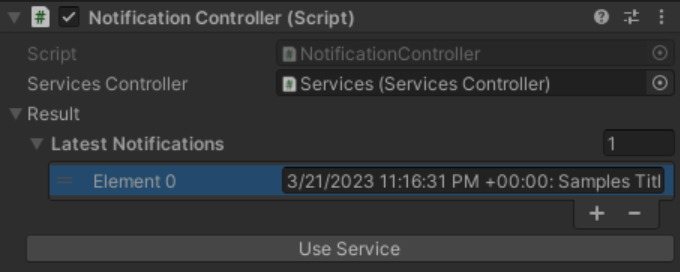
The Facility Simulator constantly generates notifications for this sample project. If you select Use Service multiple times, more events load and appear in the list (refer to the following screenshot for an example). The results aren't ordered based on any specific criteria. Use the handle (=) to sort the Latest Notifications.
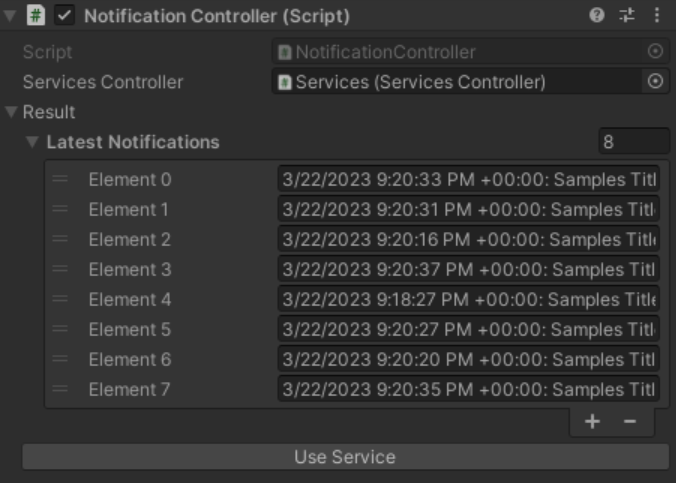
Note: To access the NotificationController script, go to the Assets/Samples/Digital Twins Live SDK/<package-version>/How To Use Services/Controllers folder.
Facility service
To use the facility service, follow these steps:
- Go to HowToUseServices > Services > Facility in the Hierarchy window.
- Select Use Service in the Inspector window.
Result: The Result field displays the complete FacilityServiceResult. You might need to expand the Result field to check the list of results (refer to the following screenshot).

Note: To access the FacilityController script, go to the Assets/Samples/Digital Twins Live SDK/<package-version>/How To Use Services/Controllers folder.
Troubleshooting
Nothing is rendering in the scene
This sample scene doesn't have cameras or UI. Instead, the sample displays visual confirmation of the services through the following:
- Log outputs to the console
- Public fields in the Inspector window when you select GameObjects in the Hierarchy window that have different
Controllercomponents