Prepare a branch or twig mesh
Unlike trunk scans, branch or twig scans typically require preparation to work on a SpeedTree model. As part of that preparation, you'll need fix the pivot point and add 3D anchors where you want things to grow off the mesh.
You can create a SpeedTree model specifically for preparing the mesh and then use that model to export a new, doctored mesh. Take the following steps to prepare a branch mesh:
- Import the mesh and its textures.
- Add the mesh to the model.
- Orient and position the mesh (fix the pivot point).
- Mark the locations where branches might grow.
- Mark the locations where leaves might grow.
- Export the mesh.
If the branch or twig mesh is ready to use, refer to Ways to use a branch or twig mesh.
Import the mesh and its textures
To import a 3D scan:
- Import the mesh as a mesh asset.
- Create a material asset that uses the textures associated with the scan. Be sure to associate the mesh asset with the material.
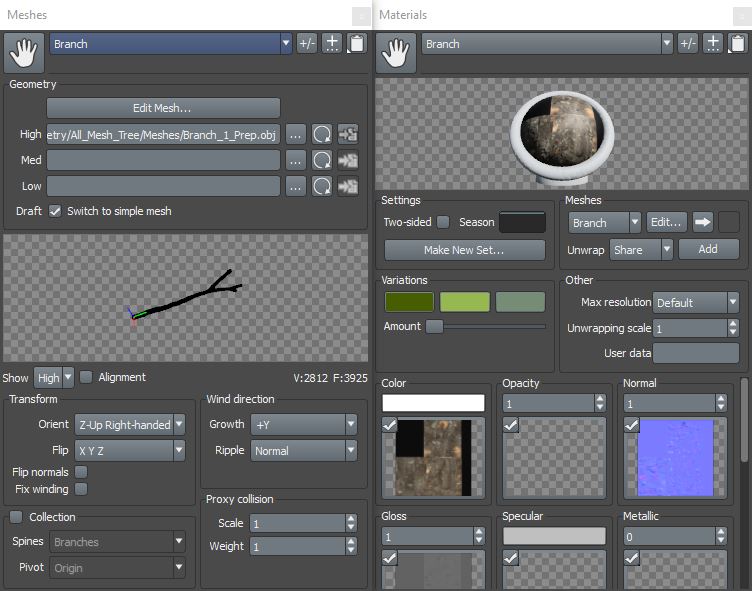
Note
Meshes must be a single model that can have a single material on it. Photogrammetry meshes are typically saved as single meshes with unwrapped UV data that correspond to a texture atlas.
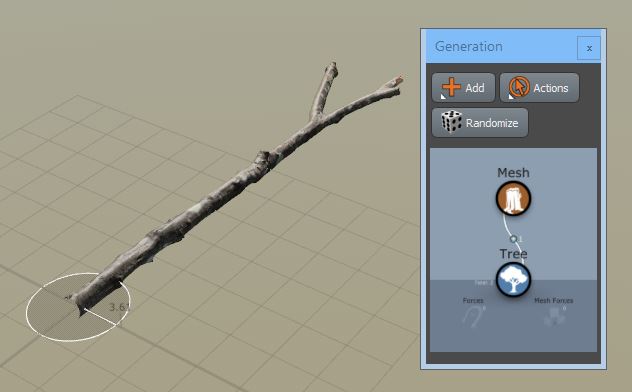
Add the mesh to the model
Once you have assets in place, use a Mesh generator to make them part of your model:
- Add a Mesh generator to the model.
- Assign the material asset to the Mesh generator. The Mesh generator will automatically pick up the mesh asset via its association with the material asset.
Orient and position the mesh (fix the pivot point)
To orient and position the mesh:
- Switch to node editing mode.
- Select the mesh in the Tree Window.
- Use the gizmo to position the mesh such that the base of the branch is located exactly on the scene origin. >[!NOTE] >The scene origin will be the pivot point when the fully prepared mesh is exported.
- Rotate the mesh such that the branch is pointing down the y-axis.
Mark the locations where branches might grow
It's now time to mark spots on the mesh where branches might grow.
- Create a blank material, name it "Branches", and set the color to orange.
- Import "Helper.fbx" from the "
/samples/Photogrammetry/All_Mesh_Tree_Example/Meshes" folder and assign it to the material. We'll use this material/mesh combo to visualize the branch anchor points. - Select the Mesh generator and add the "Place 3D Anchors" geometry template.
Assign the helper material to the Leaf mesh generator.
Note
Even though we're marking branch locations, all anchors are exported via the leaf reference system. We'll identify them as branches based on the ID assigned to them later.
In the Tree Window, hold the space bar and click on the mesh to create a new anchor point. You should see the helper mesh stuck to the branch and pointing towards the camera.
- Continue adding anchors for every point you might want a branch to grow.
Mark the locations where leaves might grow
- Create a blank material, name it "Leaves", and set the color to green.
- Assign the helper mesh asset to the new material. We'll use this material/mesh combo to visualize the leaf anchor points.
- Select the Mesh generator and add a second copy of the "Place 3D Anchors" geometry template.
- Assign the "Leaves" material to the new Leaf mesh generator.
- In the Tree Window, hold the space bar and click on the mesh to create a new set of anchor points. You should now see an orange and a green set of anchor indicators on your mesh.
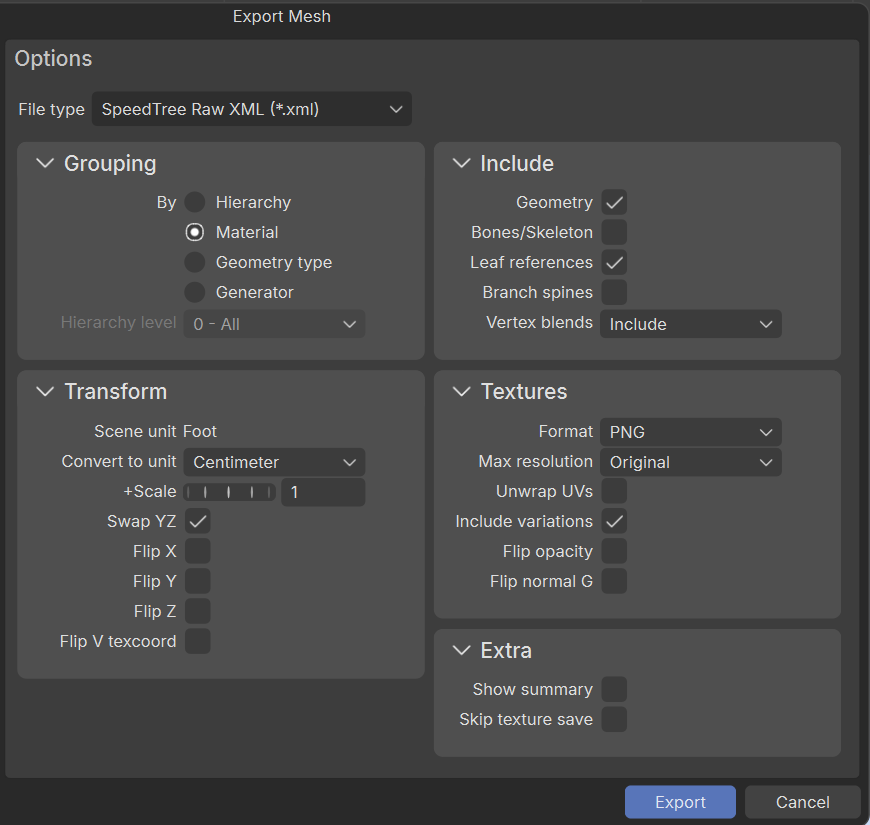
Export the mesh
- Select File > Export mesh.
- Select SpeedTree XML as the file type and then set the export options as shown below.
Note
Notice that Leaf references is selected. The helper objects will be replaced by 3D anchors in the exported mesh. These anchors will act as growth locations when the mesh is used on a model. Using the By material option means each unique material will be given an integer id you can use to distinguish branch anchors from leaf anchors.
The newly exported mesh is ready to be used to construct a more complex model. Import it into any model and you should see anchors represented as green dots in the Mesh Asset Bar.
Tip
It's a good idea to save the file you used to prepare the mesh. You may decide to delete, add, or move anchor points in the future.
Best practices
The following outlines a few things to keep in mind when using photogrammetry branch meshes.
If you're going to spawn branches off of branches, take the time and prepare it with anchors.
Choose branch meshes that are straight, at least for the first half of the mesh.
When preparing a mesh with 3D anchors, you can use Stitch generators to cut out parts you don't want.
Make sure the pivot point of the mesh is near the base and inside the branch.