Enable Rendering Layers for Decals in URP
To enable Rendering Layers for decals in your project:
In the Project window, select a Renderer asset with a Decal Renderer Feature.
In the Decal Renderer Feature, enable Use Rendering Layers.
When you enable Rendering Layers for Decals, Unity shows the Rendering Layers property on each Decal Projector.
Example
This section describes how to configure the following application example:
The scene contains a Decal Projector.
The Decal Projector projects a decal on the wall and the ground, but not on the paint bucket.
The following illustration shows the example:
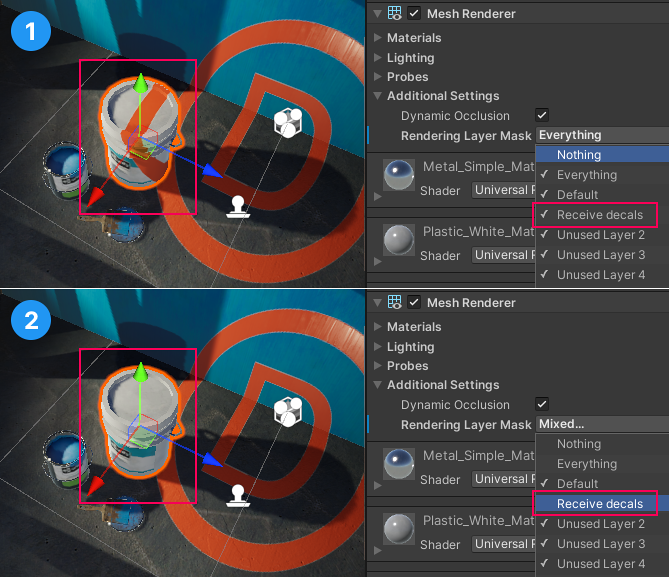
In image 1, the paint bucket has the Receive decals layer selected. In image 2 it does not, so the Decal Projector does not project on the bucket.
To implement the example:
Enable Rendering Layers for Decals in your project, as described above.
Create a Decal Projector in the scene.
Go to Project Settings > Tags and Layers. Add a Rendering Layer called
Receive decals.Select the Decal Projector. In the Rendering Layers property, select
Receive decals.Select the paint bucket GameObject. In the Rendering Layer Mask field, clear the
Receive decalslayer. Now the Decal Projector does not affect this GameObject.