Add spines to a hero mesh
Use mesh helpers to add a spine hierarchy to an imported hero mesh.
Add the mesh to your model hierarchy
Add a Mesh generator to the scene.
Assign a material with the hero mesh to the Mesh generator.
Add a main spine to the mesh
To create a spine for the main part of your mesh (for example, within a trunk):
In the Tree window, select Scene Objects > Mesh helpers > Add mesh helper.
A mesh helper appears in the Tree window.Position the start (S) and end (E) markers of the mesh helper on the section of the mesh where you want to add the spine.
The typical start-end direction should be the growing direction of the tree.In the Property bar, click Set point sequence, and in the Tree window, trace out a sequence of points along the mesh, from the start (S) marker to the end (E) marker.
In the Property bar, click Send spine, and in the Tree window, click on the mesh.
The Modeler creates a Branch generator of spine only type as a child of the Mesh generator.
Note
At this point, the mesh helper served its main purpose and you can delete it without affecting the created spine. However, you might want to keep it, either as a backup in case you need to re-generate the same spine, or as a single mesh helper that you reset and reuse to create other spines.
Add a secondary spine to a sub-part of the mesh
To create a spine for a secondary part of the same mesh (for example, within an outgrowth of the mesh like a branch):
Make sure you first added a main spine to the mesh, as described in the previous section.
Create and position a mesh helper on the secondary part of the mesh that you target, and use Set point sequence to add points along the mesh.
Click Send spine, and then select the main spine that you created earlier, instead of the mesh itself.
The Modeler creates a Branch generator of spine only type as a child of the previously created main spine.
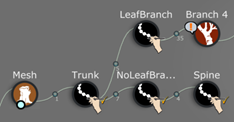
Complete the spine hierarchy of the mesh
To get a full hierarchy of spines for the mesh, you can create multiple independent generators, add multiple spines as additional nodes of an existing generator, or use a mix of both. It depends on the way you need to later manage the behavior and properties of the created procedural spines: separately or grouped.
Note
Once you create multiple spines, give them appropriate names in the Generation Editor to be able to identify them well during your design.
Add a subsequent spine as a generator
This action provides the same result as the creation of a first secondary spine, but here you have to specify where to exactly send the spine to.
To add a subsequent spine as its own generator in the spine hierarchy of the mesh:
Create a mesh helper, position it, and add points along the mesh, then start the action to send the spine to a parent spine.
When you select an existing spine to send the new spine to, choose New Generator.
Add a subsequent spine as a node in a generator
To add a spine as a node in an existing generator:
Create a mesh helper, position it, and add points along the mesh, then start the action to send the spine to a parent spine.
When you select an existing spine to send the new spine to, choose the name of the generator you want to add the spine to as a node.
Outcome and applications
When you're done, the Mesh generator has a child hierarchy that includes Branch generators of spine only type, some of which may include multiple nodes that you added manually.
These spine-only Branch generators are capable of being the source of new generators and wind animation.