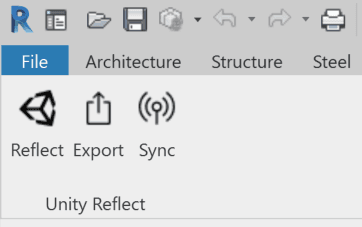
Publishing to Reflect from Revit
Unity Reflect is compatible with the following versions of Autodesk Revit:
*Autodesk no longer maintains or updates this version.
Installation
To install the plug-in, run the Reflect installer and select your version or versions of Revit.
Syncing with Reflect
Once the Revit plug-in is installed on your computer, you can start the Reflect service from inside Revit to begin real-time syncing.
Open Revit. If prompted to grant permissions to the plug-in, select Load Once (or Always Load to avoid future prompts).
Open the Revit project you want to sync and select the Unity Reflect tab.
Select a 3D view to publish with Reflect. You can select a view from the project browser or select the default Revit 3D view.
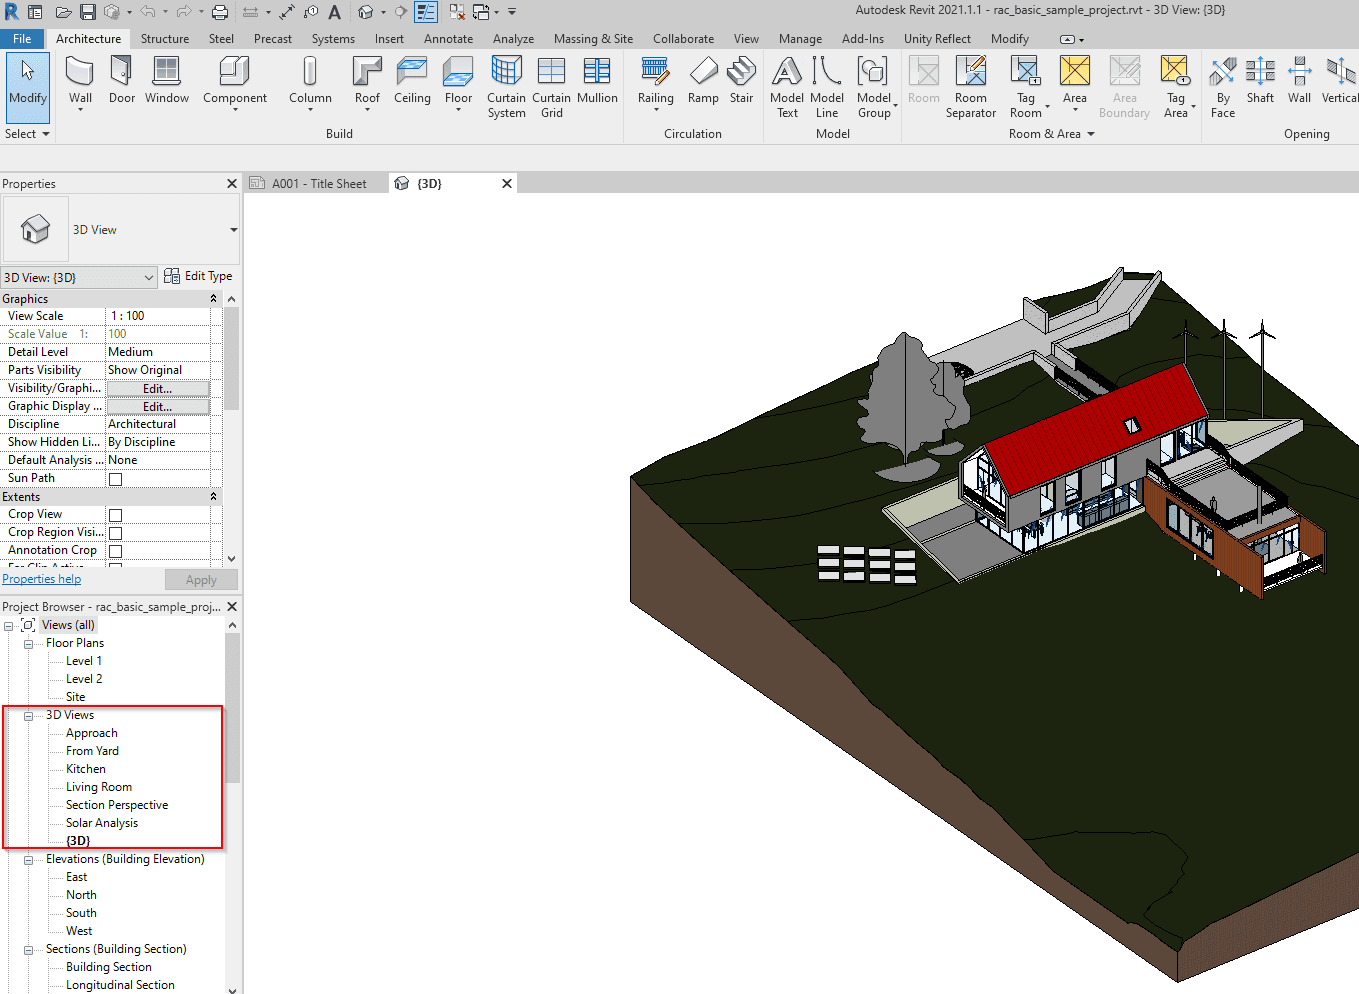
Selecting a view in the project browser
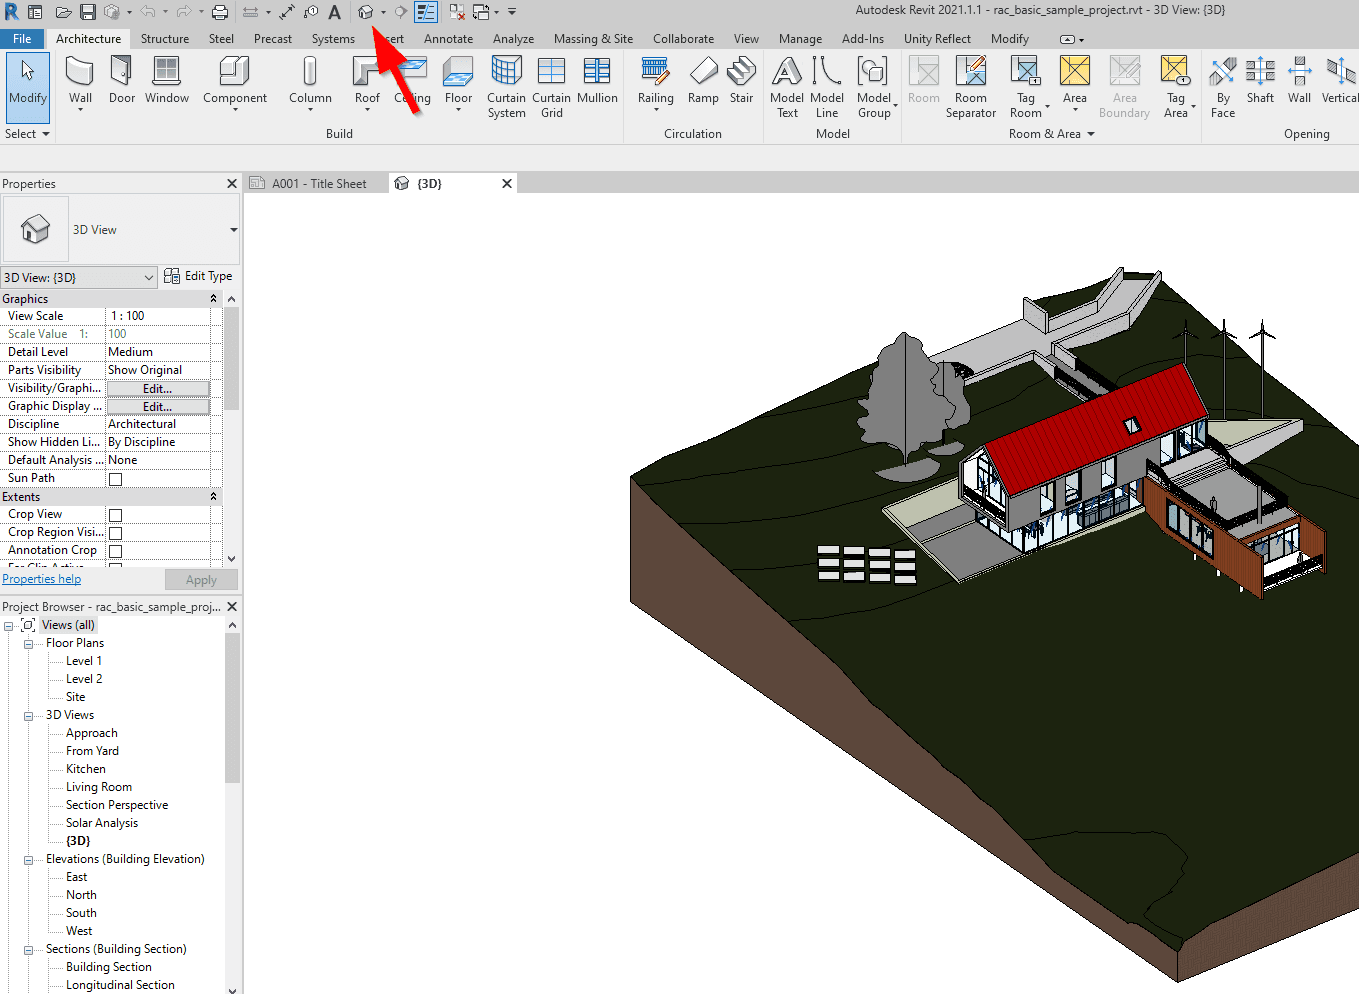
Selecting the default view
Click Sync to enable real-time syncing with Reflect.
Exporting to Reflect
Open Revit. If prompted to grant permissions to the plug-in, select Load Once (or Always Load to avoid future prompts).
Open the Revit project you want to export and select the Unity Reflect tab.
Select a 3D view to publish to Reflect. You can select a view from the project browser or select the default Revit 3D view.
Selecting a view in the project browser
- Click Export View to export your view to Reflect.