- Unity User Manual (2019.1)
- 2D
- スプライト
- Sprite Shape Renderer
Sprite Shape Renderer
The Sprite Shape Renderer component renders the geometry that Unity generates along a Spline and controls how it visually appears in a Scene for both 2D and 3D projects. Its inputs are derived from the Sprite Shape Profile.
プロパティー

| プロパティー | 機能 |
|---|---|
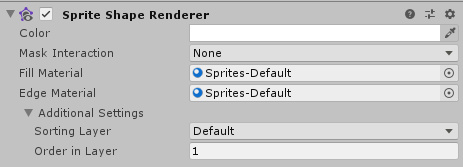
| Color | Define the vertex color of the Sprite Shape geometry, which tints or recolors the Sprite Shape. Use the color picker to set the vertex. See the Color section below this table for examples. |
| Mask Interaction | Set how the Sprite Renderer behaves when it interacts with a Sprite Mask . See examples of the different options in the Mask Interaction section below. |
| None | The Sprite Shape Renderer does not interact with any Sprite Masks in the Scene. This is the default option. |
| Visible Inside Mask | The Sprite Shape is visible where the Sprite Mask overlays it, but not outside of it. |
| Visible Outside Mask | The Sprite Shape is visible outside of the Sprite Mask, but not inside it. The Sprite Mask hides the sections of the Sprite Shape it overlays. |
| Sorting Layer | Set the Sorting Layer of the Sprite Shape geometry, which controls its priority during rendering. Select an existing Sorting Layer from the drop-down box, or create a new Sorting Layer. |
| Order In Layer | Set the render priority of the Sprite Shape within its Sorting Layer. Lower numbered Sprite Shapes are rendered first, with higher numbered Sprite Shapes overlapping those below. |
詳細
色
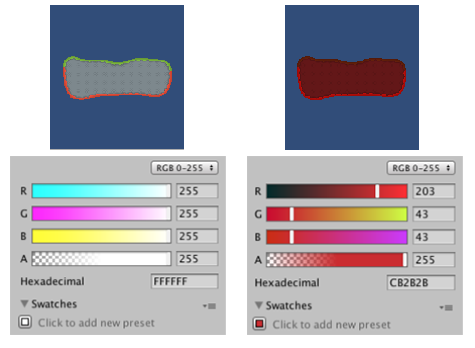
The examples below show what happens when you change the RGB values on the Sprite Shape Renderer’s Color setting. To change a Sprite Shape’s opacity, change the value of the Alpha (A) channel, where lower values make the Sprite appear more transparent and higher values make the Sprite appear more opaque.

Fill Material and Edge Material
Use a Material’s Material and Shader settings to control how Unity renders Fill and Edge geometries. The default Material for a new Sprite Shape is ‘Sprites - Default’. Scene lighting does not affect this default Sprite Shape. To make the Sprite react to lighting, assign the Material ‘Default - Diffuse’ instead. To do this, click the small circle next to the Material field to bring up the Object Picker window, and select the ‘Default-Diffuse’ Material. Refer to Materials, Shaders & Textures for more information on these settings.
Mask Interaction
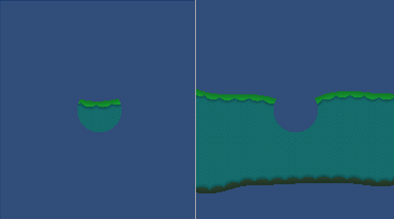
Mask Interaction controls how the Sprite Shape Renderer interacts with Sprite Masks. Select either Visible Inside Mask or Visible Outside Mask from the Mask Interaction drop-down menu. The examples below show the effect of either option:
