Warning
Warning: Unity Simulation is deprecated as of December 2023, and is no longer available.
Installing the Linux Headless build target for Simulation
Requirements
Note
We support and recommend using the latest 2021.3.x LTS versions found here
We broadly support these version ranges: LTS 2022.3.x (all) LTS 2021.3.x (all) LTS 2020.3.x (all)
- Log into your Unity account in Unity Hub.
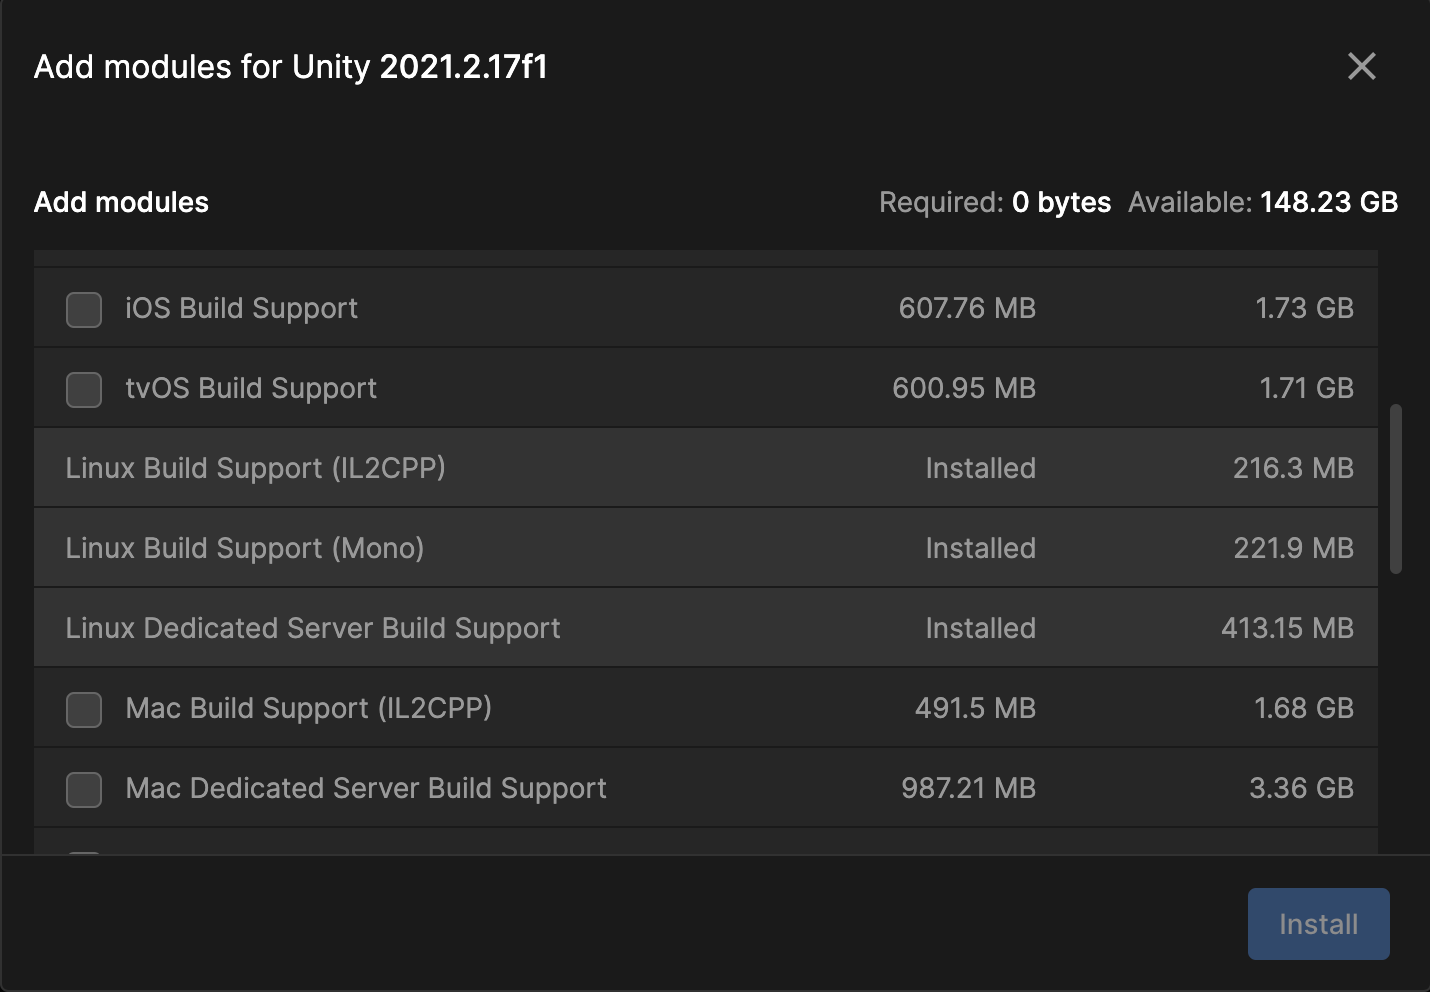
- Confirm that Linux Build Support modules are installed for your project's Unity version.
> If it's not installed, you can install it in Unity Hub by selecting
Installs > Click on settings icon for the Unity version you want to install for > Add Modules > Select Linux Build Support (IL2CPP, Mono) and Linux Server Build Support > Install Ensure you have access to and have installed the Installer module, per the instructions here
Note
If you're not added to our allow-list, please reach out to
unitysimulationpro@unity3d.comto request access to the package.
Linux Headless Simulation(LHS) is supported on Ubuntu 20.04 and 18.04, as the runtime OS.
More details can be found here, for more basic system requirements:
- Unity 2022.3.x versions
- Unity 2021.3.x versions
The links refer to the 'desktop' versions here mainly because they have the GPU support that would be needed for LHS builds, even though we are running it headless like a server. Linux Headless Simulation also uses the Vulkan graphics API. A Vulkan compatible GPU and graphics drivers must be installed. OpenGL support has not been scoped yet. For more information visit this site.
Linux Headless Simulation requires the Unity Simulation Capture package to enable rendering. This package can be installed in a project using the Unity Package Manager:
- Open
Window->Package Manager - In the Package Manager window find and click the + button in the upper lefthand corner of the window
- Select
Add package by name... - Enter
com.unity.simulation.captureand clickAdd
Note
This section covers only steps required to build the project for the LHS target, for regular Linux builds, please refer here.
Steps to install Linux Headless Simulation
Select
Simulation>Install Componentsfrom the menu.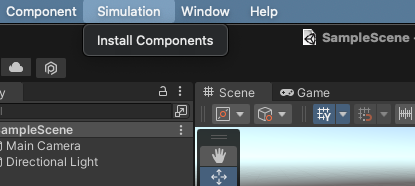
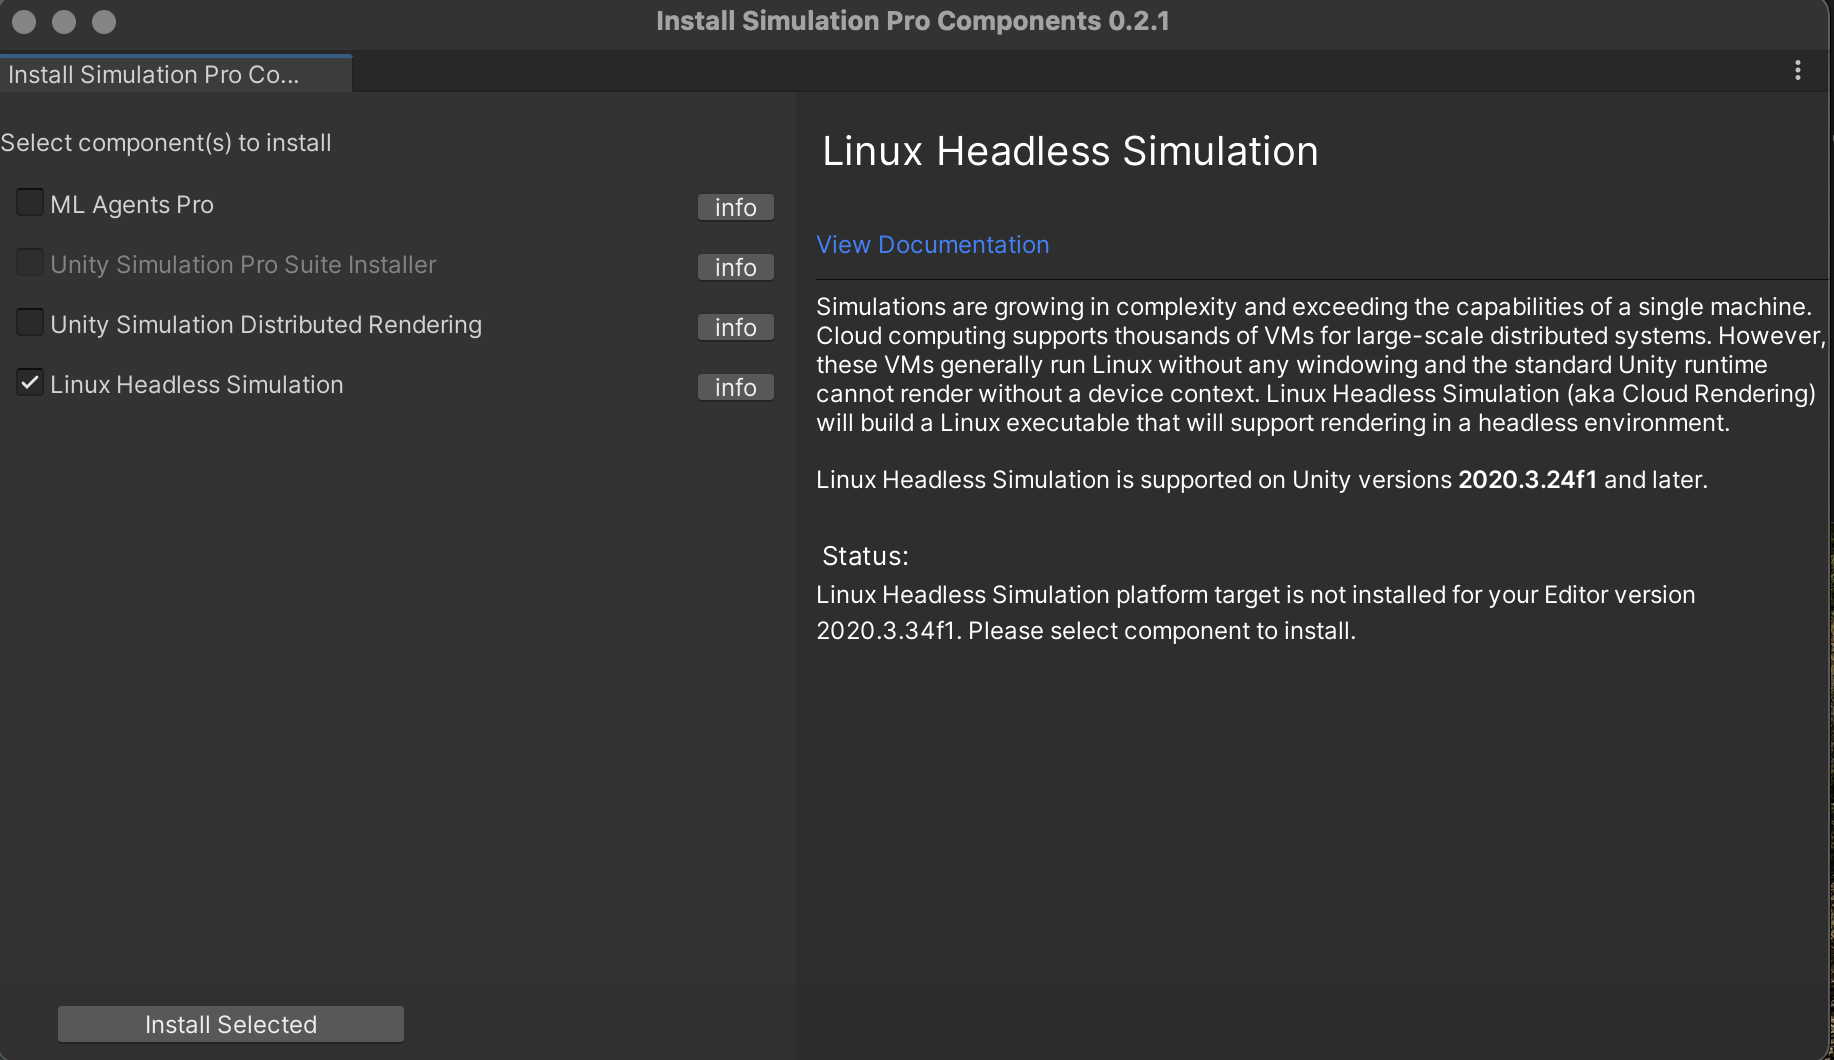
Select
Linux Headless Simulationcomponent and clickInstall SelectedNOTE: The download and installation might take a while. Please don't close the project.
After installation is finished, click
Reopen Project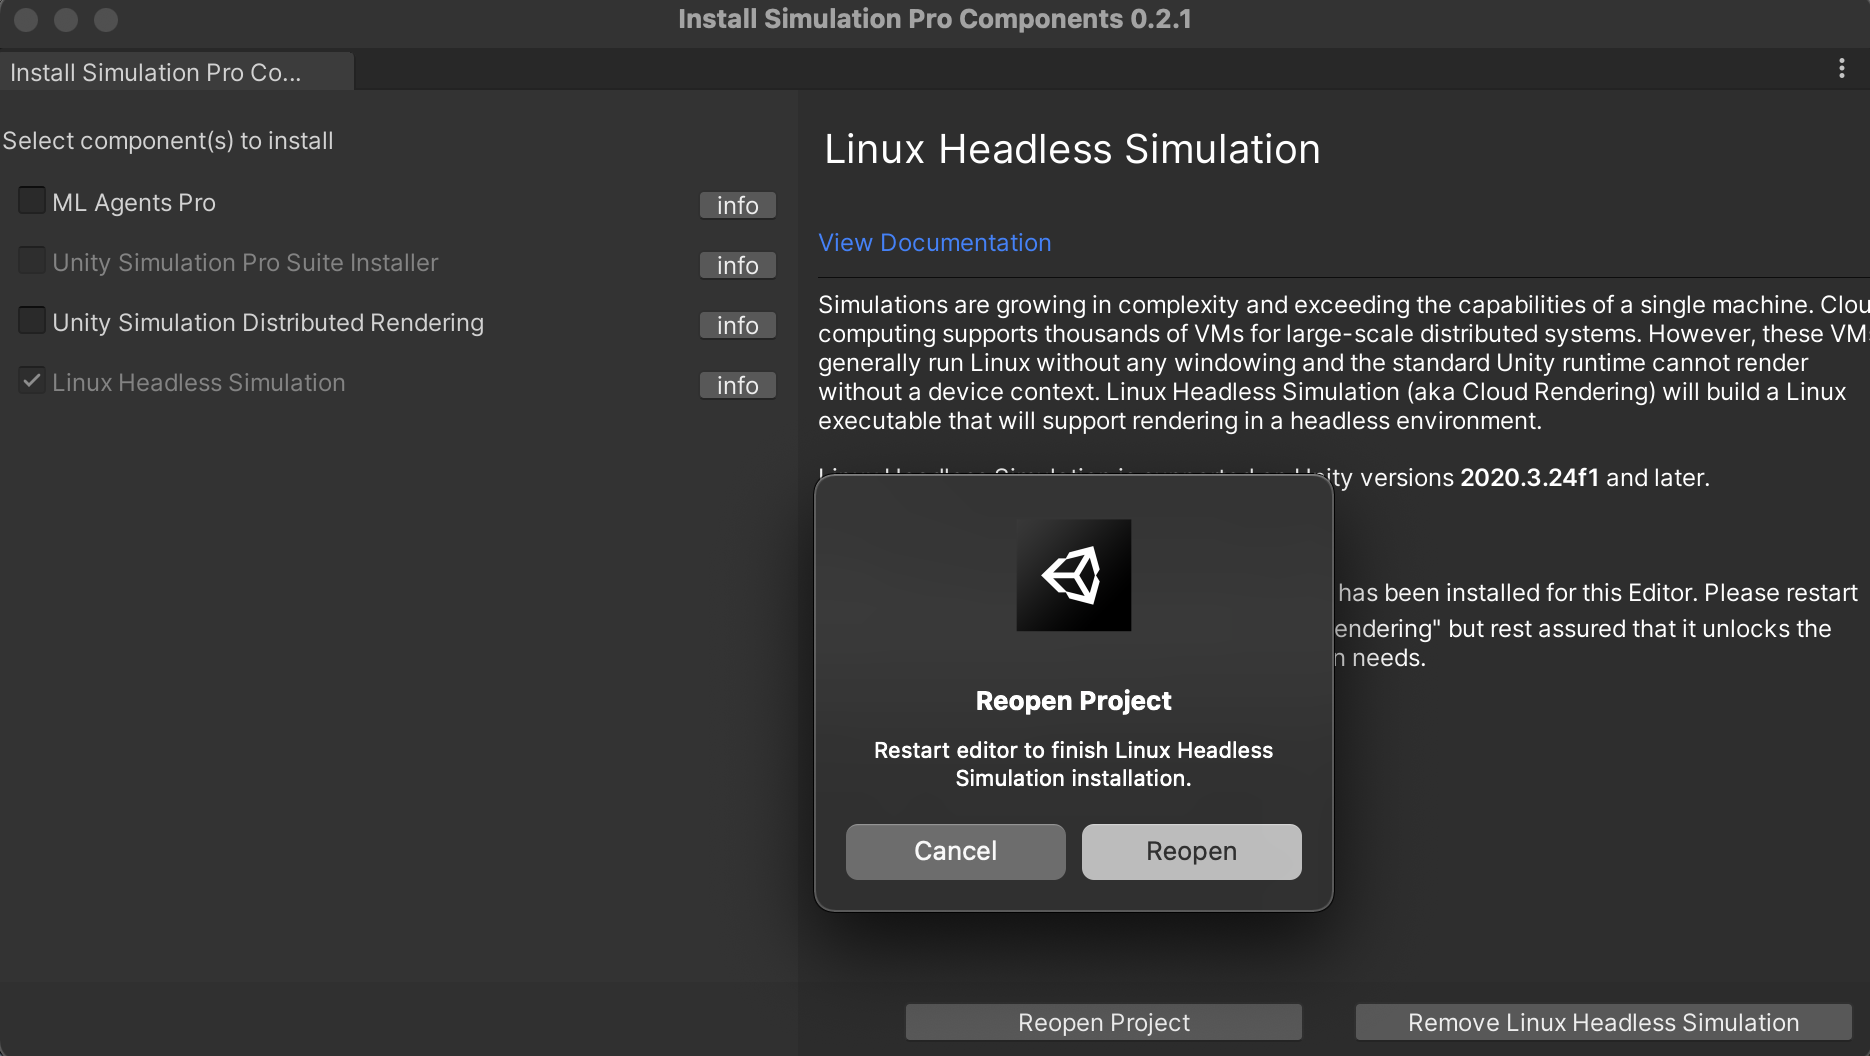
Now, once your project opens up, navigate to the Build Settings window, and you should see the 'Cloud Rendering' option in the platforms panel.
Note
If you get the '...Linux toolchain...not installed' error message when trying to use the Cloud Rendering option for the very first time, you might want to select the plain Linux target once, and hit 'Switch Platform' for the required toolchain components to be loaded. And then you can use the 'Cloud Rendering' target.
Note
If you upgrade your Unity Editor version, you need to install the LinuxHeadlessSimulation target for the new version, if it's not already installed, following the instructions here
Now, you can move on to learn how to create a player build using the LHS build target here
How to get access?
If you have landed here without visiting our product page here, we recommend heading over there, and reaching out to our product team to get access first. Once thats completed, for any further engineering support please reach out to unitysimulationpro@unity3d.com so we can get you set up and provide the required help.