Warning
Warning: Unity Simulation is deprecated as of December 2023, and is no longer available.
Sensor Setup
Sensors in Unity Simulation live in their own package and can be used independently from vehicle models and controllers.
Unity Simulation sensors produce observations based on the state of the scene. This mapping between state and observation is defined by the sensor model.
We group our sensors by the types of data they output, not by what specific brand name they might map to (e.g., RealSenseD435i or Ouster O0128). As an example, we provide one depth camera that calculates depth from a pair of stereo images, and another type of depth camera that adds noise to perfect depth data calculated from the known geometry in the scene. Sensor models will never exactly match a real-world sensor. To choose the right sensor for your simulation, you should think about which aspects of the real world are most important to simulate.
We currently support the following sensor models out of the box:
- IMU. An Inertial Measurement Unit is a sensor that reports angular velocity, acceleration, and orientation of the object to which it is attached.
- LiDAR. A Light Detection and Ranging sensor that emits pulsed light waves from a laser into the environment and measures the return time to calculate the distances to surrounding objects.
- Depth camera. A sensor that reports the distances to the surrounding objects in an image format where each pixel encodes a distance value.
- RGB camera. A sensor that captures images of the surrounding environment into RGB or grayscale image formats.
- Fisheye camera. A sensor that captures images of the surrounding environment using an ultra wide-angle lens.
- Joint sensor. A sensor that reports the physical state of the joints on a robot.
- Time of Flight sensor. A sensor that reports distance to the surrounding objects in a point cloud format.
The package also contains Prebuilt Sensors, which emulate real-world sensors available for purchase. These prefabs are found in the Samples. You can read more about these sensors and how to install them here.
Using sensors
Using sensors typically requires these steps:
- 1. Add sensor to scene hierarchy
- 2. Configure sensor properties
- 3. Visualize sensor output
- 4. Configure connection
1. Add sensor to scene hierarchy
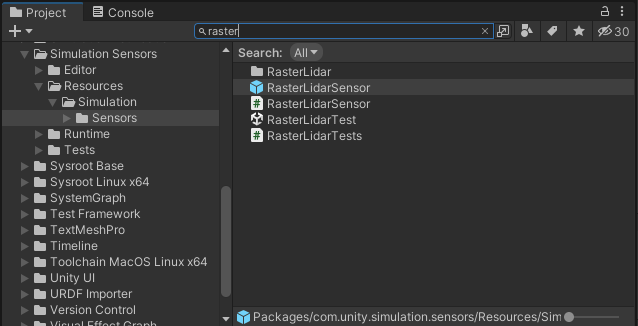
You can find Prefabs for the following sensors, in the Project window, under Packages\Simulation Sensors\Resources\Simulation\Sensors:
- CameraSensor: RGB-D Camera
- FisheyeCameraSensorCube: Fisheye camera implemented using 5 Unity cameras
- FisheyeCameraSensorLR: Fisheye camera implemented using 2 Unity cameras
- ImuSensor: IMU
- JointSensor: Joint state sensor
- PhysicsLidarSensor: Physics-based LiDAR
- RasterLidarSensor: Raster-based LiDAR
- RayTracedLidarSensor: Raytracing-based LiDAR
- StereoDepthSensor: Parallel stereo depth camera
- TofSensor: Time of Flight Sensor
To add a sensor:
- Search the sensor name. To filter the search results add
t:Prefabbefore typing the sensor name. - Drag and drop the sensor prefab to the scene hierarchy
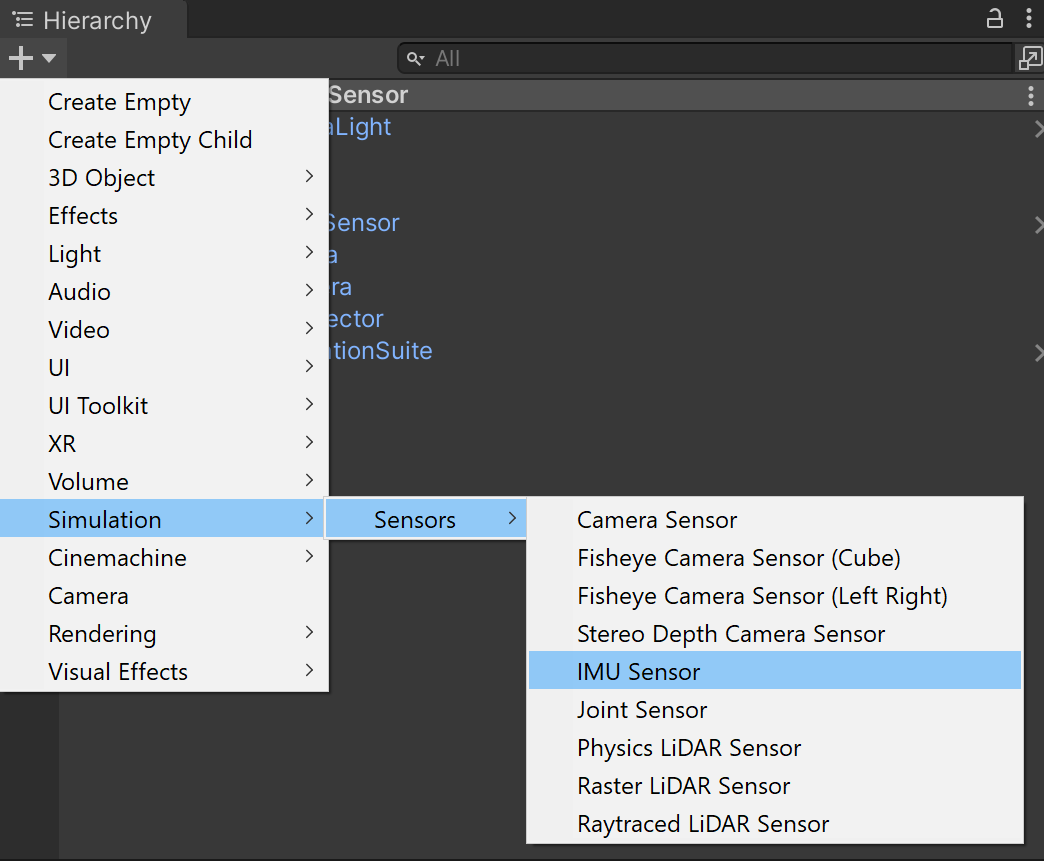
You can also instantiate sensor prefabs from the GameObject/Sensors menu or by clicking the + icon in the Hierarchy. If a GameObject is selected, the new sensor will become a child of the selected GameObject. If no GameObject is selected, a parent GameObject will be automatically created along with the sensor. ArticulationBody and TfBroadcaster components will be created on the parent GameObject if they did not already exist.
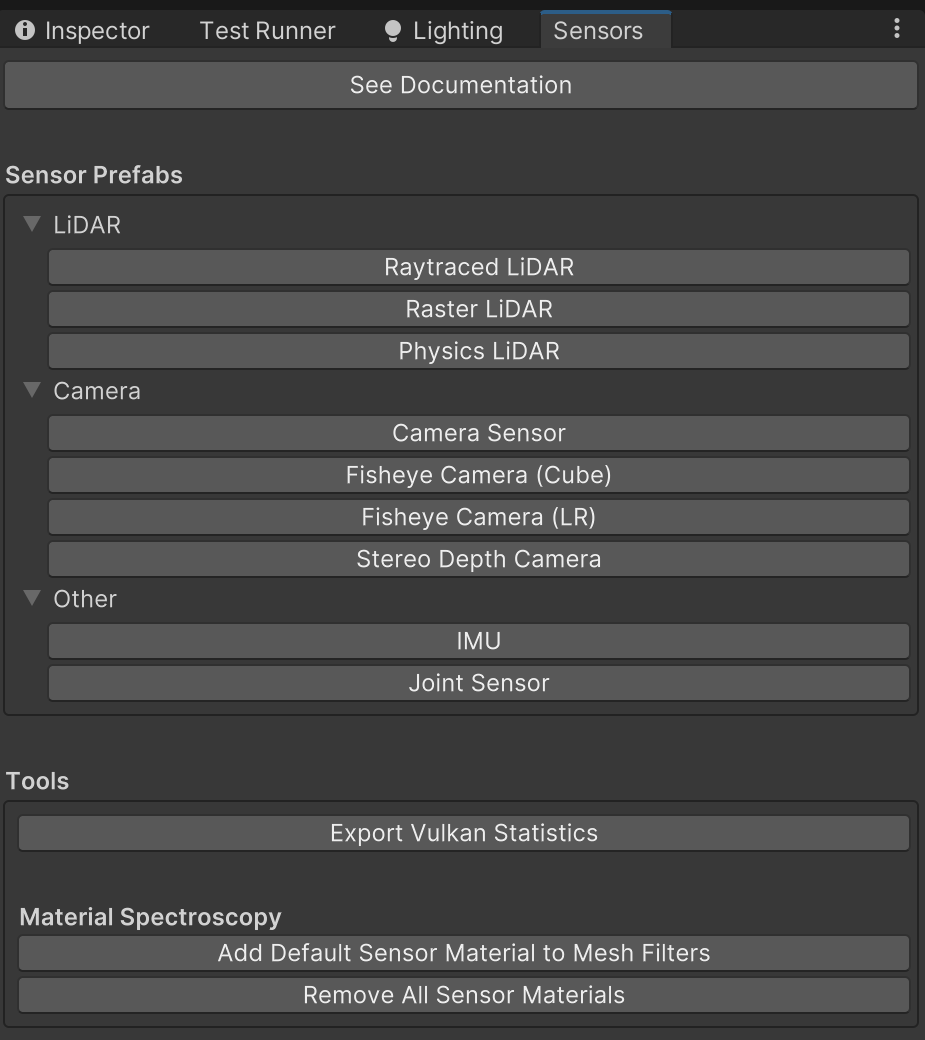
Alternatively, you can instantiate sensor prefabs from the Sensors window by navigating to Window/Simulation/Sensors and clicking the sensor prefab buttons. This follows the same parent GameObject creation and component addition behavior as described above.
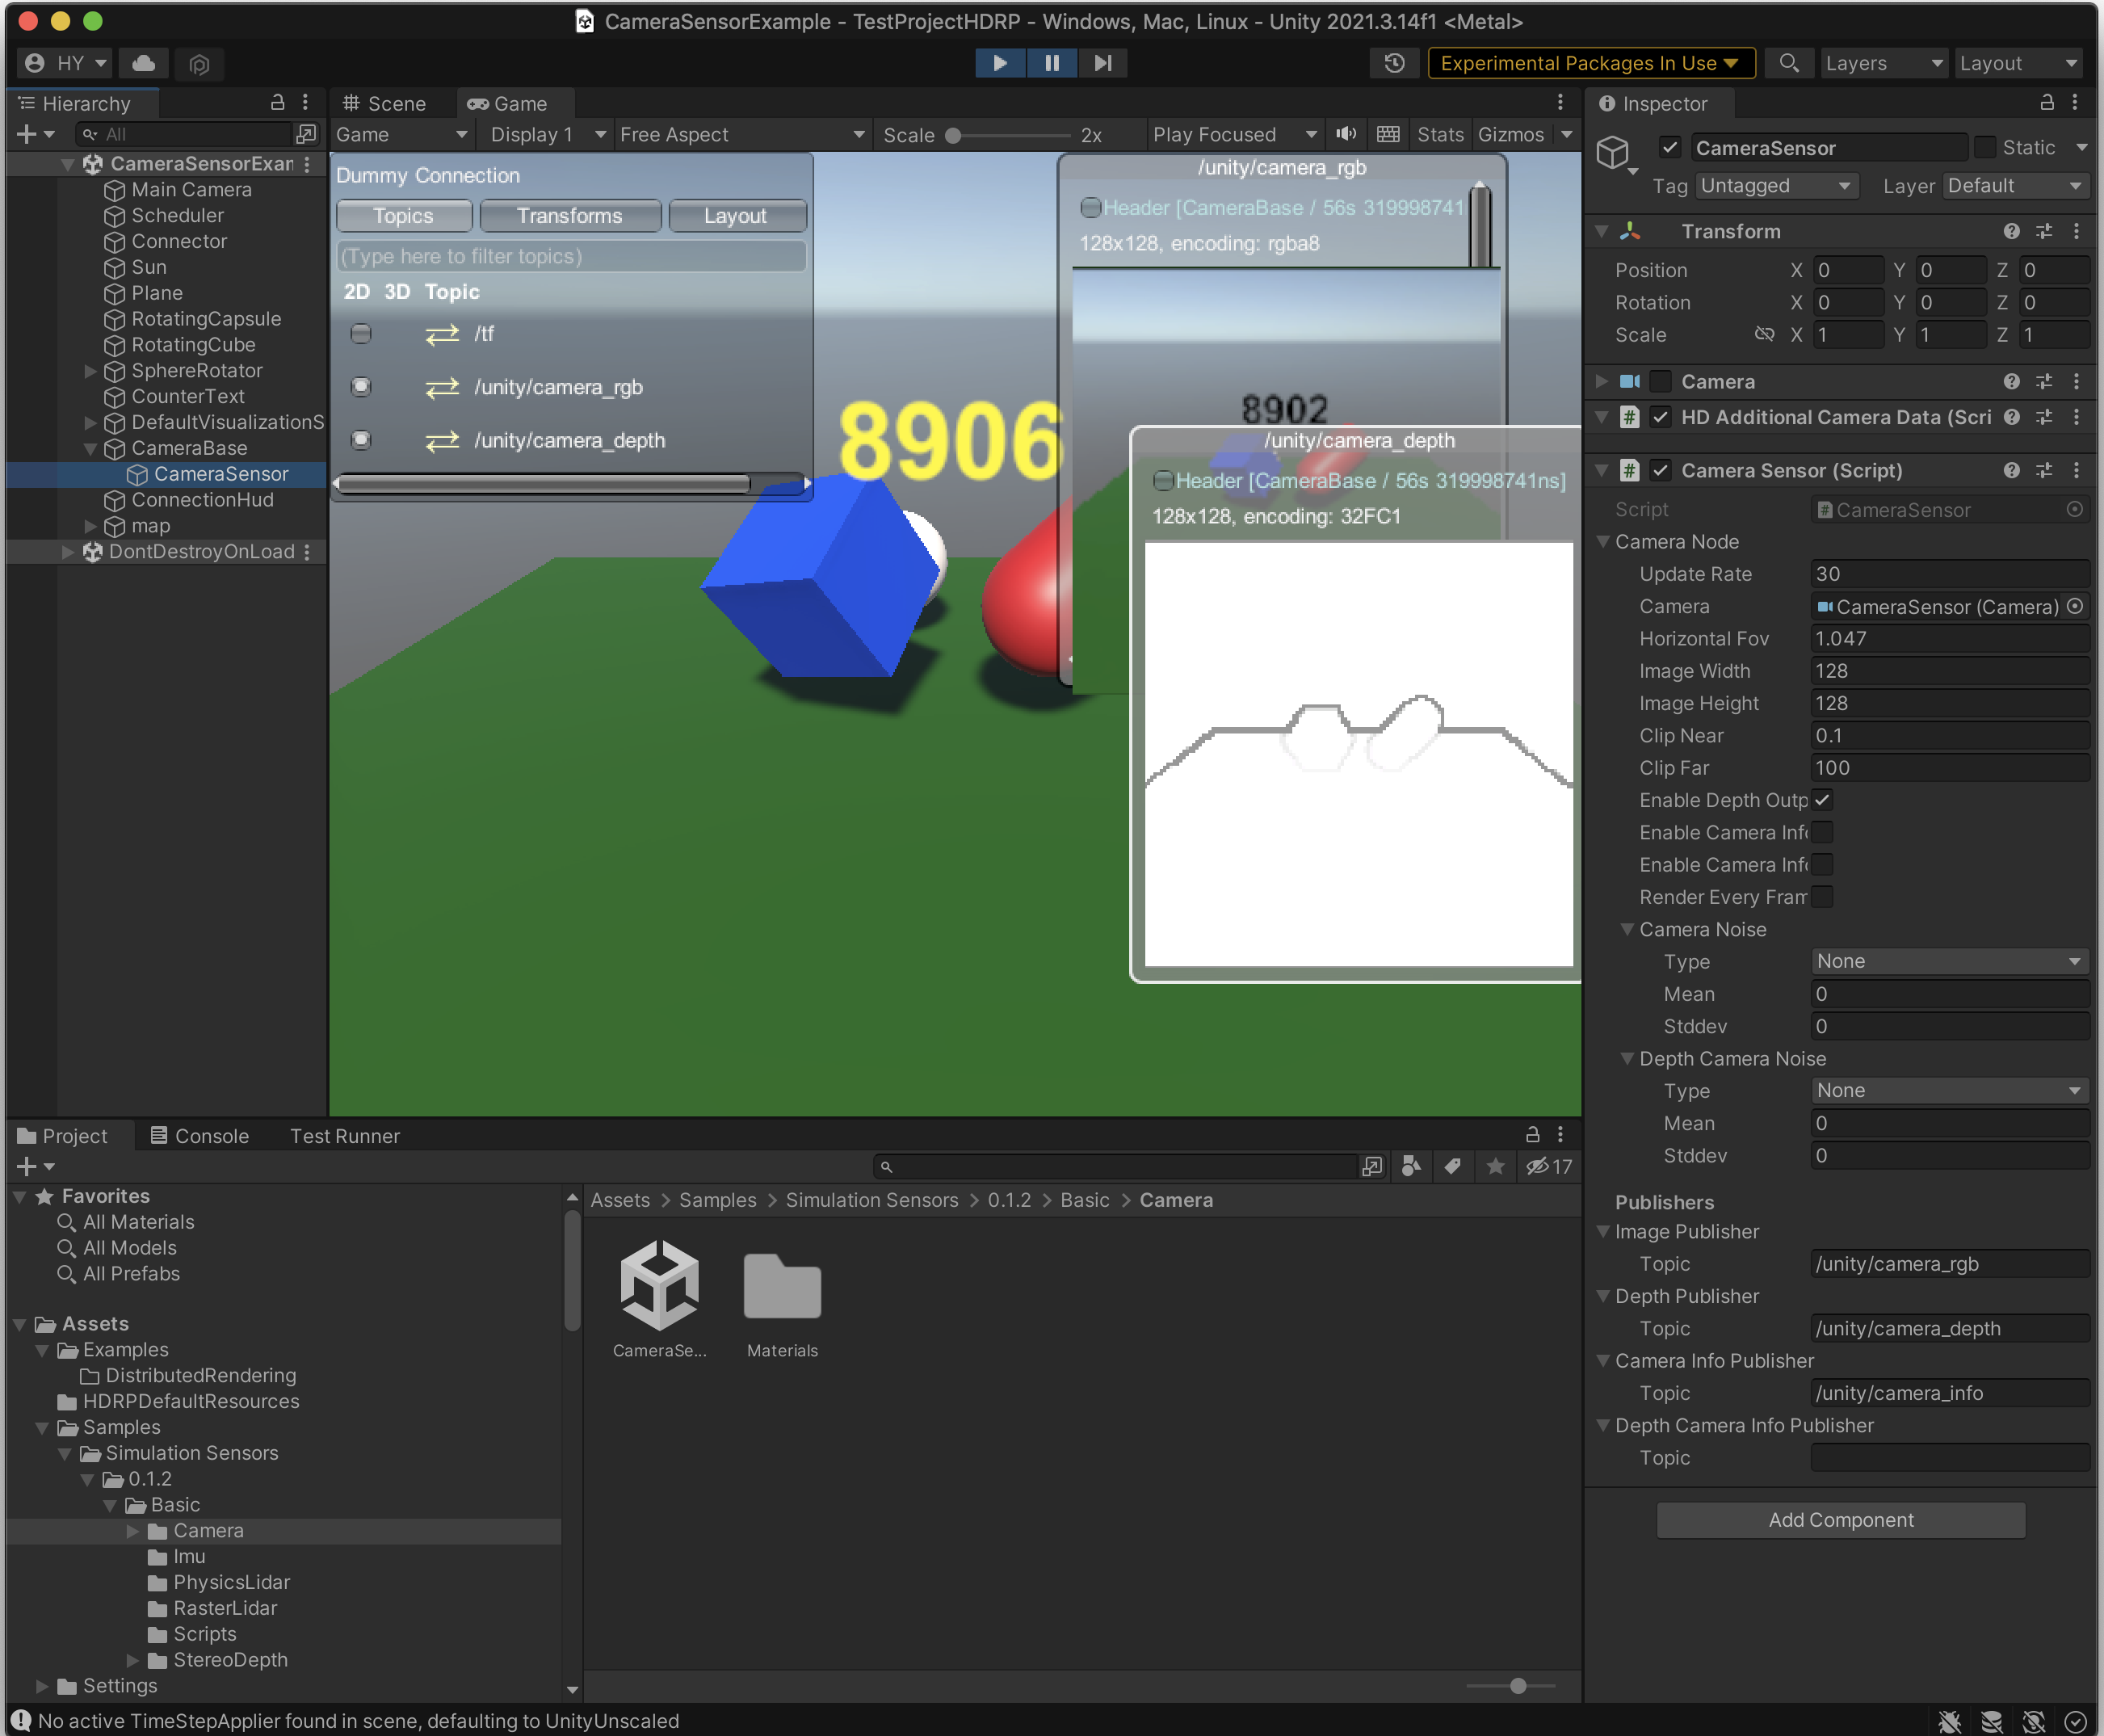
2. Configure sensor properties
Sensors can be configured through the properties in the Unity Editor's Inspector window, under its Sensor component.

Noise
By default, sensors will report the exact data as is observed and computed. We currently support noise sampled from a Gaussian distribution which can be explicitly added to the data generated by the sensors. This can be enabled through noise parameters by specifying the mean and standard deviation of the distribution. However, note that the original data from the simulated sensors can already contain imperfections and sampling and discretization noise. This can vary depending on the system, the configuration of the simulation (rendering, physics, time, etc.) and sensor configurations.
3. Visualize sensor output
You can visualize sensor messages within Unity using the Simulation Foundation package which includes default configurations for common message types, as well as APIs so you can create your own custom visualizations.
To enable visualizations:
- Ensure the Foundation package is installed in your project.
- Drag and drop the
DefaultVisualizationSuite.prefabinto your scene hierarchy. - Ensure your scene has a GameObject with an
IConnectorcomponent in it. If it does not, add a GameObject with aDummyConnectionComponenton it. - Use the Visualization HUD in Play mode to toggle the visualization for any active topic.
For more information, refer to the Visualize sensor data.
4. Configure connection
Sensors will publish messages through their topics. The topic strings can be set through each sensor's properties. The messages will publish to the configured connection.
For more information, refer to Communicating with external processes.
Importing Package Samples
You may optionally import the Simulation Sensors package samples into your project:
- In the Editor toolbar, go to Window > Package Manager
- In the Package list, select the Simulation Sensors package.
Expand the samples tab to display the Basic and Advanced samples.
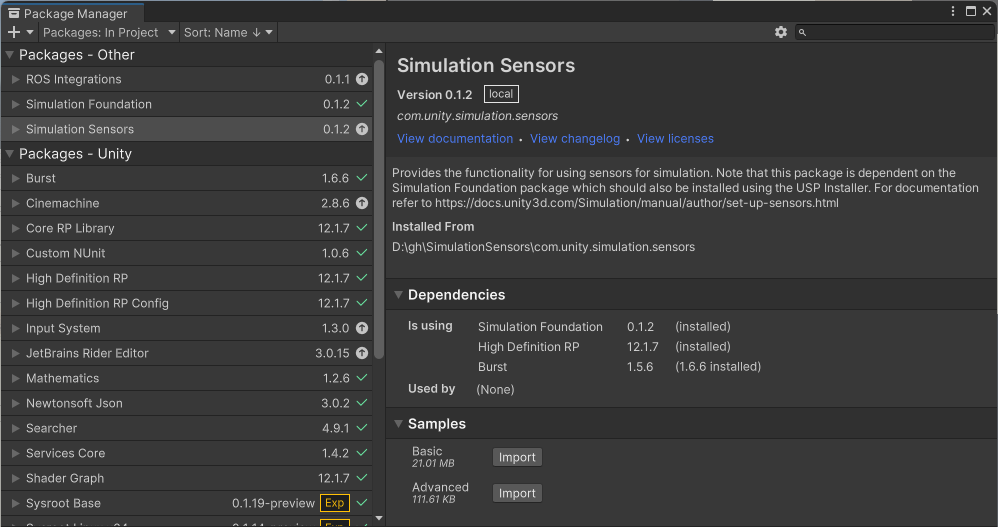
Select Import next to the samples you are interested in.
The samples will be imported to your project Assets folder under Assets/Samples/Simulation Sensors/. Find the following basic sample scenes under the appropriate version number.
- Imu/ImuExample
- Camera/CameraSensorExample
- FisheyeCamera/FisheyeCameraSensorExample
- PhysicsLidar/PhysicsLidarExample
- RasterLidar/RasterLidarExample
- RayTracedLidar/RayTracedLidar
- StereoDepth/TestStereoDepthSensor
- Tof/TofSensorExample
All basic example scenes are set up with a DummyConnector, DefaultVisualizationToolkit and TF publisher. Once you play a scene, you may use the Visualization HUD to view the output of the sensors.
Note
When updating the Simulation Sensors package, it's recommended to reimport the samples to make sure you receive bug fixes and that the samples are still compatible with the new version of the package.