Visual Compositor Nodes
- Regular Nodes
- Add
- Alpha Clip
- Bandpass Filter
- Blend
- Blur
- Coherent Noise
- Color Channel
- Color Mask
- Depth Comparison
- Depth Conversion
- Difference
- Directional Mask
- Drawn Edges
- Drop Shadow
- Easy Color Adjustment
- Final Output
- Glow
- HSV
- Invert
- Layer
- Level Adjustment
- Linear Gradient
- Material ID Render
- Multiply
- Object ID Render
- Outline
- Post Process
- Preview
- Proc Amp (Keyer)
- Render
- Render Texture
- Selection Group Color Render
- Shadow Render
- Solid Color
- Spherical Gradient
- Spline Mask
- Stable Diffusion Txt2Img (Experimental)
- Stable Diffusion ImgImg (Experimental)
- Streaming Image Sequence
- Subtract
- Texture2D
- Toon ClipMask Render
- Transform
- Vertex Color Render
- Waifu2x
-
- Abs Value
- ACos Value
- Add Value
- ASin Value
- ATan Value
- Bool Value
- Ceil Value
- Clamp Value
- Clamp01 Value
- Color Value
- Cos Value
- Deg2Rad Value
- Divide Value
- Float Value
- Floor Value
- Frac Value
- Inverse Lerp Value
- Lerp Value
- Max Value
- Min Value
- Multiply Value
- Pack Vector Value
- Perlin Noise Value
- Ping Pong Value
- Playable Director Time
- Power Value
- Random Value
- Rad2Deg Value
- Repeat Value
- Round Value
- Sign Value
- Sin Value
- Smooth Step Value
- Subtract Value
- Tan Value
- Unpack Vector Value
- Vector2 Value
- Vector3 Value
- Vector4 Value
- Organize Nodes
Regular Nodes
Nodes that output RenderTextures.
Add
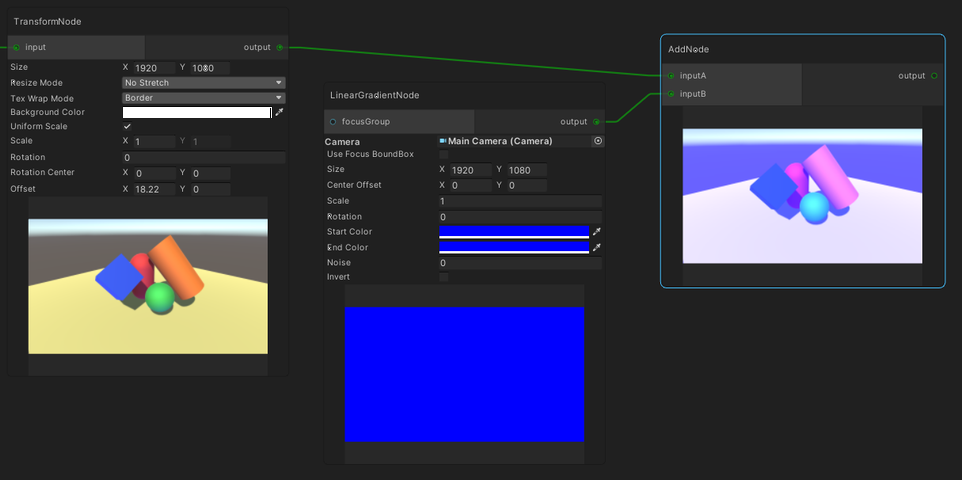
Brightens the first input with the second input.
This is the same as Add mode in Blend node.
Alpha Clip
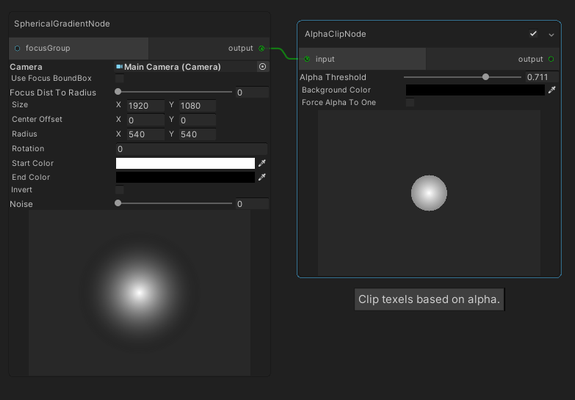
Clips input texels which have alpha below the Alpha Threshold parameter.
| Parameters | Description |
|---|---|
| Alpha Threshold | The threshold for clipping. |
| Background Color | The color to replace clipped texels. |
| Force Alpha To One | Force the alpha of unclipped texels to one. |
Bandpass Filter
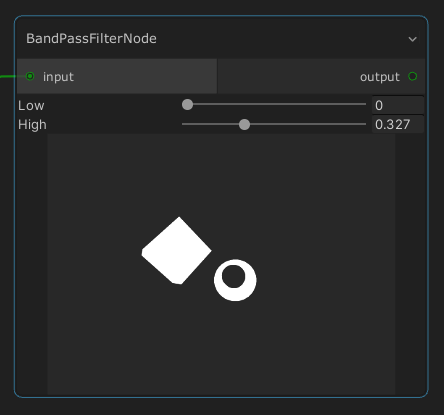
Outputs a mask based on the red color of the input image between Low and High slider values.
Blend
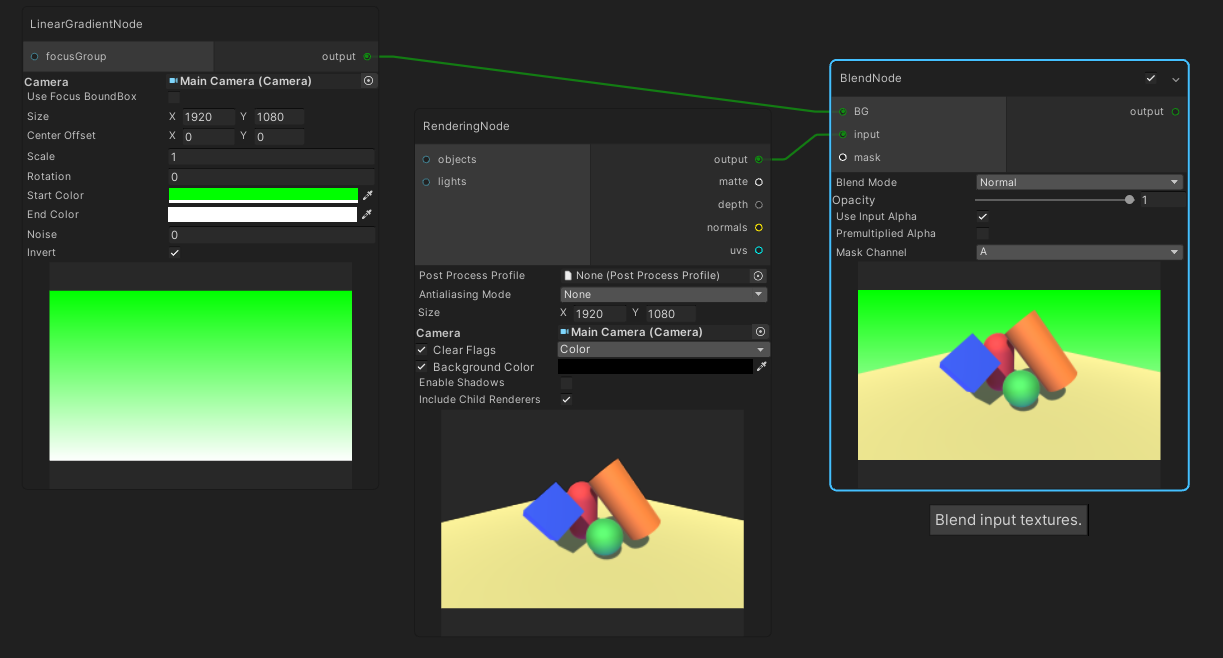
Blends input texture with the background texture, based on the following equation.
Equation: blendModeEq(background, input) * opacity + background * (1.0 - opacity)
| Parameters | Description |
|---|---|
| Blend Mode | The blend mode. |
| Opacity | The blend strength. |
| Use Input Alpha | Multiply opacity with the input alpha for blending. |
| Premultiplied Alpha | Ignores the left opacity in the above equation. |
| Mask Channel | The channel of the mask texture to be used in blending, if assigned. |
The effect of each blend mode for each color channel is as follows:
| Blend Mode | RGB | Alpha |
|---|---|---|
| Add | Adds both colors. | Adds both alpha. |
| Average | Averages both colors. | Averages both alpha. |
| Color Burn | Darkens the background color to reflect the input color by increasing the contrast. | Outputs the input alpha. |
| Color Dodge | Brightens the background color to reflect the input color by decreasing the contrast. | Outputs the input alpha. |
| Darken | Selects the darker color. | Selects the lower alpha. |
| Difference | Subtracts the brighter color between the input and the background texture with the other. | Selects the higher alpha. |
| Exclusion | Similar to Difference but with lower contrast. | Selects the higher alpha. |
| Glow | Same as Reflect | Same as Reflect |
| Hard Light | Same as Overlay | Same as Overlay |
| Hard Mix | Changes all colors to primary colors (red, green, or blue), white, or black. | Outputs the input alpha. |
| Lighten | Selects the brighter color. | Selects the higher alpha. |
| Linear Burn | Darkens the background color to reflect the input color by decreasing the brightness. | Same as RGB. |
| Linear Dodge | Same as Add | Same as Add |
| Linear Light | Burns or dodges the colors by decreasing or increasing the brightness, depending if the input color is less than 0.5 or not. | Outputs the input alpha. |
| Multiply | Multiplies both colors. | Multiplies both alpha. |
| Negation | Calculates the absolute of the inverse of both added colors, and negates it | Outputs the input alpha. |
| Normal | Outputs the input color. | Outputs the input alpha. |
| Overlay | Multiplies or screens the colors, depending if the input color is less than 0.5 or not. | Outputs the input alpha. |
| Phoenix | Outputs the inverse of the color differences. | Outputs the input alpha. |
| Pin Light | Darkens or brightens the colors, depending if the input color is less than 0.5 or not. | Same as RGB. |
| Reflect | Darkens the background color with the input color. | Outputs the input alpha. |
| Screen | Multiplies the inverse of the input and background color. | Outputs the input alpha. |
| Soft Light | Darkens or lightens the colors, depending if the input color is less than 0.5 or not. | Outputs the input alpha. |
| Subtract | Subtracts the input color from the background color. | Outputs the background alpha. |
| Vivid Light | Burns or dodges the colors by increasing or decreasing the contrast, depending if the input color is less than 0.5 or not. | Outputs the input alpha. |
Notes:
- Mask is only applied to the input texture.
- If background texture size is prioritized to be the size of the output texture.
Blur
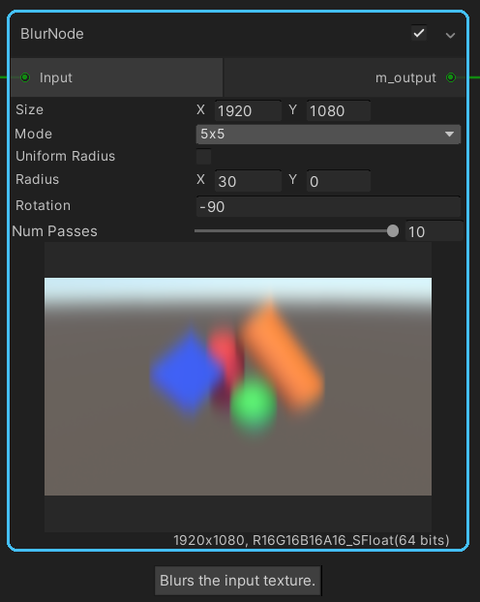
Blurs the input texture.
| Parameters | Description |
|---|---|
| Size | The target resolution size. This is used to reduce artifacts around the edges by blurring bigger input textures. |
| Mode | Blur mode specifies how pixels are taken into account in blurring. 3x3 is the lightest, while 7x7 is the heaviest. |
| Uniform Radius | Apply uniform radius (force y-radius to equal x-radius). |
| Radius | The radius of the blur for each axis. |
| Rotation | The rotation of the blur. |
| Num Passes | The number of passes to smoothen the blur result. Note that the performance gets heavier with more passes. |
Coherent Noise
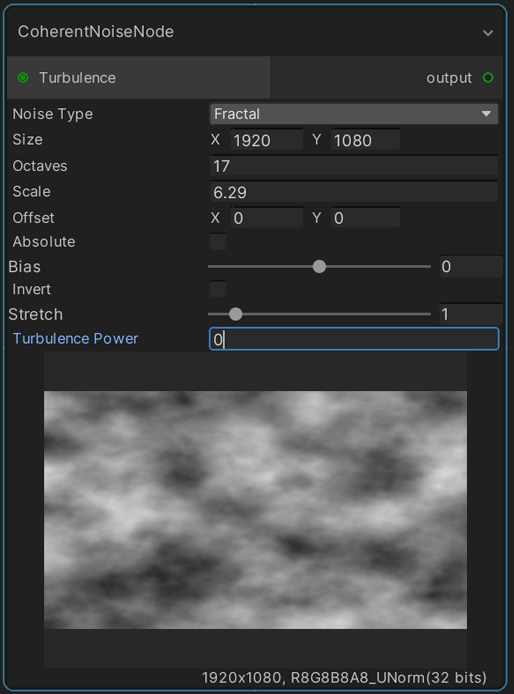
Creates deterministic procedural noise.
| Parameters | Description |
|---|---|
| Noise Type | The type of noise: fractal, cylinders or spheres. The fractal noise is of brownian motion type. Cylinder noise is sin(uv.x) and sphere noise is sin(length(uv)). |
| Octaves | How many times to sample the fractal noise. Each additional sample is applied with 50% of the previous sample, at 2x the scale of the previous sample. |
| Scale | This changes the zoom level of the noise, which could also be called the frequency of the noise. |
| Offset | A position vector where sampling of the noise will begin. Use this as a seed parameter, or to scroll across the noise. |
| Absolute | If checked, this uses the absolute value of the noise sample. For the sine wave noises (cylinders and spheres) which range from -1 to +1, the formula is abs(sample). For fractal noise, which range from 0 to 1, the formula is abs(lerp(-1, 1, sample)). |
| Bias | Shift the noise value by a fixed amount. (sample + bias) |
| Invert | Inverts the value. (1 - sample) |
| Stretch | Modifies the sampling distance coordinate (uv.x * stretch) to stretch or compress the noise output texture. |
| Turbulence Power | If the Turbulence input is assigned, the sample coordinates will be shifted in a direction specified by the turbulence texture, with a maximum magnitude of this the Turbulence Power value. |
Color Channel
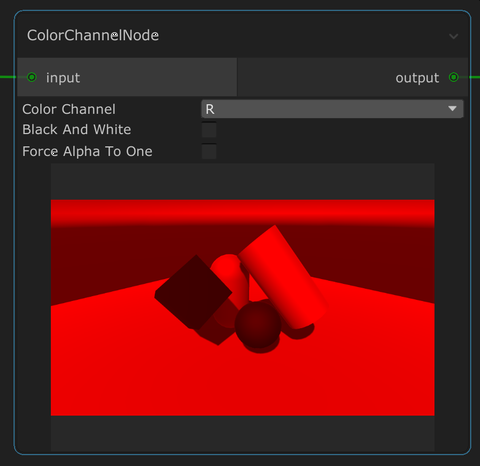
Outputs the selected color channel from the input.
| Parameters | Description |
|---|---|
| Color channel | The color channel to show. |
| Black And White | Shows the chosen color channel as black and white. |
| Force Alpha To One | Force the alpha values of all pixels to one. |
Color Mask
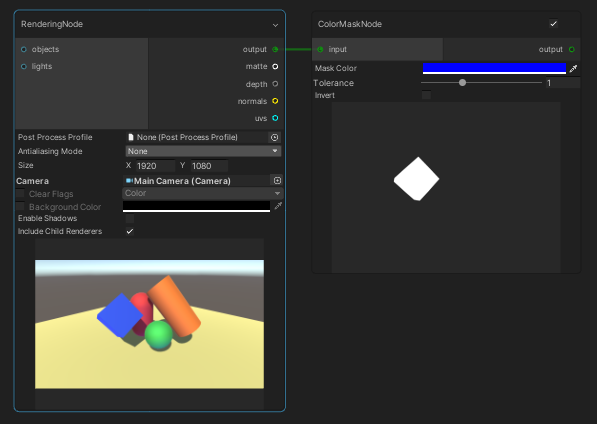
Creates a mask from input based on the specified color and tolerance.
Depth Comparison
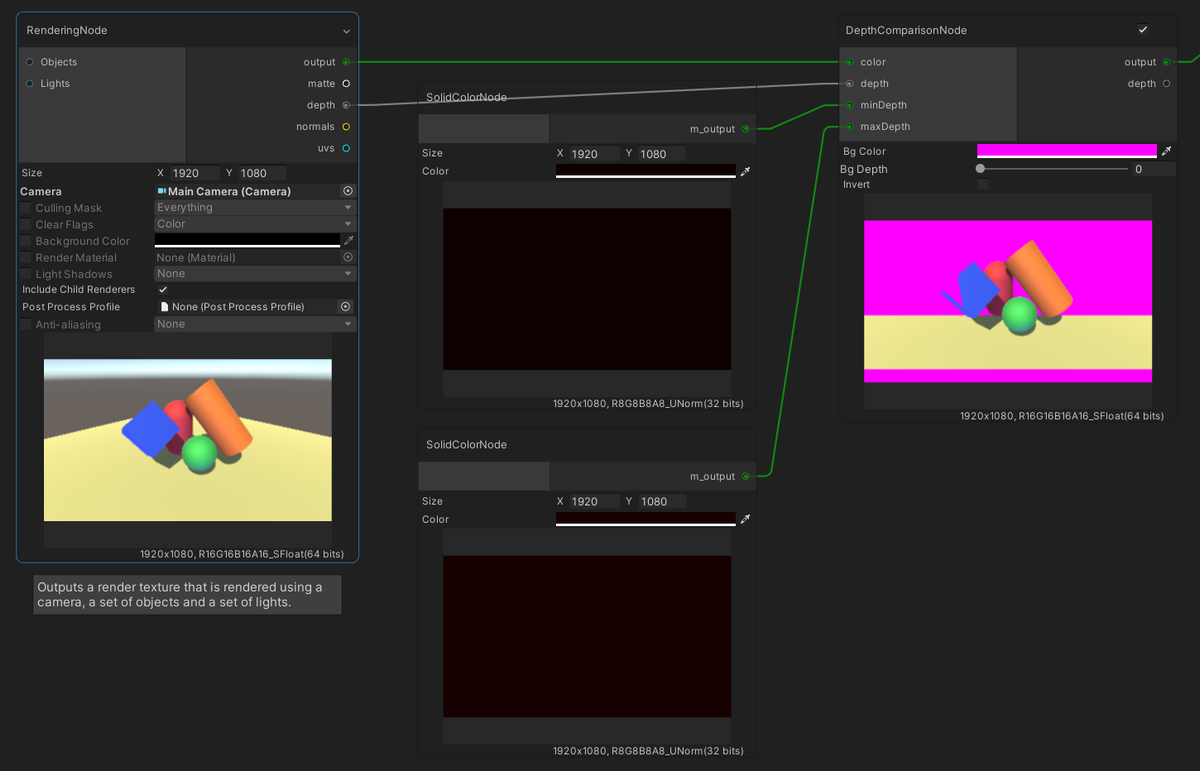
Filters color by comparing the input depth with minDepth (defaults to 0) and maxDepth (defaults to 1).
| Parameters | Description |
|---|---|
| Bg Color | The output color of pixels that don't pass the test. |
| Bg Depth | The output color depth of pixels that don't pass the test. |
| Invert | Inverts the depth test result. |
Depth Conversion
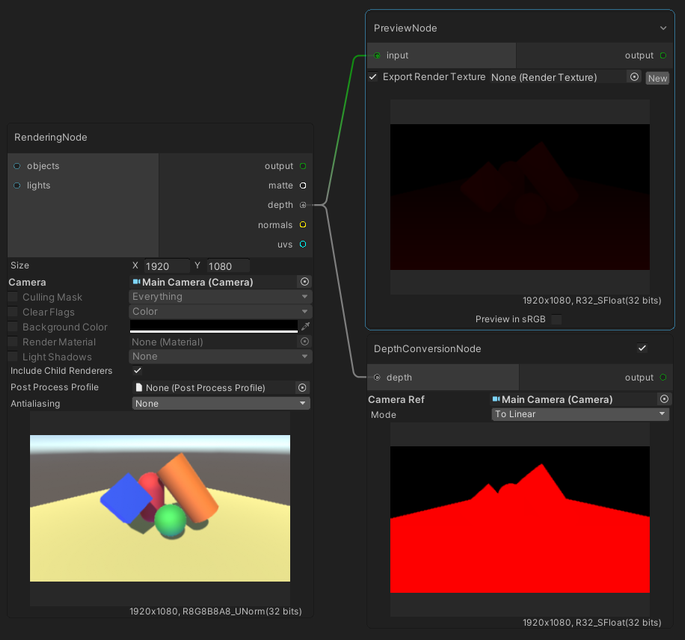
Converts depth to linear or non-linear space.
Difference
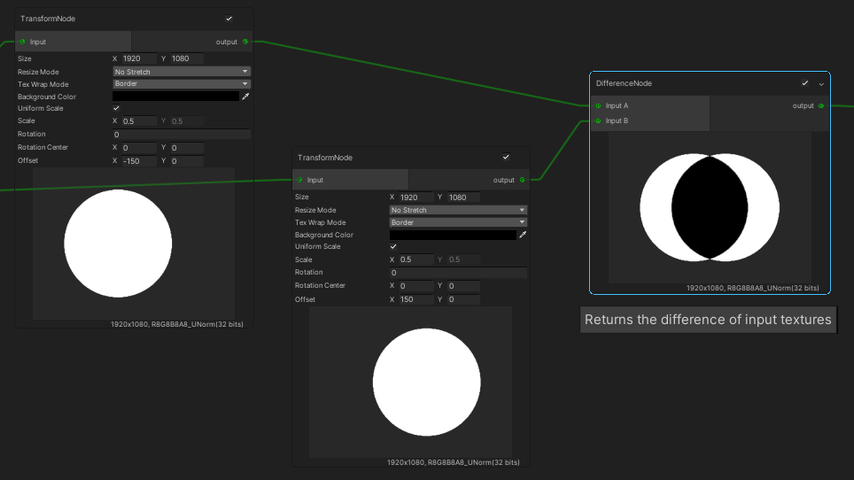
Returns the difference of input textures.
This is the same as Difference mode in Blend node.
Directional Mask
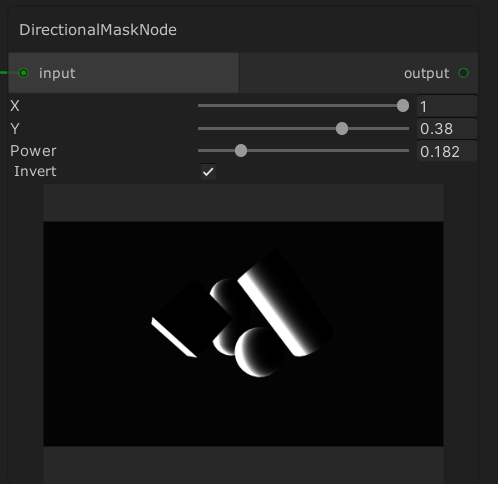
This node takes a normal map as input, and produces a mask based on those normals and the X / Y slider values.
Drawn Edges
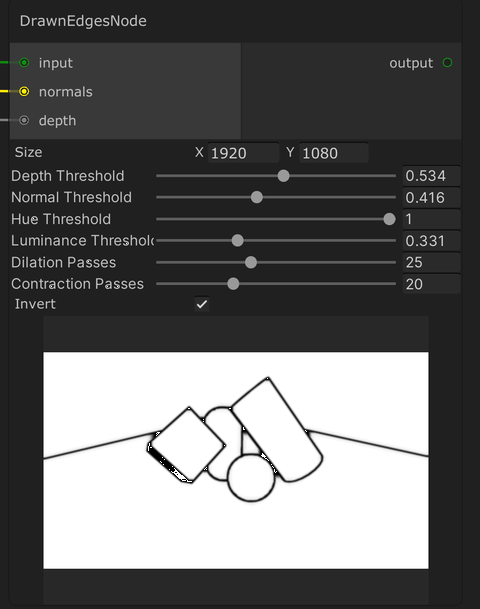
Draws edges based on color, normals, and depth.
Drop Shadow
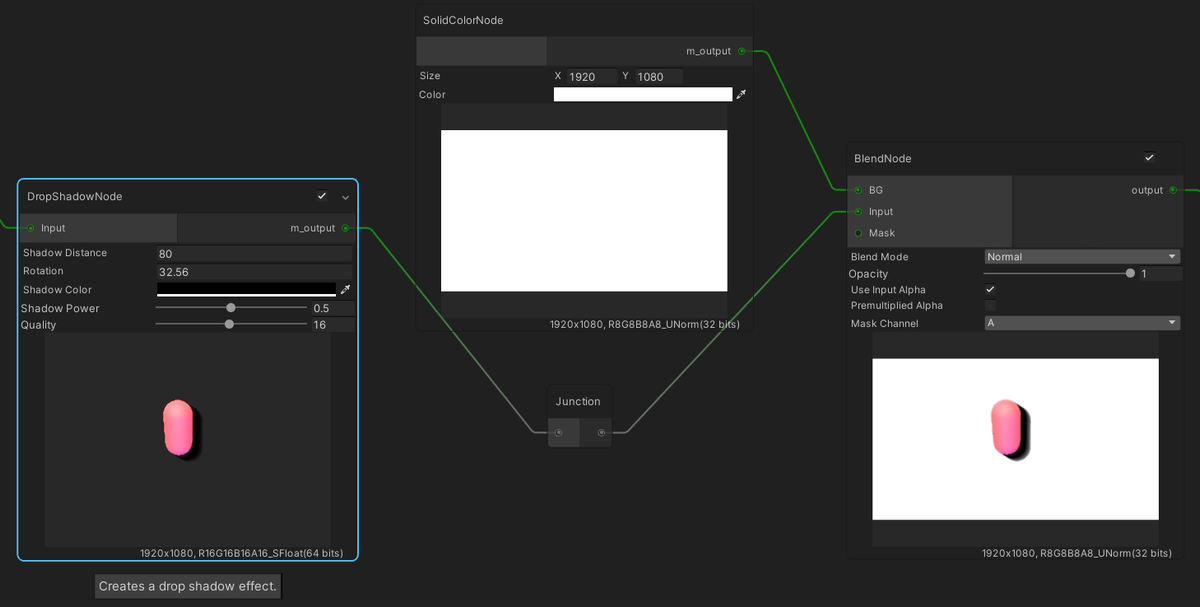
Creates a drop shadow effect.
Easy Color Adjustment
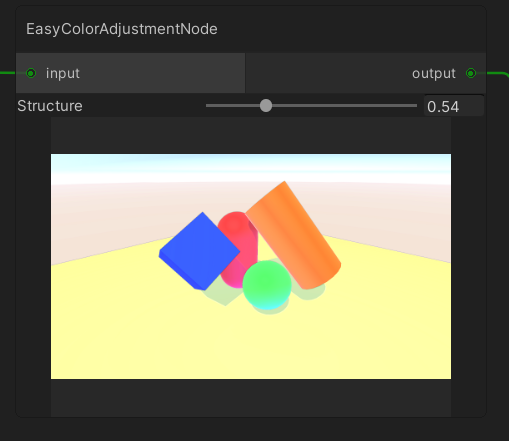
Performs simple color adjustment on the input by applying an amount of saturation, contrast and sharpening.
Final Output
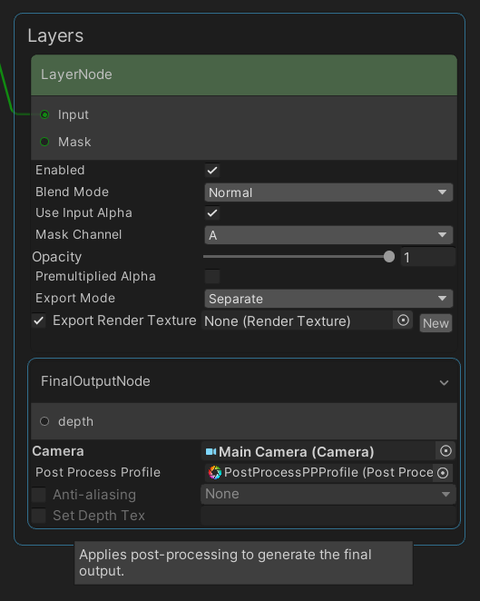
This node is created automatically inside the layer stack and
applies post processing, in a similar way to Post Process Node, to generate the final output.
Please refer to Post Process for details on its parameters.
Glow
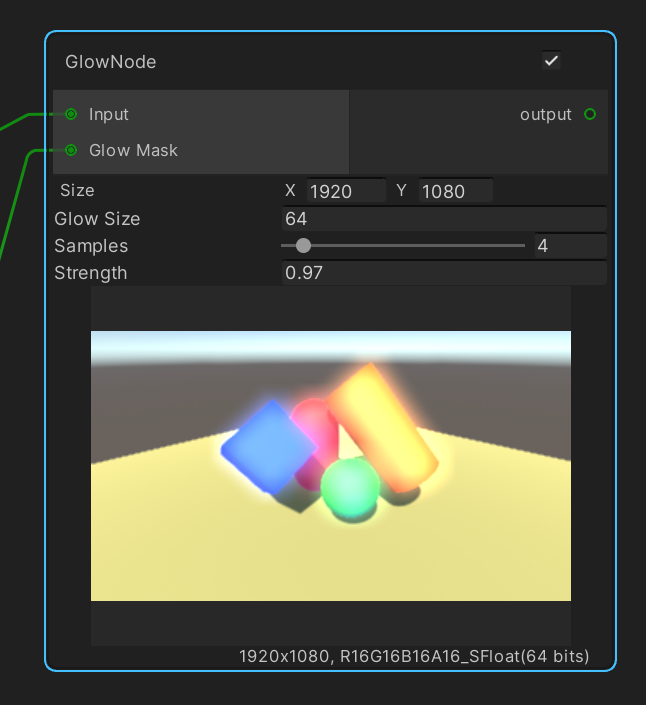
Creates a glow effect by blurring the input, using the glow mask, then adding it to the original input.
| Parameters | Description |
|---|---|
| Glow Size | The size of the glow effect in pixels, which extends from the edges of the mask. |
| Samples | The number of samples used to calculate the blur. A larger number produces a smoother blur. |
| Strength | Specifies how much of the blur effect is added to the input image, which creates the glow. |
HSV
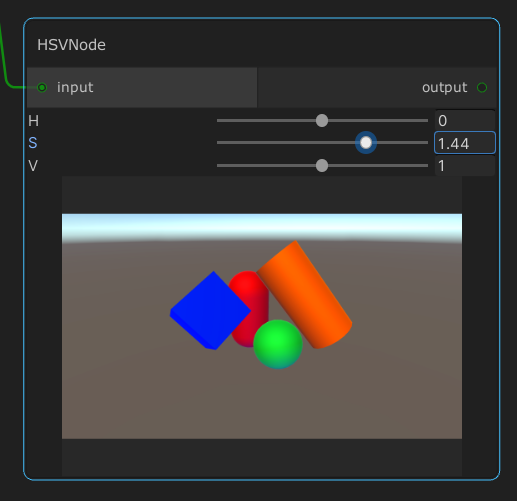
Simultaneously adjusts the hue, saturation, and brightness of the image.
Invert
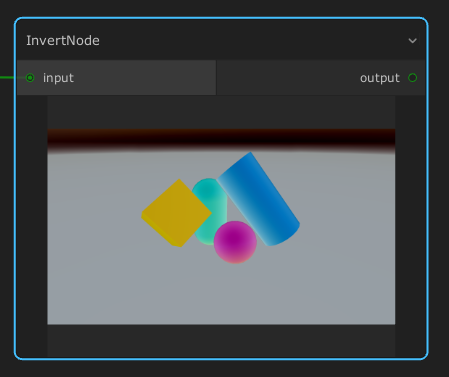
Invert the color of the input image.
Layer
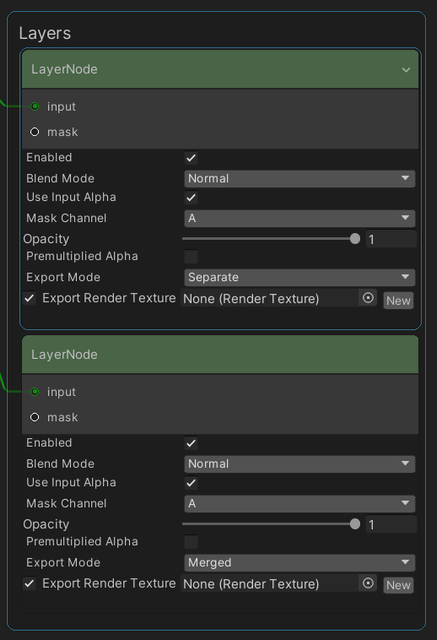
A layer node, which is activated only inside the layer stack, blends input with the layer result up to the previous layer.
This is similar to Blend node, with the previous layer node result acting as the background texture.
We can use the export settings to export the render output into a RenderTexture, which can then be saved into files using Recorder.
| Export Mode | Description |
|---|---|
| Separate | Exports the input of the LayerNode. |
| Merged | Exports the merge result of the input and the output of the previous layer. |
Level Adjustment
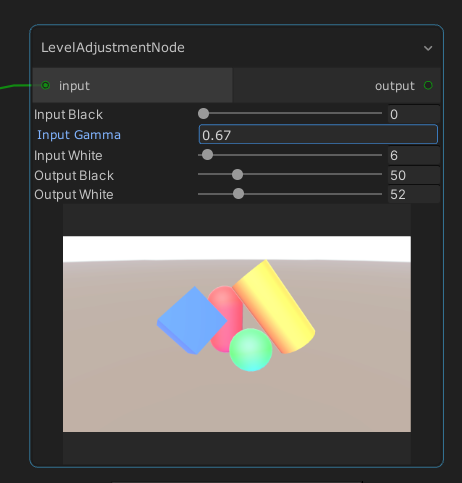
Adjusts the contrast and the overall gamma of the input image.
Linear Gradient
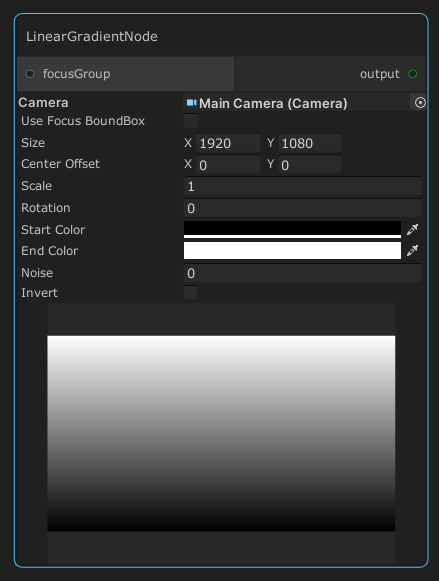
Generates a linear gradient texture.
Material ID Render
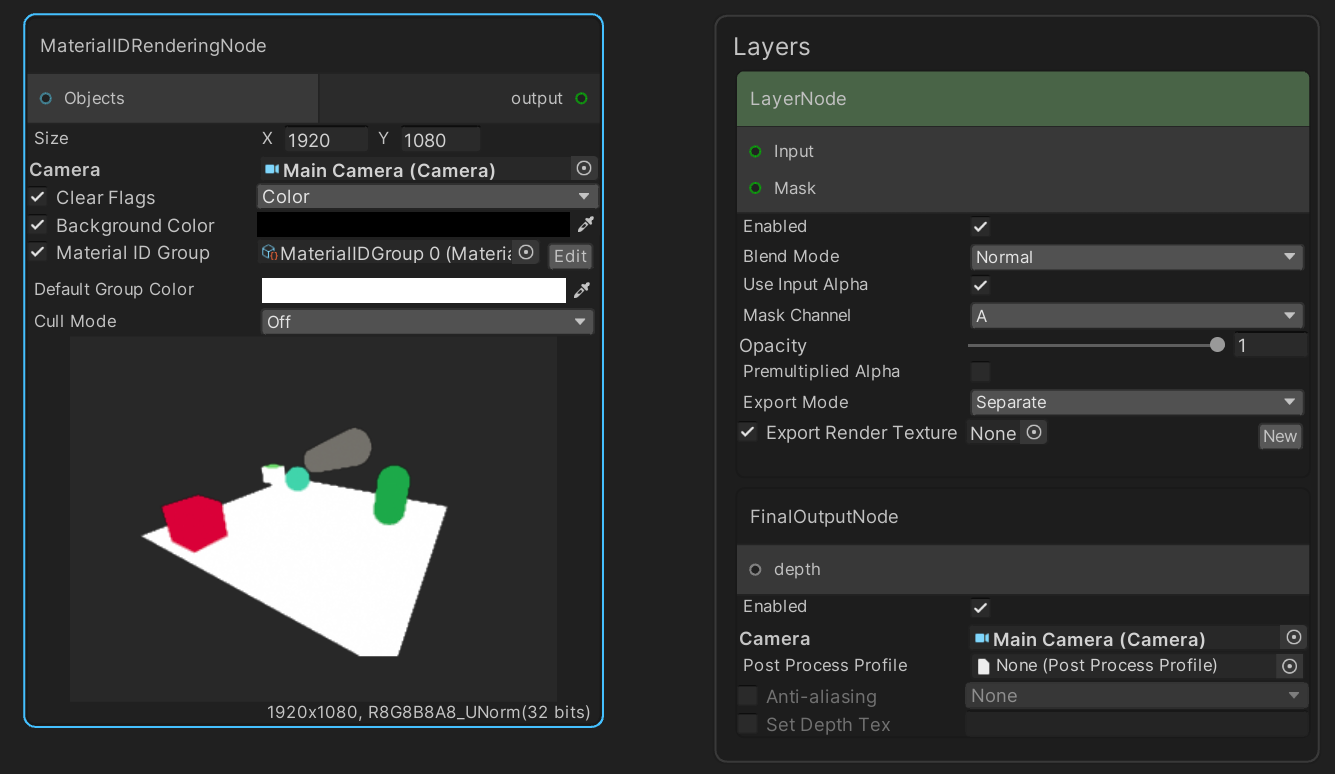
Renders objects using colors assigned to the materials of the objects in Material ID Color Window.
By default, this node will render all objects,
and the Objects port can be used to render only selected objects.
| Properties | Description |
|---|---|
| Size | The target resolution size. |
| Camera | The camera to used for rendering. |
| Clear Flags | Override the clear flags of the camera. |
| Background Color | Override the background color of the camera. |
| Material ID Group | If checked, the node will render Objects with Material ID Colors which can be edited in Material ID Color Window. |
| Default Group Color | The color for rendering objects not assigned in any group. |
| Cull Mode | Backface culling mode. |
Material ID Color Window
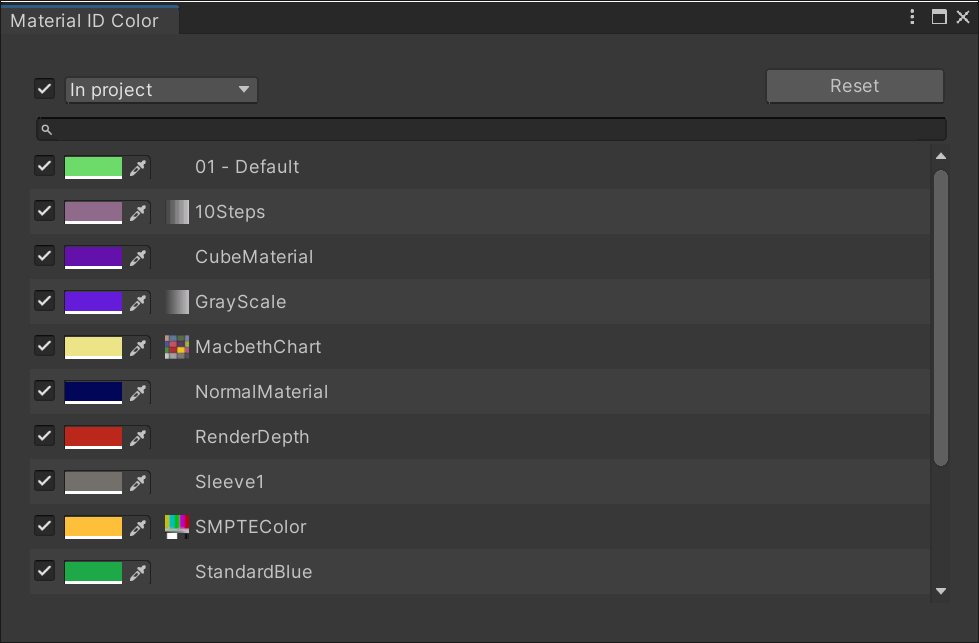
Each material color for Material ID Color Render Node is editable in this window. Pressing Reset button assigns all the colors automatically.
Multiply
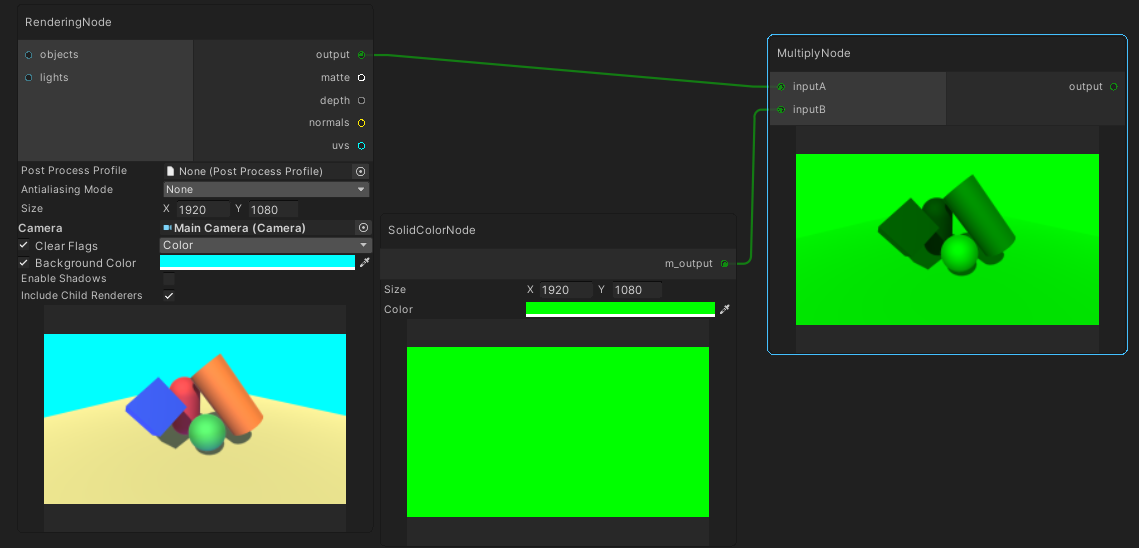
Multiplies the color values of the two input textures.
This is the same as Multiply mode in Blend node.
Post Process
Applies post processing based on the active render pipeline.
Built-In Render Pipeline
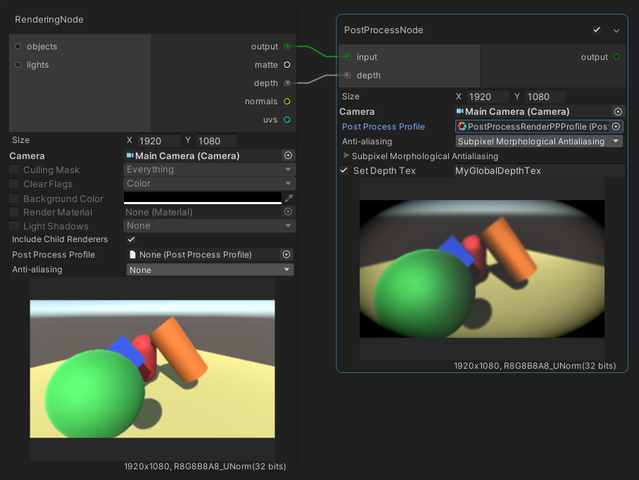
Requires the project to use Post Processing Stack v2.
| Parameters | Description |
|---|---|
| Size | The target resolution size. |
| Camera | The reference camera for applying post processing. |
| Set Depth Tex | Used for custom effects. If enabled and a variable is assigned, the variable will be set with the input depth. |
| Post Process Profile | The profile to apply in this node. |
| Anti-aliasing | The selected anti-aliasing mode to reduce the appearance of jagged edges in the scene. |
HDRP/URP
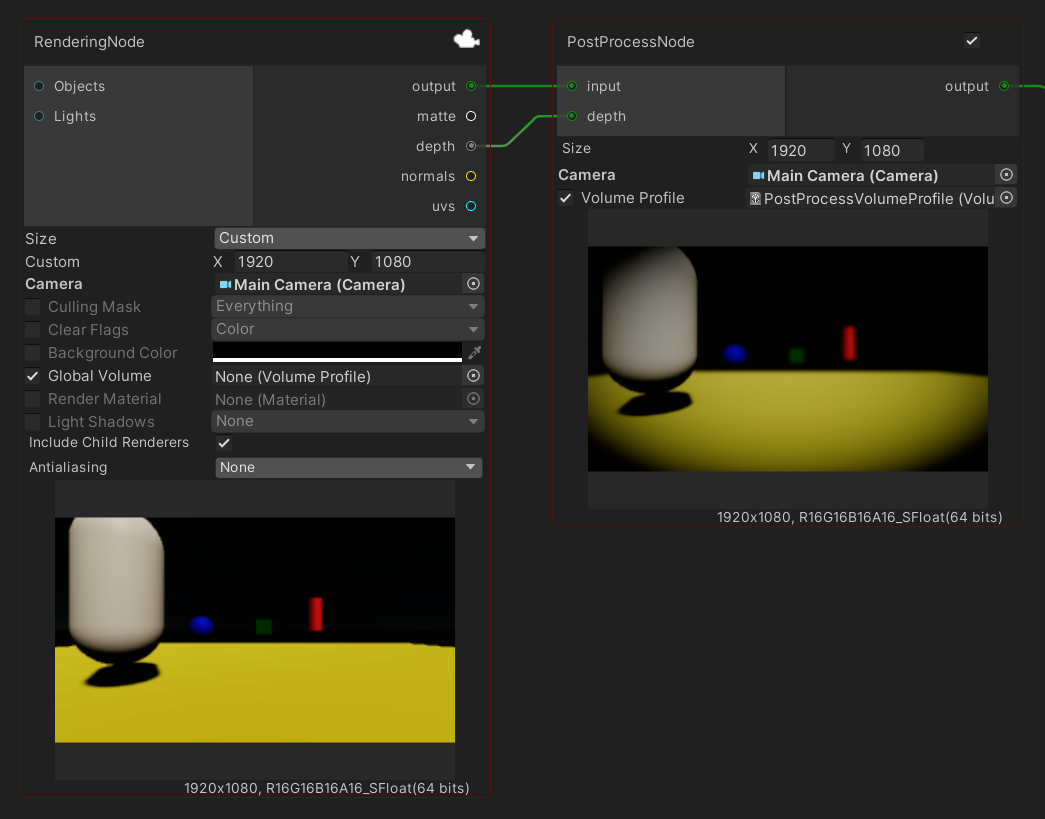
Applies HDRP Post Processing or URP Post Processing based on the active render pipeline.
| Parameters | Description |
|---|---|
| Size | The target resolution size. |
| Camera | The reference camera for applying post processing. |
| Volume Profile | The profile to apply in this node. |
Limitations of Post Process Nodes
| Render Pipeline | Known Limitations |
|---|---|
| HDRP | Post Process Nodes may not work well in scenes which have Volumes that modify the source of Ambient Light Probes, such as HDRI Sky because Ambient Light Probes always affect the scene one frame late. Please refer the Limitation of Dynamic Ambient mode section in the HDRP documentation for more details. |
| URP | As of URP 16.0.1, URP does not yet have the capability to preserve alpha after post-processing. If you require this feature, please share your feedback on the product board of URP. |
Object ID Render
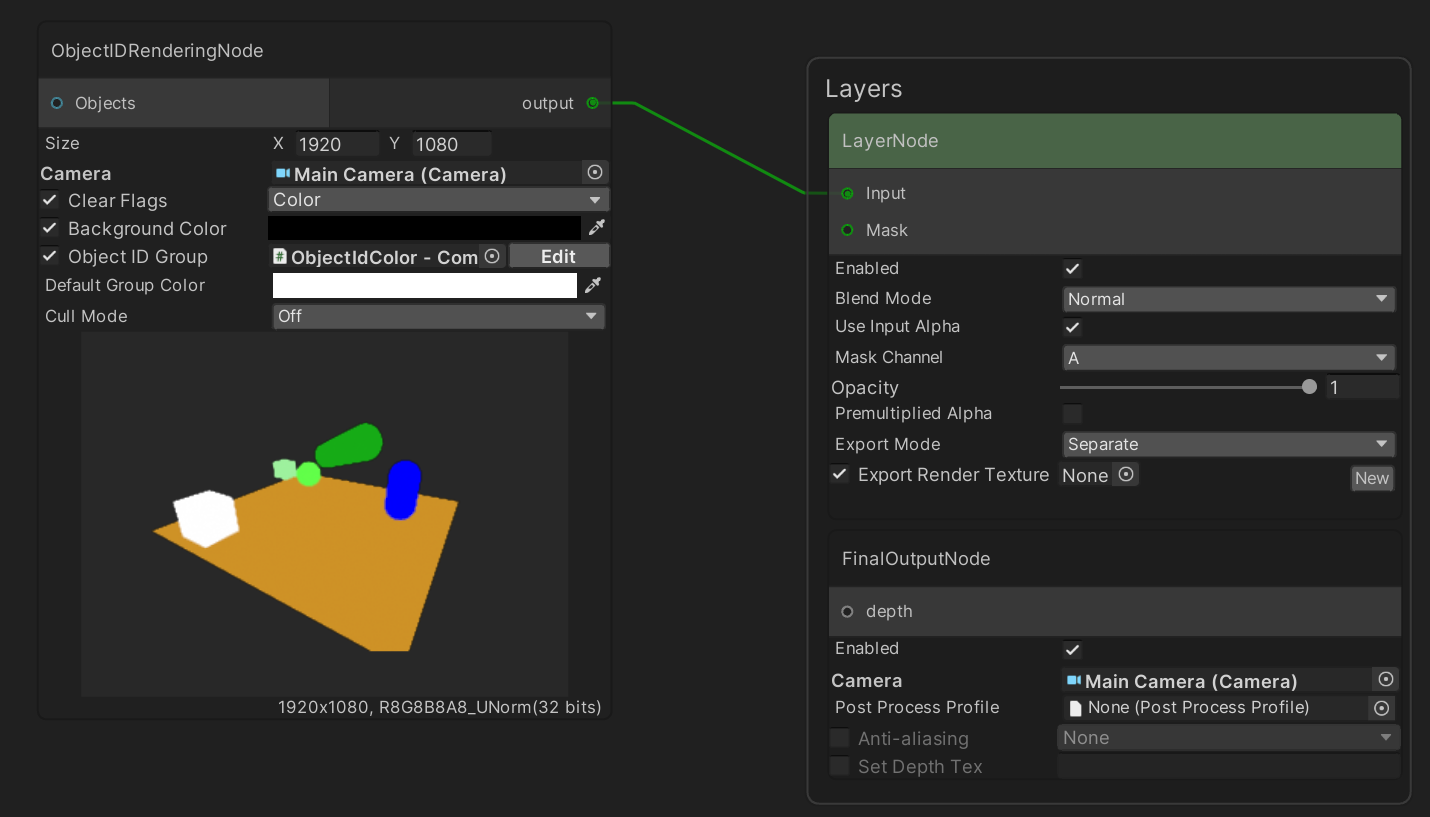
Renders objects using colors assigned to the objects in Object ID Color Window.
By default, this node will render all objects,
and the Objects port can be used to render only selected objects.
| Properties | Description |
|---|---|
| Size | The target resolution size. |
| Camera | The camera to used for rendering. |
| Clear Flags | Override the clear flags of the camera. |
| Background Color | Override the background color of the camera. |
| Object ID Group | If checked, the node will render Objects with Object ID Colors which can be edited in Object ID Color Window. |
| Default Group Color | The color for rendering objects not assigned in any group. |
| Cull Mode | Backface culling mode. |
Object ID Color Window
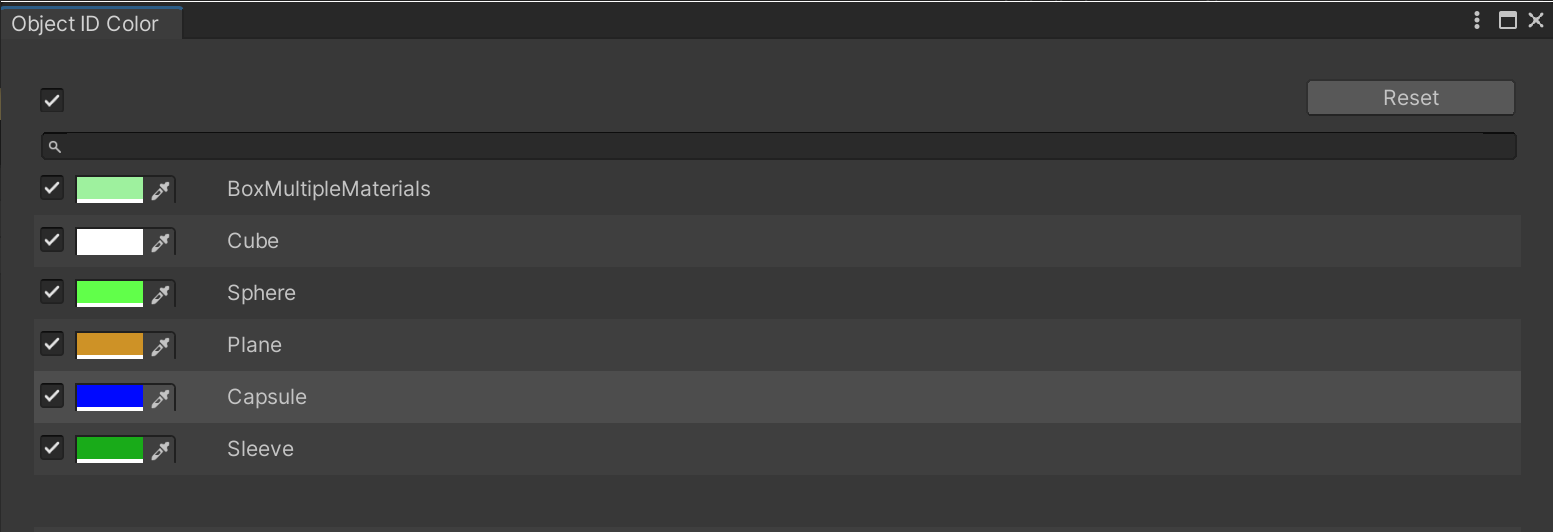
Each object color in Object ID Color Render Node is editable in this window. Pressing Reset button assigns all the colors automatically.
Outline
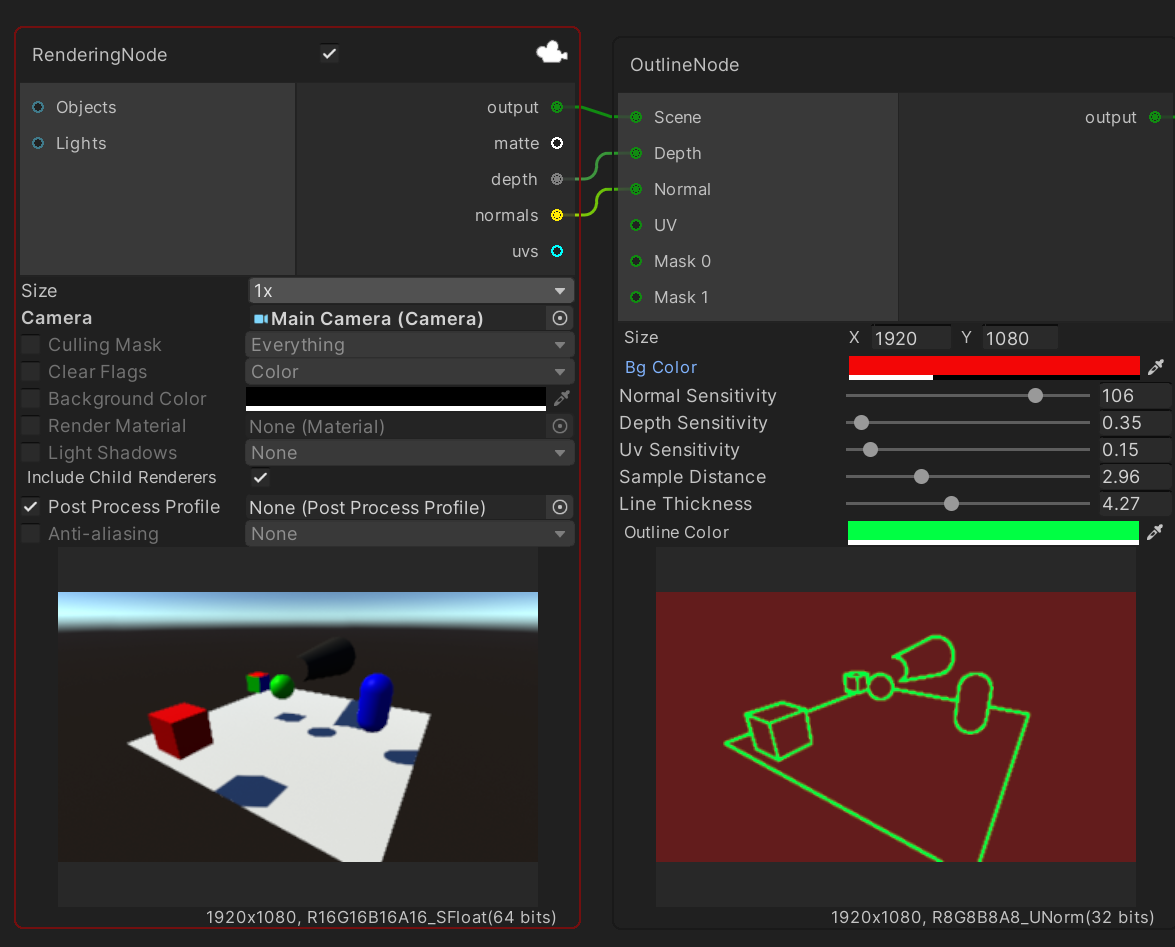
Displays clear and solid outlines.
| Properties | Description |
|---|---|
| Size | The target resolution size. |
| BG Color | Override the background color. |
| Normal Sensitivity | Normal sensitivity by degree. |
| Sample Distance | Pixel sampling distance. |
| Line Thinkness | Outline thickness. |
| Outline Color | Outline color. |
Preview
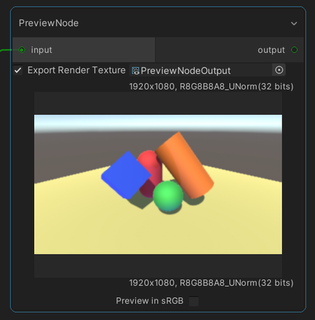
Previews the graph output at a certain stage in the graph.
| Properties | Description |
|---|---|
| Export Render Texture | If set, this node saves the intermediary output to the assigned render texture per frame. |
| Preview in sRGB | Preview the result in sRGB. Only functional in linear workflow. |
Proc Amp (Keyer)
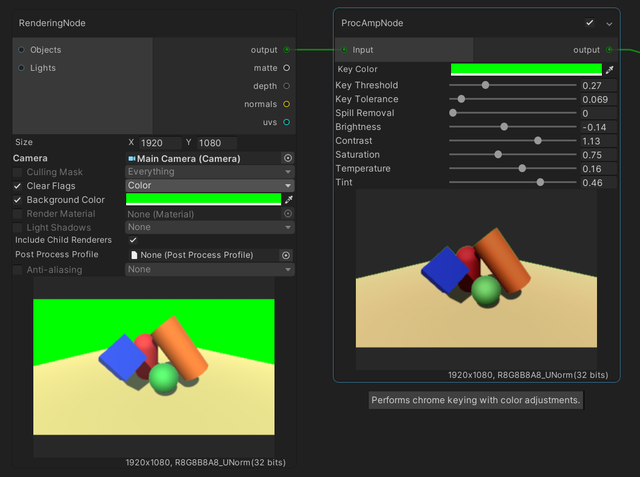
Performs chroma keying with color adjustments based on ProcAmp.
Render
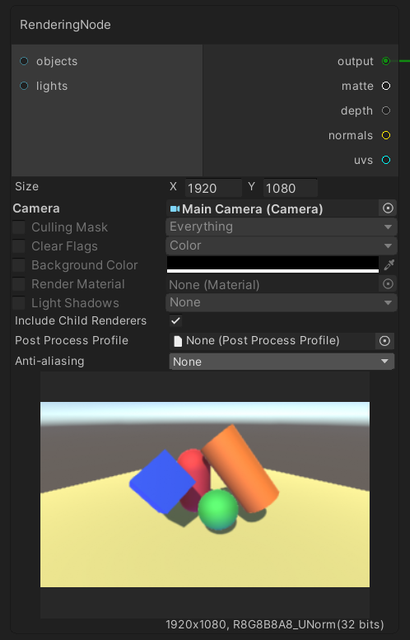
Renders a group of objects and lights with a specified camera into the output port (color).
By default, all objects are rendered using all lights in the scene.
We can use the input ports and the following properties to modify the render output.
| Properties | Description |
|---|---|
| Culling Mask | Override the Culling Mask property of the camera. |
| Clear Flags | Override the Clear Flag property of the camera. |
| Background Color | Override the Background property of the camera. |
| Render Material | Make the camera render with this material. |
| Light Shadows | Override the Shadow Type properties of applicable lights. |
| Include Child Renderers | Render the children of the selected GameObjects or not. |
| Post Process Profile | Applies post-processing. This property is only applicable for built-in projects. |
| Anti-aliasing | The type of anti-aliasing used to reduce the appearance of jagged edges in the scene. |
Depending on the used render pipeline, this node can also provide additional output types when the corresponding ports are connected to other nodes. The following table describes the support and cost of each additional output type in each render pipeline.
| Built-In | HDRP | URP | |
|---|---|---|---|
| Matte | ✔️ with an extra blit op | ✔️ with an extra blit op and Depth's Full Screen Custom Pass |
✔️ with two extra blit ops. |
| Depth | ✔️ | ✔️ with a FullScreen Custom Pass | ✔️ with an extra blit op. |
| Normals (View Space) |
✔️ with an extra full render | ✔️ with a FullScreen Custom Pass | ✔️ with an extra full render |
| UVs | ✔️ with an extra full render | ✔️ with an extra full render | ✔️ with an extra full render |
Additionally, Render node use the following setup in each render pipeline.
| Built-In | HDRP | URP | |
|---|---|---|---|
| HDR | Follows Use HDR property in GraphicsSettings and Allow HDR in Camera component | Always enabled | Follows HDR settings in Universal Render Pipeline Asset and Allow HDR in Camera component |
Render Texture
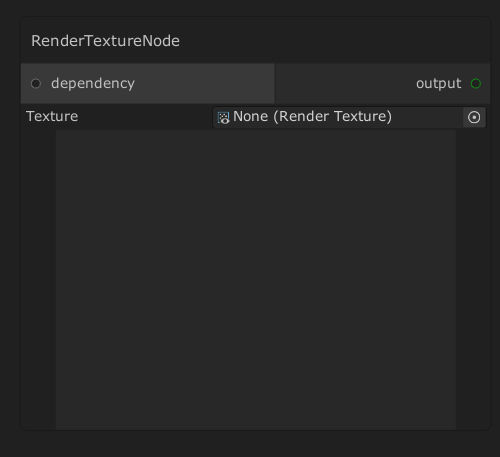
This node outputs the contents of a render texture.
If the render texture is dependent on another node in the graph,
the dependency port can be used to make sure this node is processed after the dependee.
Selection Group Color Render
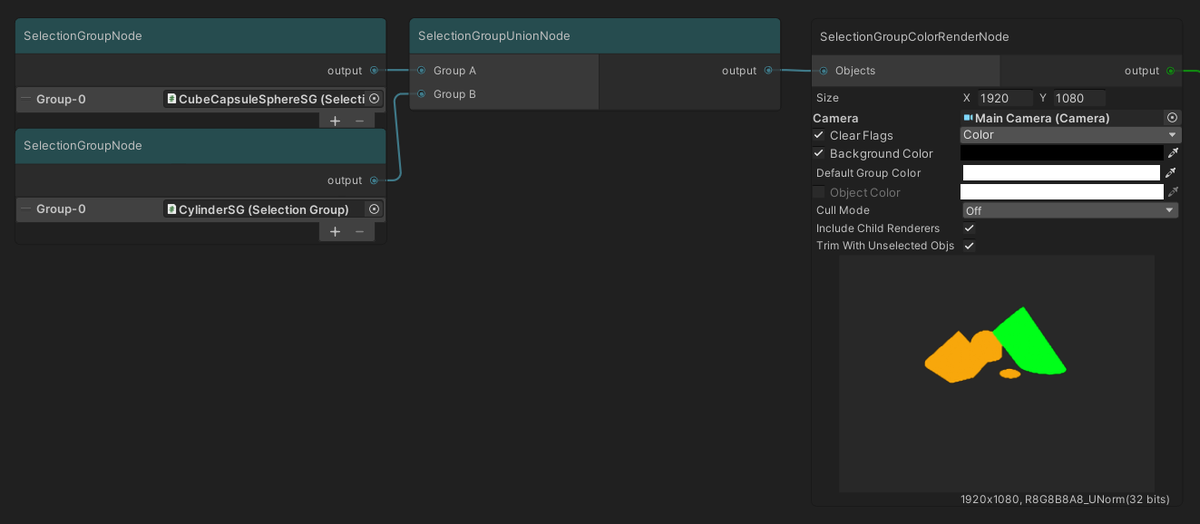
Renders objects with the colors of the
selection groups
to which the objects are assigned.
By default, this node will render all objects,
and the objects port can be used to render only selected objects.
| Properties | Description |
|---|---|
| Size | The target resolution size. |
| Camera | The camera to used for rendering. |
| Clear Flags | Override the clear flags of the camera. |
| Background Color | Override the background color of the camera. |
| Default Group Color | The color for rendering objects not assigned in any group. |
| Object Color | If checked, the node will use this color to render objects instead of using selection group colors. |
| Cull Mode | Backface culling mode. |
| Include Child Renderers | Render the children of the selected GameObjects or not. |
| Trim With Unselected Objs | Let unselected objects trim rendered objects by using the depth buffer. |
Shadow Render
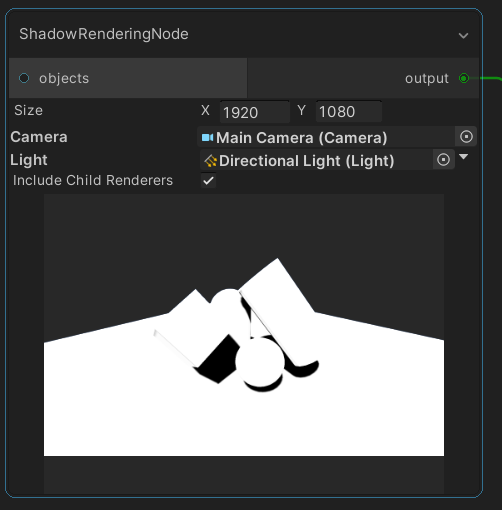
Outputs the screenspace shadow map generated by Unity
when rendering a group of objects with a single light.
By default, this node will use all objects,
and the objects port can be used to render only selected objects.
The generated shadow is affected by the following properties:
- the LightShadow settings of the input light.
- the shadow quality settings.
Currently, Shadow Rendering Node only outputs the shadows of a directional light.
Solid Color
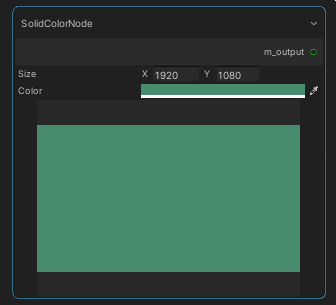
Generates a solid color texture.
Spherical Gradient
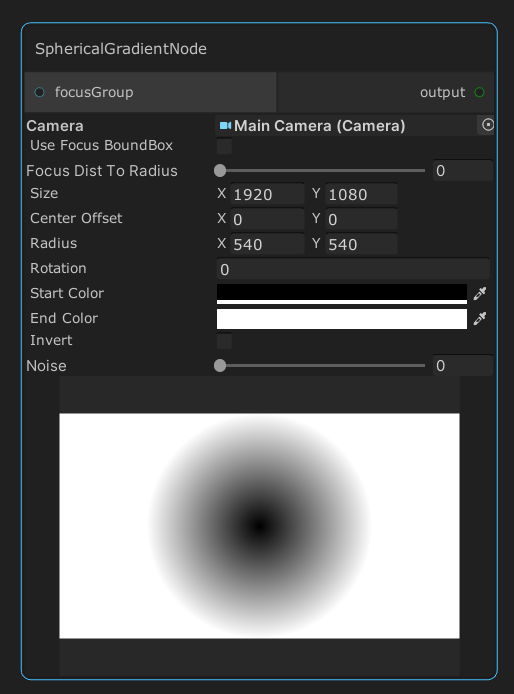
Generates a spherical gradient texture.
Spline Mask
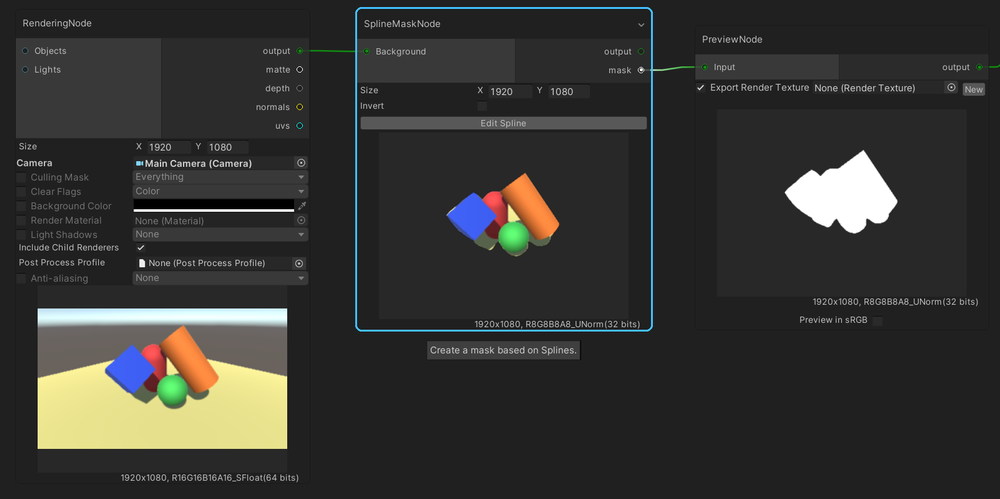
Outputs a mask and a masked background based on one or more Bezier Spline curves.
| Properties | Description |
|---|---|
| Size | The target resolution size. |
| Invert | Inverts the mask. |
Click on the Edit Spline button to open the Spline Mask Editor window of the node for editing the splines.
Stable Diffusion Txt2Img
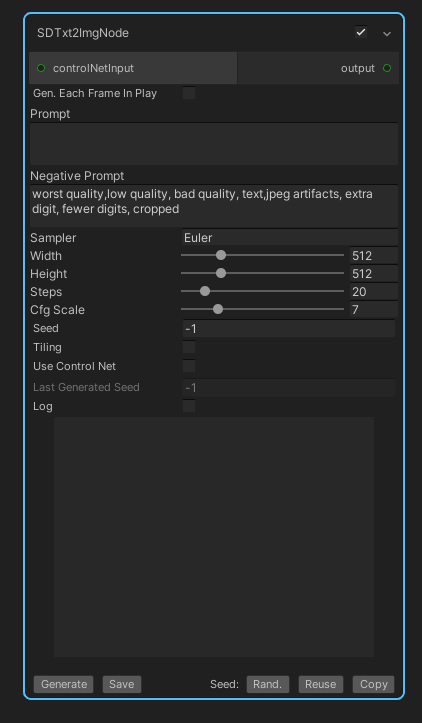
This is an experimental node that uses Stable Diffusion, and most of the properties in this node reflect the properties in Stable Diffusion Web UI.
| Properties | Description |
|---|---|
| Generate Each Frame In Play | Generates an image every frame in Play Mode. |
| Use Control Net | Use Control Net or not. This will open up additional controls when enabled. |
| Log | Logs requests to and responses from Stable Diffusion Web UI. |
The buttons at the bottom of the node have the following functionalities:
| Button | Functionality |
|---|---|
| Generate | Generate an image manually. |
| Save | Save the generated image. |
| Rand. | Randomize the seed for generating an image. |
| Reuse | Reuse the last seed in the next generation. |
| Copy | Copy the last used seed to clipboard. |
Please refer to Stable Diffusion Integration for more details.
Stable Diffusion Img2Img
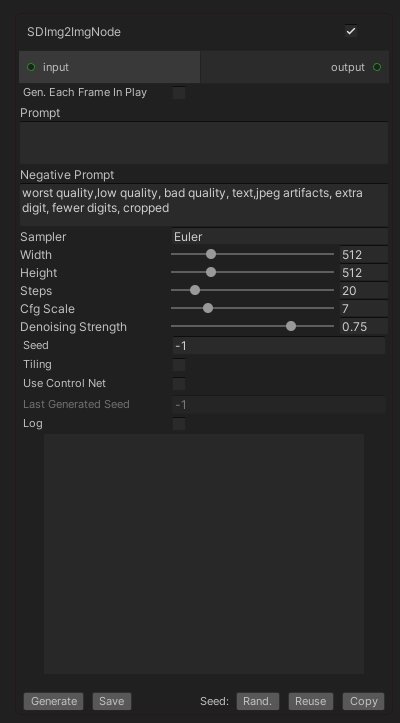
This is an experimental node that uses Stable Diffusion, and most of the properties in this node reflect the properties in Stable Diffusion Web UI.
| Properties | Description |
|---|---|
| Generate Each Frame In Play | Generates an image every frame in Play Mode. |
| Use Control Net | Use Control Net or not. This will open up additional controls when enabled, and the incoming value in the input port will be passed to Control Net. |
| Log | Logs requests to and responses from Stable Diffusion Web UI. |
The buttons at the bottom of the node have the following functionalities:
| Button | Functionality |
|---|---|
| Generate | Generate an image manually. |
| Save | Save the generated image. |
| Rand. | Randomize the seed for generating an image. |
| Reuse | Reuse the last seed in the next generation. |
| Copy | Copy the last used seed to clipboard. |
Please refer to Stable Diffusion Integration for more details.
Streaming Image Sequence
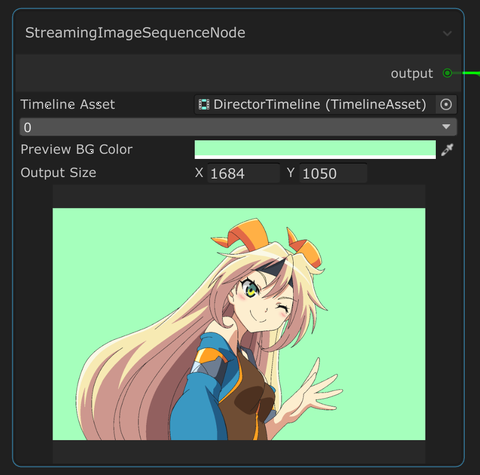
Retrieves the current active frame of Streaming Image Sequence.
Subtract
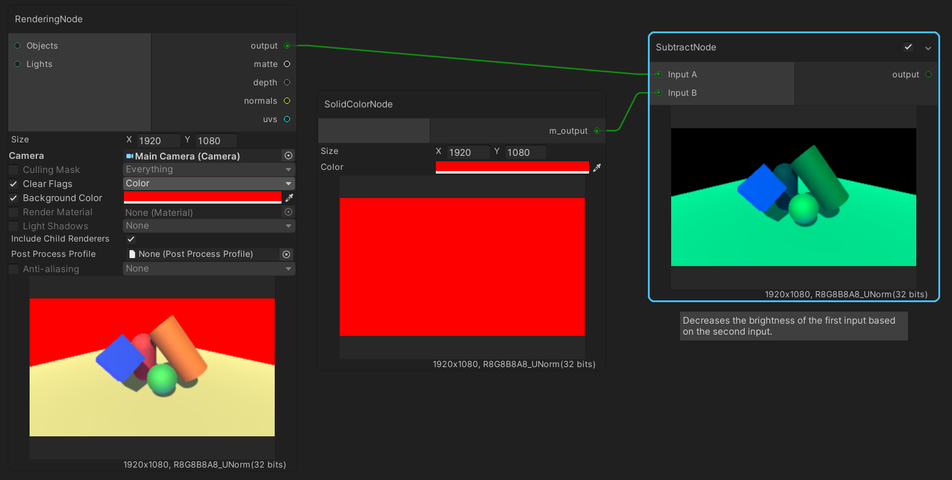
Decreases the brightness of the first input based on the second input.
This is the same as Subtract mode in Blend node.
Texture2D
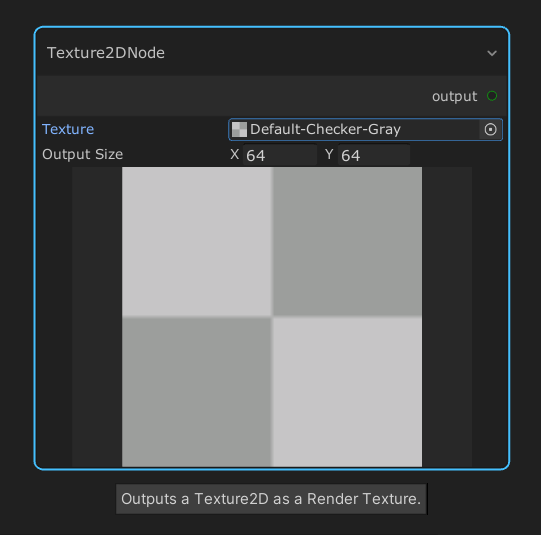
Allows a simple 2D texture to be inserted and used in the graph.
Toon ClipMask Render
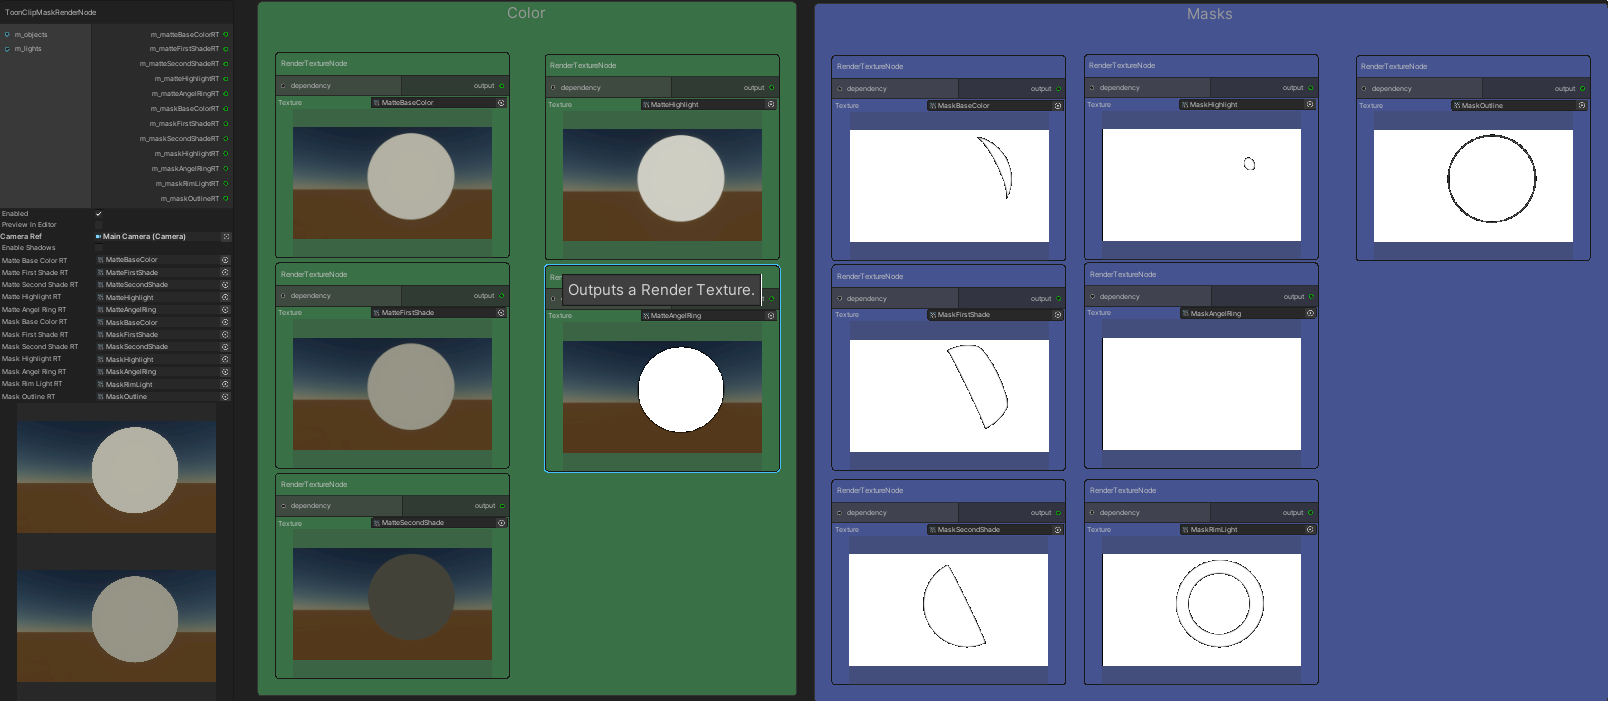
Outputs color layers and mask layers of the final Unity Toon Shader output
into multiple render textures which are assigned to the node.
Unity Toon Shader
is required to use this node, and currently, this node only works for HDRP.
This node is disabled by default in Edit Mode, because a separate render of the same set of objects is needed for each render texture, which can cause very slow performance.
To enable it in Edit Mode, check the Preview in Editor checkbox.
In addition, we can improve the performance of this node by previously assigning RenderTexture assets to the appropriate fields at the bottom of the node, which correspond to the required outputs.
Note:
- This node is experimental. Specifications may change in the future.
- Feather values (blur values) are not reflected in each color or mask.
Transform
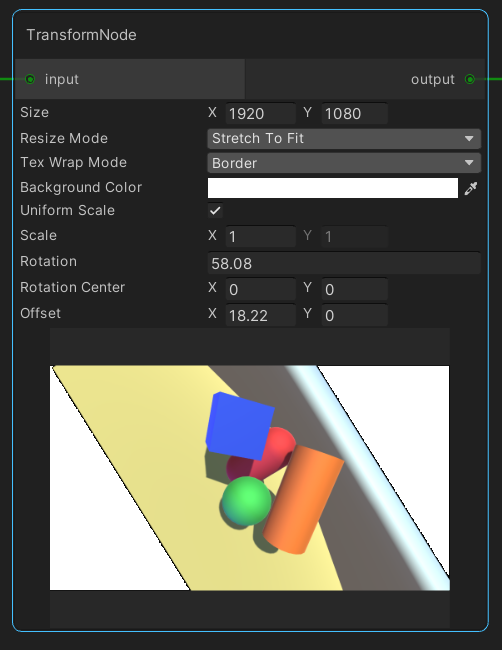
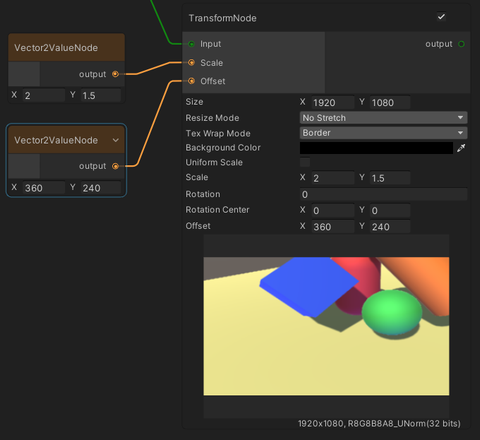
This node applies 2D transforms to the input image, allowing for scrolling and zooming effect.
| Parameters | Description |
|---|---|
| Size | The target resolution size. |
| Tex Wrap Mode | Similar to TextureWrapMode, with additional Border option. Border: makes the texture edge pixels use the specified background color when outside of of 0..1 range. |
| Background Color | The background color outside texture edge pixels. Only used when Tex Wrap Mode is set to Border. |
| Resize Mode | The texture resize mode when the target resolution size is different from the input resolution size. |
| Uniform Scale | Apply uniform scale (force y-scale to equal x-scale). |
| Scale | The scale. |
| Rotation | The rotation in degrees. |
| Rotation Center | The center point of the rotation in pixels. (0,0) is the center of the texture. |
| Offset | The translation. |
The order of the 2D transformation is Scale * Rotation * Translation.
Vertex Color Render
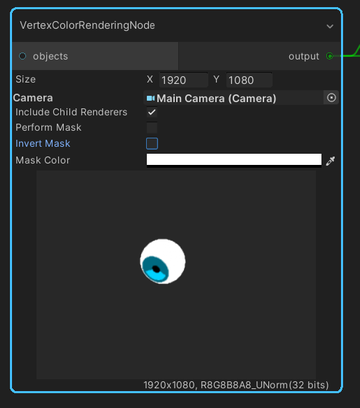
Renders a group of objects using their vertex colors with a specified camera.
By default, all objects in the scene are rendered.
| Parameters | Description |
|---|---|
| Include Child Renderers | Render the children of the selected GameObjects or not. |
| Perform Mask | If enabled, only output pixels which colors match the Mask Color. |
| Invert Mask | Invert the output pixels. Only applicable when Perform Mask is enabled. |
| Mask Color | The color of the mask. Only applicable when Perform Mask is enabled. |
Waifu2x
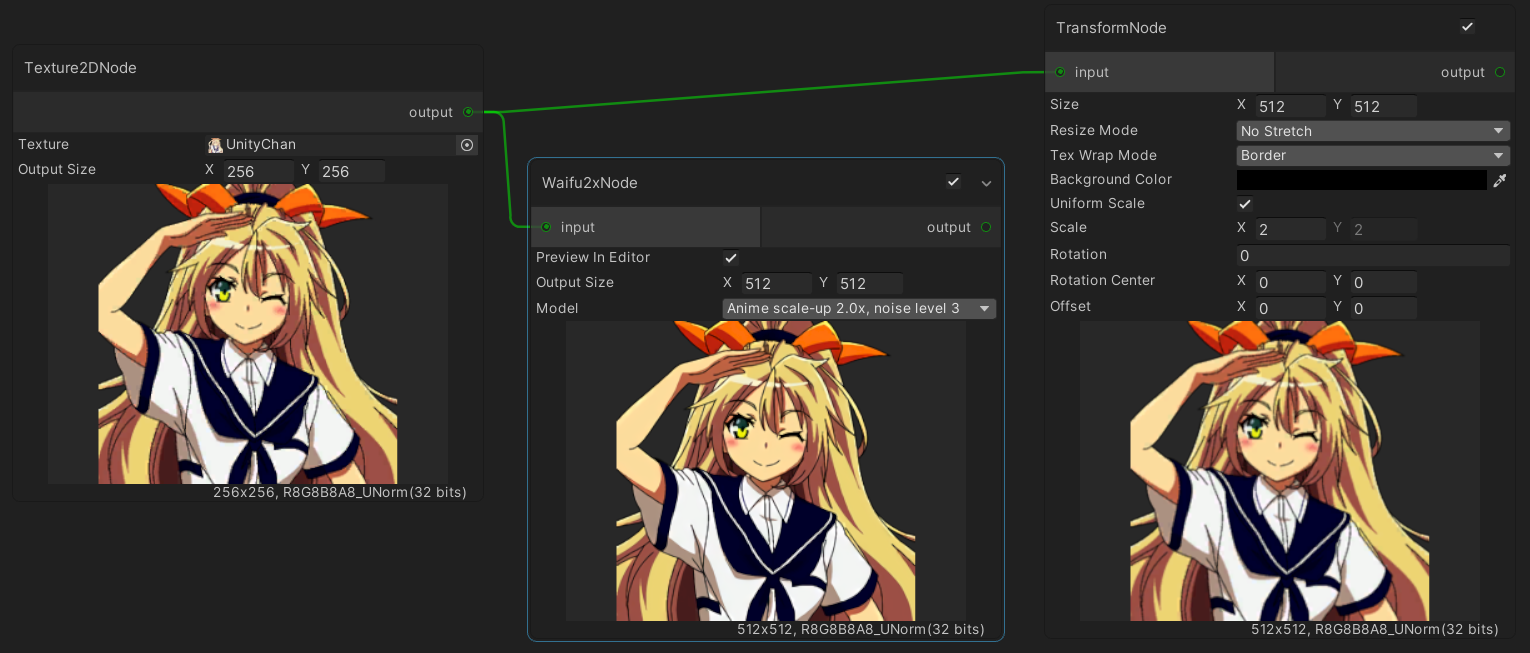
Upscale an image while reducing noise using Waifu2x with Unity Barracuda neural network inference library.
| Parameters | Description |
|---|---|
| Preview in Editor | Enable/disable the node in edit mode. |
| Output Size | The target resolution size. |
| Model | The waifu2x model to apply. Refer to waifu2x-caffe for more details. |
Value Nodes
Nodes to assign values to the properties of other nodes which have been added as input ports.
Abs Value
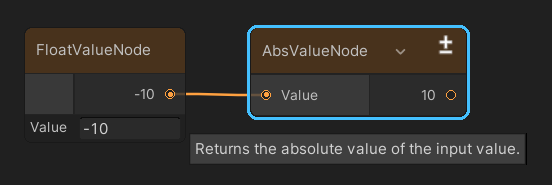
Returns the absolute value of the input value.
ACos Value

Returns the arc-cosine of the input value.
Add Value
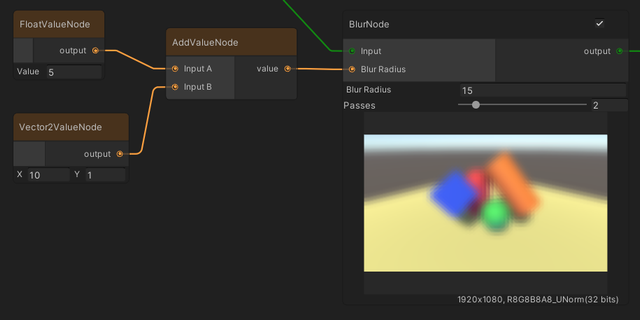
Adds two float, Vector2, Vector3, Vector4, or Color operands.
ASin Value

Returns the arc-sine of the input value.
ATan Value
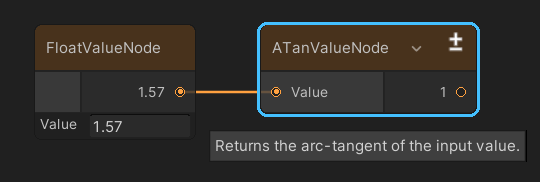
Returns the arc-tangent of the input value.
Bool Value
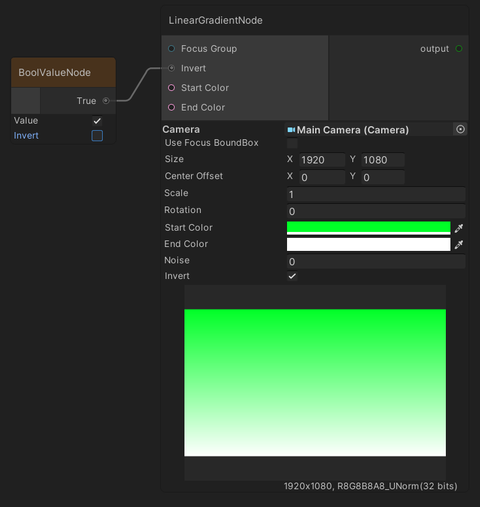
Outputs a boolean value.
Ceil Value
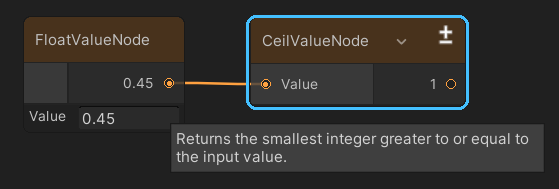
Returns the smallest integer greater to or equal to the input value.
Clamp Value
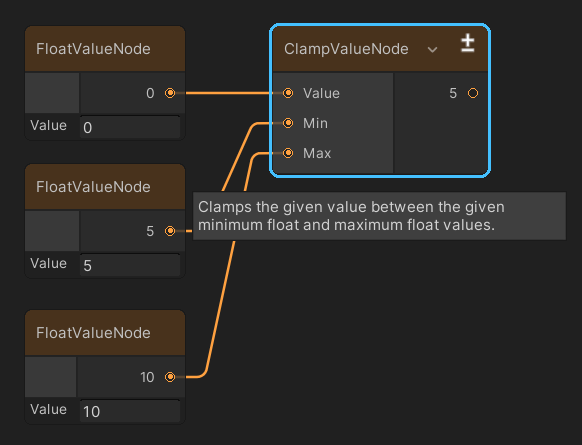
Clamps the given value between the given minimum float and maximum float values.
See Mathf.Clamp for more details.
Clamp01 Value

Clamps value between 0 and 1 and returns value.
See Mathf.Clamp01 for more details.
Color Value
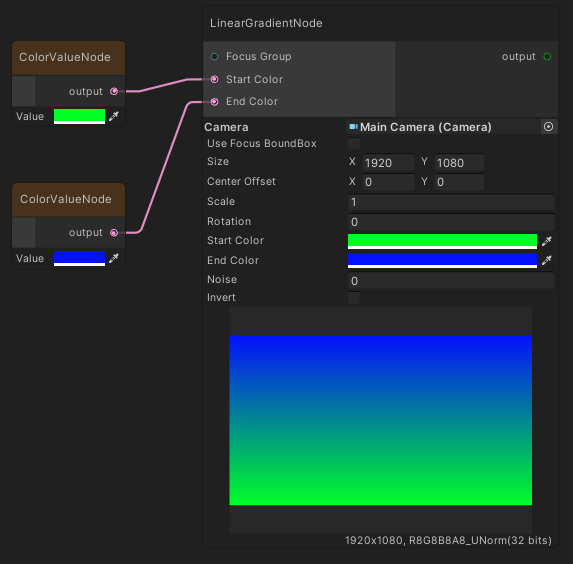
Outputs a Color value.
Cos Value

Returns the cosine of the input value.
See Mathf.Cos for more details.
Deg2Rad Value
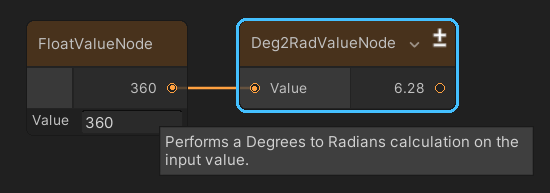
Performs a Degrees to Radians calculation on the input value.
Divide Value
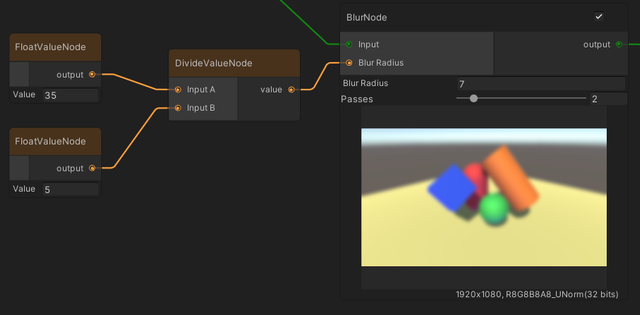
Divides a float, Vector2, Vector3, Vector4, or Color operand with another operand.
Float Value
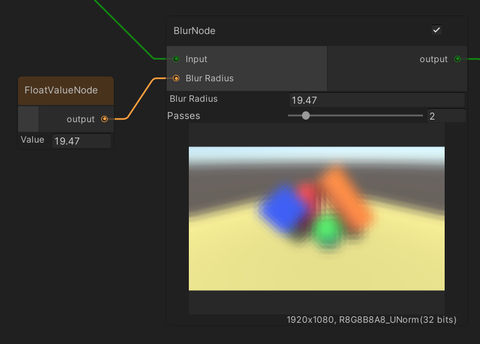
Outputs a float value.
Floor Value
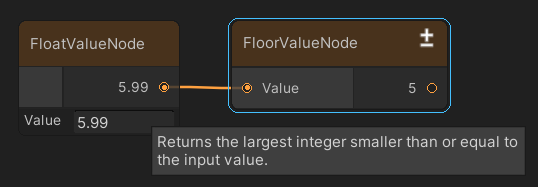
Returns the largest integer smaller than or equal to the input value.
Frac Value

Returns the fractional part of the input value.
Inverse Lerp Value
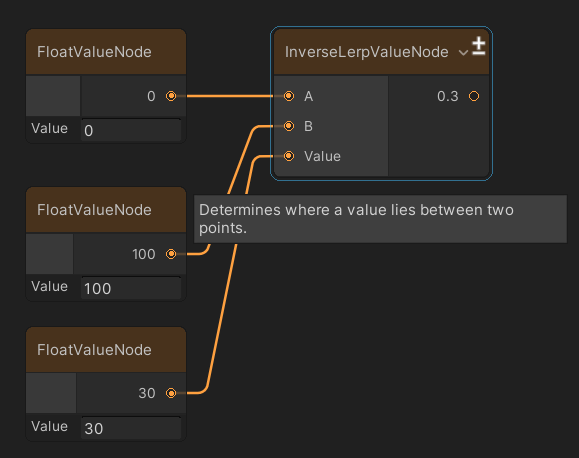
Determines where a value lies between two points.
See Mathf.InverseLerp for more details.
Lerp Value
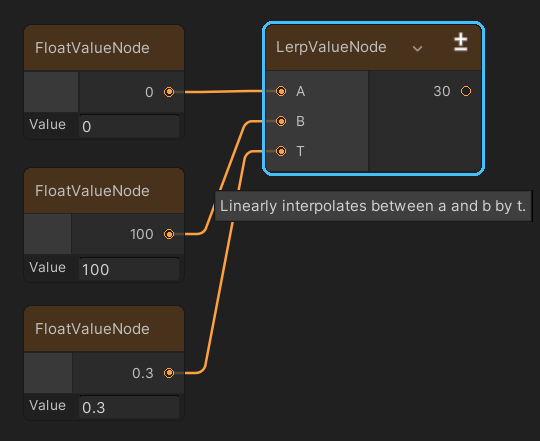
Linearly interpolates between a and b by t.
See Mathf.Lerp for more details.
Max Value
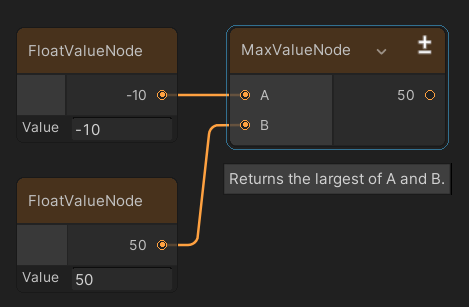
Returns the largest of A and B.
Min Value
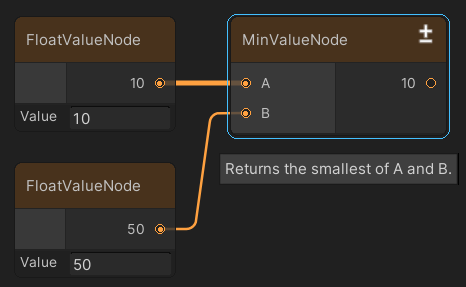
Returns the smallest of A and B.
Multiply Value
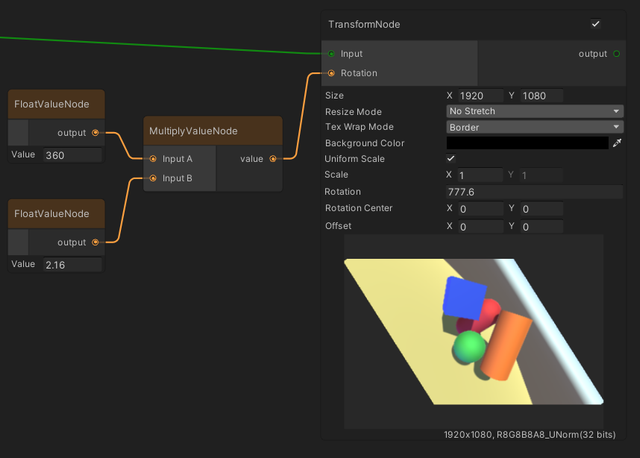
Multiplies two float, Vector2, Vector3, Vector4, or Color operands.
Pack Vector Value
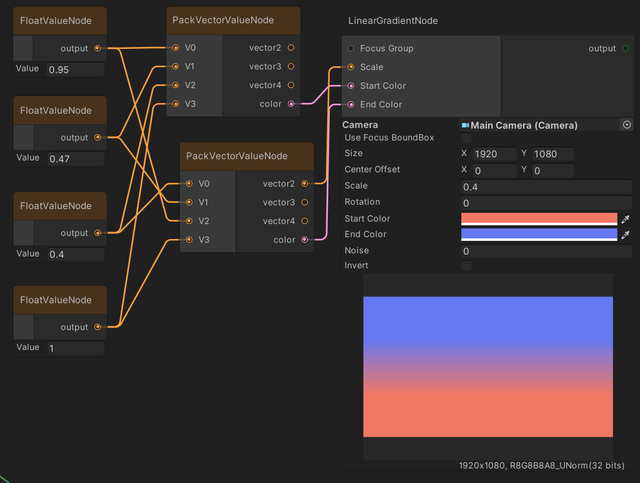
Packs float values to create Vector2, Vector3, Vector4, and Color values.
Perlin Noise Value
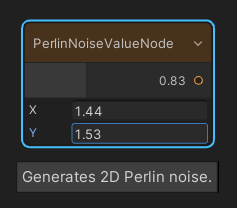
Generates 2D Perlin noise.
Ping Pong Value
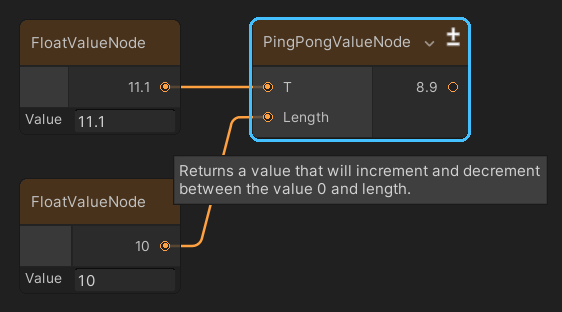
Returns a value that will increment and decrement between the value 0 and length.
See Mathf.PingPong for more details.
Power Value
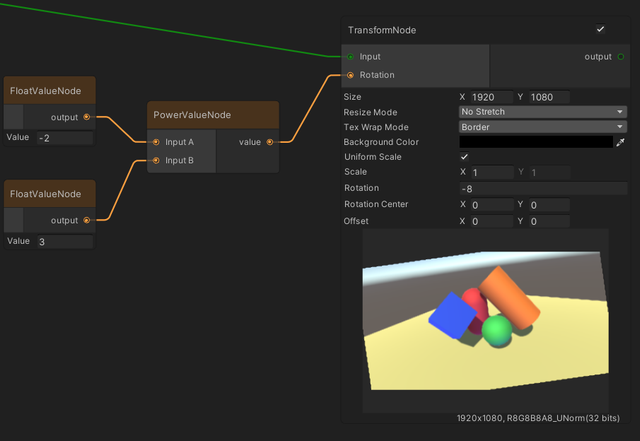
Returns the first Vector2, Vector3, Vector4, or Color operand raised to the power of the second operand.
Playable Director Time

Retrieves time values from PlayableDirector (Timeline).
| Parameters | Description |
|---|---|
| Director | The source PlayableDirector. Will be set to the first PlayableDirector found in the scene by default. |
| Mode | Outputs the time in seconds or frames. |
| Clip | Outputs the time relative to the clip if set, while following its gap extrapolation properties. |
Random Value
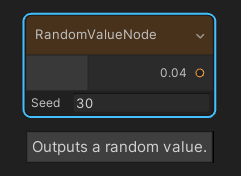
Outputs a random value based on an initialization seed.
Rad2Deg Value
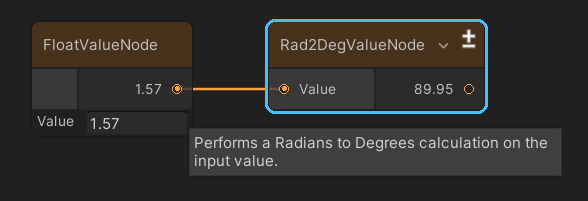
Performs a Radians to Degrees calculation on the input value.
Repeat Value
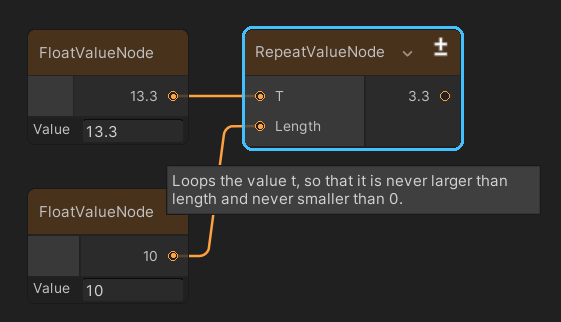
Loops the value t, so that it is never larger than length and never smaller than 0.
See Mathf.Repeat for more details.
Round Value

Returns the value rounded to the nearest integer.
See Mathf.Round for more details.
Sign Value
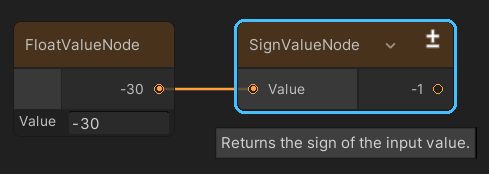
Returns the sign of the input value. See Mathf.Sign for more details.
Sin Value
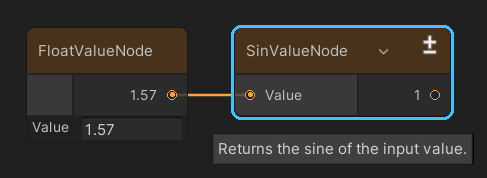
Returns the sine of the input value.
Smooth Step Value
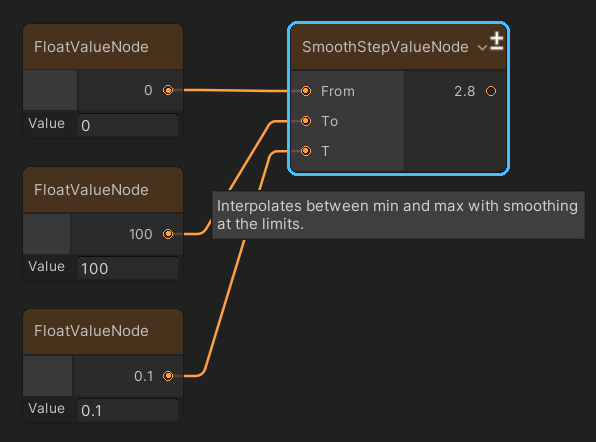
Interpolates between min and max with smoothing at the limits.
See Mathf.SmoothStep for more details.
Subtract Value
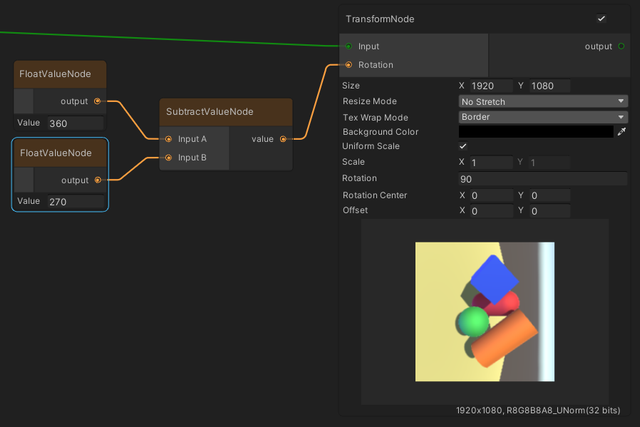
Subtracts one float, Vector2, Vector3, Vector4, or Color operand from another.
Tan Value

Returns the tangent of the input value in radians.
Unpack Vector Value
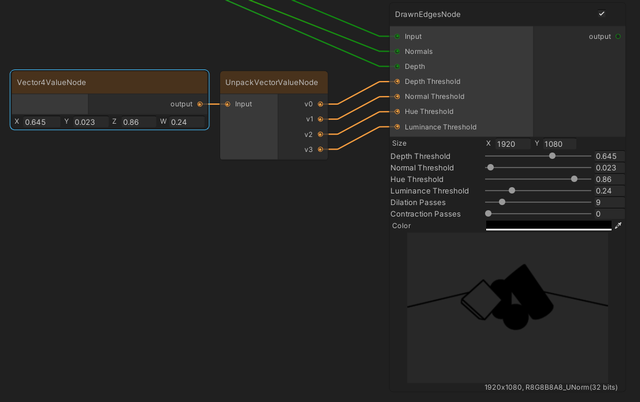
Unpacks Vector2, Vector3, Vector4, or Color into its individual float values.
Vector2 Value
Outputs a Vector2 value.
Vector3 Value
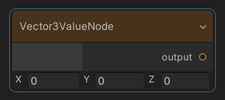
Outputs a Vector3 value.
Vector4 Value
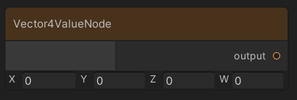
Outputs a Vector4 value.
GameObject Nodes
Nodes that output a set of GameObjects.
GameObject
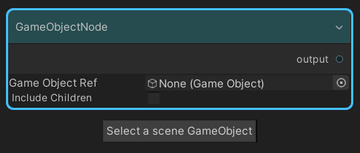
Outputs the selected GameObject.
| Parameters | Description |
|---|---|
| Include Children | Adds the children of the selected GameObject to the output if checked. |
GoQL
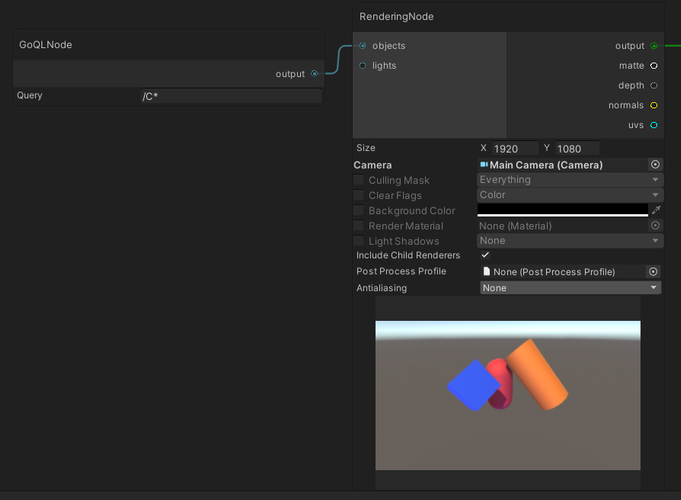
Outputs a set of GameObjects that satisfies the assigned GoQL.
Please refer to the
SelectionGroups document
for more details on GoQL.
Selection Group
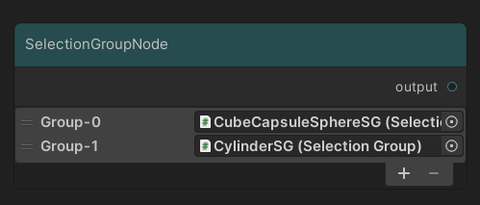
This node outputs the GameObject members of all Selection Groups added in the node.

In addition to the general way to create nodes, we can also drag a group from the Selection Groups window to the Visual Compositor window to create this node.
There are also other nodes for operating with Selection Groups:
Selection Group Difference
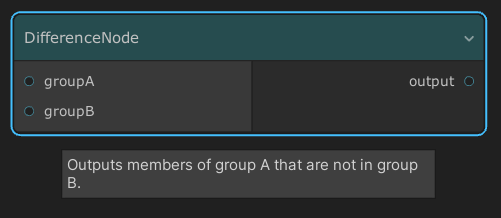
Receives two selection groups as inputs, then outputs the members of group A that are not in group B.
Selection Group Intersection
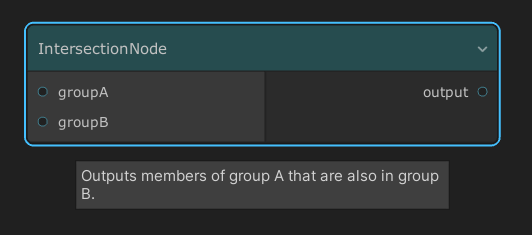
Receives two selection groups as inputs, then outputs the group members which are common to both groups.
Selection Group Union
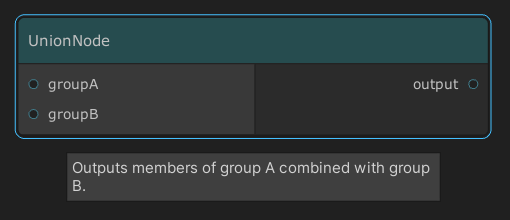
Combines all objects from two selection groups into one collection.
Organize Nodes
Nodes to organize the graph.
Comment
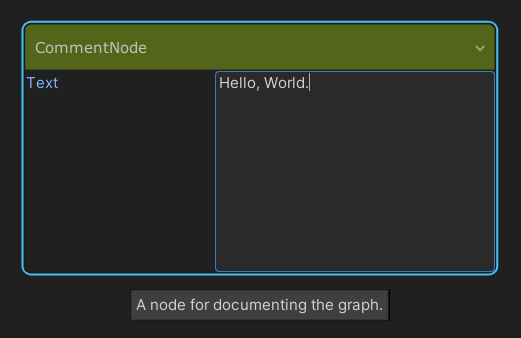
Adds a text label into the graph, which is used for documentation.
Group
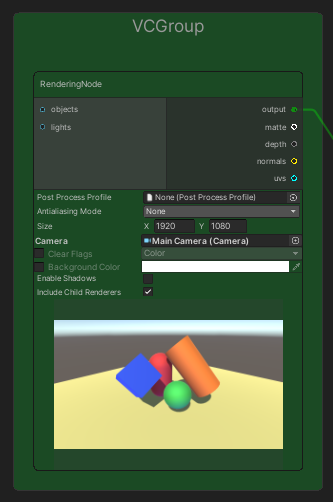
Groups nodes together with a title and a background color for organising the graph.
| Operation | Steps |
|---|---|
| Add to a group | Drag and drop a node on top of the group. |
| Remove from a group | Do one of the following: 1. Hold Shift and drag the node out of the group. 2. Right-click on the node and select "Remove from Group". |
Junction
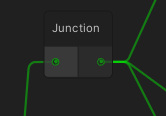
Passes input directly to output.