Getting Started with Unity Toon Shader
The Unity Toon Shader (UTS) provides extensive controls for professional cel-shading across the Built-in Render Pipeline, URP, and HDRP. This page walks through the key concepts of cel-shading step by step.
Follow these steps for simple cel-shading:
- Put a directional light in the scene.
- Create materials for cel-shading and set the appropriate shader.
- Set up three basic colors.
- Determine the character's visual style.
- Set up the outline.
After mastering the basics, explore:
- Advanced techniques such as:
- More options for stunning professional cel-shading to push the look further.
Put a directional light in the scene
To make cel-shading work, you need to place at least one directional light in the scene. Start with a neutral white light so you can see how UTS-specific settings influence the shading without additional color shifts.
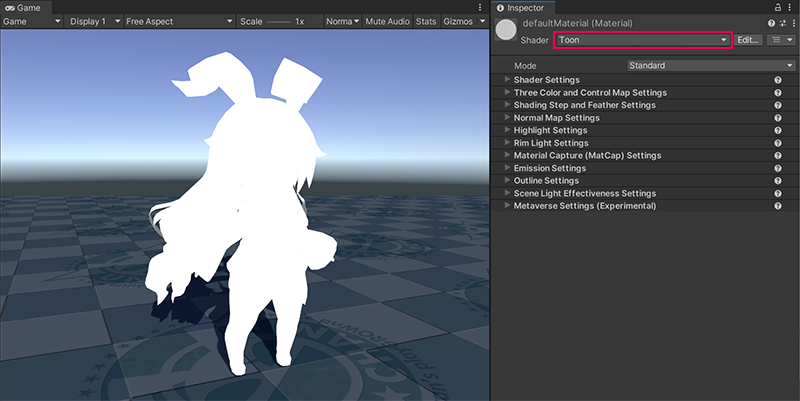
Creating a new material and applying Unity Toon Shader
Start by creating a material for your mesh and then assign the UTS shader:
- Create a new material and assign it to the mesh you plan to shade.
- In the Inspector, choose Toon > Toon or Toon > Toon (Tessellation) from the Shader drop-down. These shaders work on all supported render pipelines: Built-in Render Pipeline, URP, and HDRP.
- Once assigned, the model will render as a flat silhouette until you provide the texture maps that define the cel-shaded look.
The directional light will no longer control shading in the usual way because UTS overrides the lighting response according to artist-driven parameters. UTS also allows you to decide whether and how the directional light color influences materials. See Scene Light Effectiveness Settings for guidance.
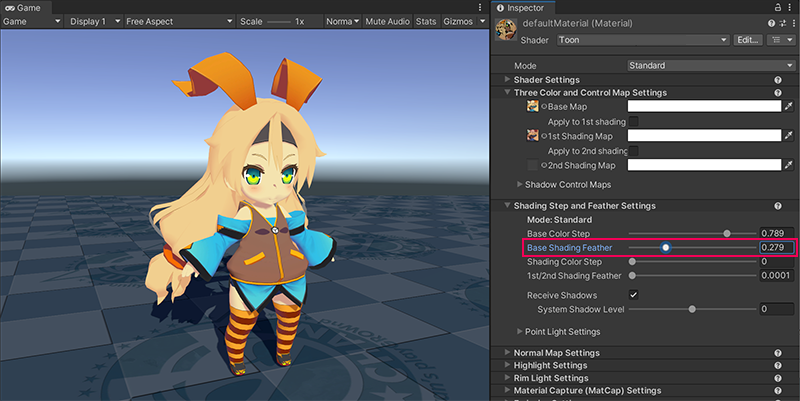
Setting up three basic colors
UTS renders meshes in three conceptual regions:
- Base Map for lit areas
- 1st Shading Map for lighter shadows, and
- 2nd Shading Map for the darkest tones.
For basic cel-shading you can focus on the Base Map and 1st Shading Map. The Three Color Map and Control Map Settings page explains the controls in depth.
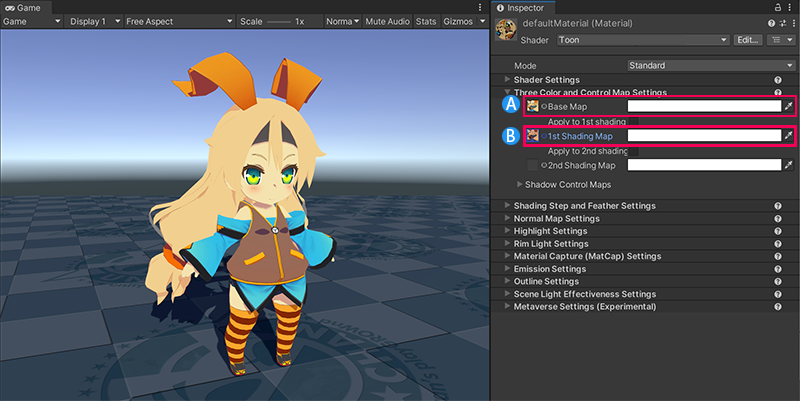
Follow these steps:
- Author or import textures for the Base Map and 1st Shading Map. They can be separate textures or the same texture colored differently.
- Assign the Base Map to define the fully lit colors.
- Assign the 1st Shading Map to introduce a darker tone that UTS will show based on your shading step settings.
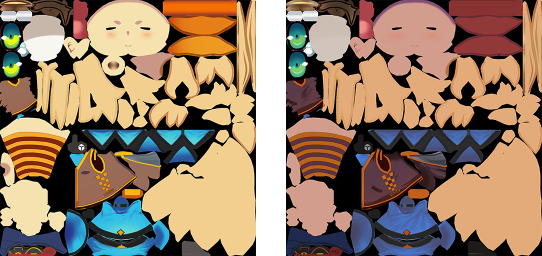
Left: an example Base Map. Right: an example 1st Shading Map.
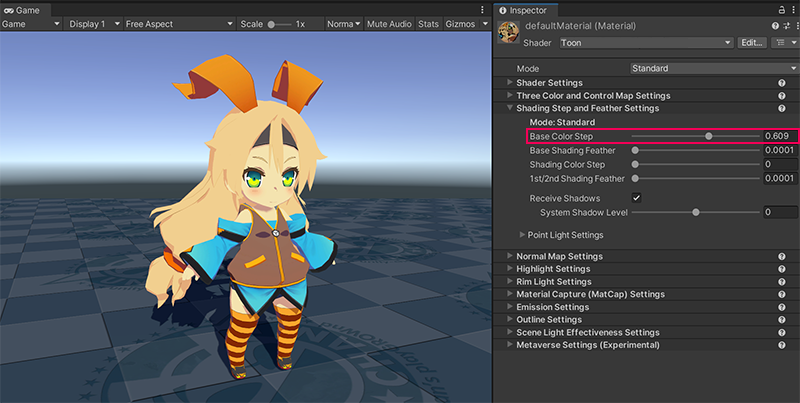
Adjusting the edges of the three basic color regions
The borders between your color regions drive the perceived style of the character. Shading Steps and Feather Settings let you adjust the position of those borders and whether they are sharp or blended.
Follow these steps:
- Increase Base Color Step so the 1st Shading Map becomes visible and the contrast between lit and shadowed regions matches your intent.
- Use Base Shading Feather to control how crisply the regions transition. Lower values create graphic, posterized shading, while higher values blend the regions.
Set up the outline
Outline is another important factor that determines the animation style. Consider the outline color relative to your background and adjust the thickness to reinforce the style. The Outline Settings page details every property.
Drag the slider to compare the images.
Advanced techniques
Now that you've learned basic cel-shading, you can refine specific features of the character. The following examples illustrate how UTS helps solve common cel-shading challenges.
Eliminating outlines around eyes
Outlines around delicate facial features can be distracting. Apply an Outline Width Map to control outline thickness per texel so you can taper or remove the stroke where needed.

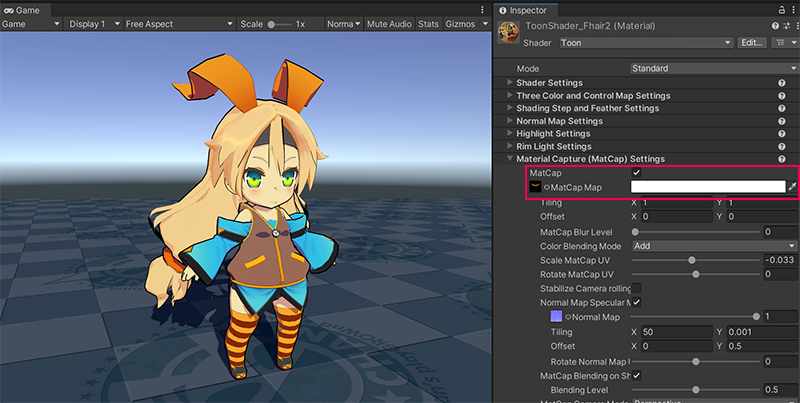
Adding luster to hair
Flat lighting can make hair feel lifeless. Combine the Highlight, Angel Ring, and Material Capture (MatCap) features to add dimensionality. In this example, we'll apply a MatCap map onto the hair.
More options for stunning professional cel-shading
Once you're comfortable with the steps above, experiment with these additional features to push the look even further:
- Emission for glowing elements such as eyes, screens, or weapons.
- Normal Map to control the bumpiness of the material.
- Rim Light to highlight the edges of meshes.