Create an auto tile
An auto tile lets you paint an environment using a spritesheet of floor layouts like corners and corridors. Use an auto tile to paint 2D tile environments without setting up rule tiles
Follow these steps:
- Create a spritesheet with your floor layout sprites.
- Import the spritesheet into an auto tile asset.
- Indicate which sprite corresponds to which floor layout by drawing masks onto the texture.
Create a texture layout for auto tile
Create a single spritesheet that contains a sprite for each floor layout. The sprites must be square.
Use either of the following layouts:
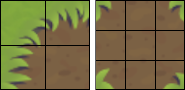
- For a simple environment that includes only corners and corridors, create sprites that represent 2 × 2 layouts of floors and walls.
- For a more complex environment that includes crossroads and T-junctions, create sprites that represent 3 × 3 layouts of floors and walls.
For more information and examples of both layouts, refer to Auto Tile Inspector window reference.
Create an auto tile asset
Follow these steps:
Import your texture into Unity and use the Slice settings of the Sprite Editor window to cut out the sprites as normal. For more information, refer to Cut out sprites from a texture.
In the Project window, right-click and select Create > 2D > Tiles > Auto Tile to create a new auto tile asset.
Set Default Sprite to a sprite that has all floor and no walls.
Set Mask Type to Mask_2x2 or Mask_3x3 depending on your texture.
In the Used Textures section, select Add.
Drag the spritesheet you created from the Project window to the Texture 2D property.
Indicate the floor layouts
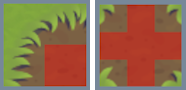
When you drag in the spritesheet, Unity displays each sprite with a grey outline. To indicate which sprite is which floor layout, click on the sprite to draw red squares over the floor areas.
For example:
- If your texture has 2 × 2 floor layouts, draw an L shape of red squares for the layout that has a corner wall.
- If your texture has a 3 × 3 layout, draw a T shape of red squares for the layout that has a T-junction.
Note: The center square in a 3 × 3 layout enables and disables the rule.
For examples with all the possible floor layouts, refer to Auto Tile Inspector window reference.
If you create a rule that meets the same criteria as another mask, Unity displays the cell with a red outline. If you don't fix this, Unity uses the sprite closest to the top-left.
Paint with the auto tile
To paint with the auto tile, add it to a tile palette and paint your environment into the Scene view. For more information, refer to Create a tile palette.
Each tile you paint represents floor. Unity checks surrounding the tiles and paints the correct sprite to create a visual border around the floor.
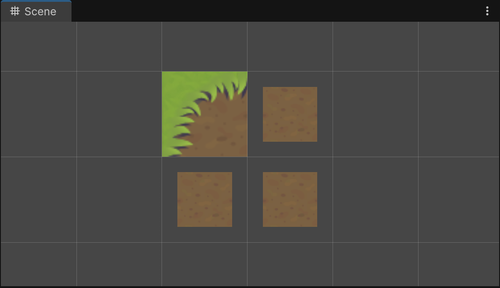
The Scene view after drawing with the example 2 × 2 auto tile. When you paint four tiles to represent a large square area of floor, Unity recognizes and uses the top-left corner sprite.
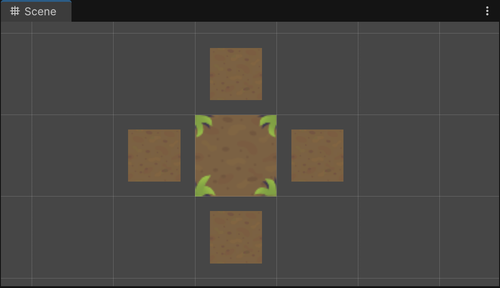
The Scene view after drawing with the example 3 × 3 auto tile. When you paint a crossroads floor, Unity recognizes and uses the crossroads sprite.
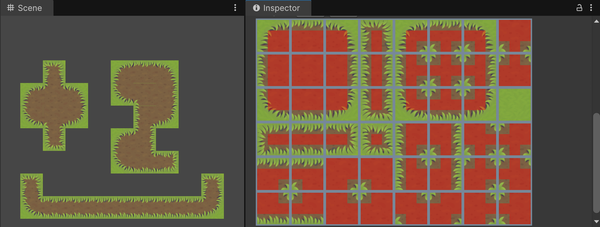
The Scene view with tiles painted using the full example on the right. The full example is a 3 × 3 auto tile texture with all 48 possible floor layouts, and the layout masks in red.