Create a rule tile
To change which tile Unity paints based on its surrounding tiles, create a rule tile. For example, you can create a rule tile that paints a specific sprite if ground is beneath.
Follow these steps:
In the Project window, right-click and select Create > 2D > Tiles > Rule Tile.
Select the type of rule tile that matches your tilemap. For example, select Rule Tile for a regular tilemap, or Isometric Rule Tile for an isometric tilemap.
Set Default Sprite to the sprite you want to customize. Drag the sprite in from the Project window or select the sprite picker.
In the Tiling Rules section, select Add (+) to add a new rule.
Use the 3 × 3 grid to set up what happens to neighboring tiles. For example, click the empty cell on the right to change it to a green arrow, which checks if the right-hand cell matches this rule tile.
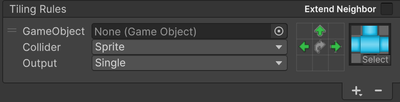
For more information, refer to Rule Tile Inspector window reference.
If all the neighbors meet the criteria, the rule matches and Unity applies the GameObject, Collider and Output properties.
In the sprite box, add a sprite for Unity to paint if the neighboring tiles match the rules.
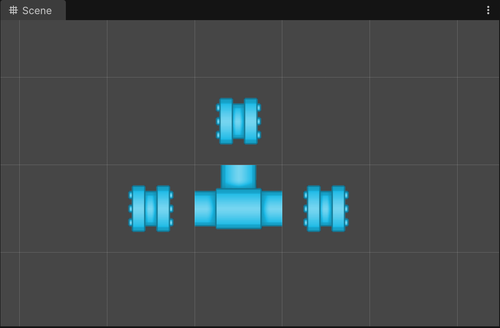
Add the tile to the tile palette as normal and paint it into the Scene view.
In the example, the rule paints the Default Sprite by default, but if it detects an existing rule tile to the right, it paints the sprite from the Tiling Rules section instead.
If you change the rules or sprites after you set up the rule tile, the rule tile updates the tilemap based on the new rules and sprites.
You can also detect and paint GameObjects instead of sprites. For more information, refer to Rule Tile Inspector window reference.
Optimize multiple rules
To optimize multiple rules, order the rules in the Tiling Rules section by how often you use them in your tilemap, starting with the most common rule. Unity checks each rule in turn, starting at the top.
Create variants of a rule tile
To create variants of a rule tile that use the same rules but different sprites, create a Rule Override Tile.
Follow these steps:
In the Project window, right-click and select Create > 2D > Tiles > Rule Override Tile.
In the Inspector window, set Tile to the rule tile you want to create a variant of.
Unity populates the Inspector window with the sprites and GameObjects the rule tile uses.
Set the sprites in the Override Sprite column to use different sprites. Leave a sprite empty to use the original sprite from the rule tile.
Add the tile to the tile palette as normal and paint it into the Scene view.
To preview the variant rule tile with both its rules and sprites, select the child asset of the rule override tile in the Project window.
To override both the sprites and the rules, create an Advanced Rule Override Tile instead.
Additional resources
- Sample projects
- 2D game art, animation, and lighting for artists
- How to create rule tiles in Unity on the Unity YouTube channel