Auto Tile Inspector window reference
Explore the properties and settings you use to paint an environment using a spritesheet of floor layouts.
For more information, refer to Create an auto tile.
| Property | Description |
|---|---|
| Default Sprite | Sets the sprite Unity paints if the surrounding tiles don't match any of the masks in the Used Textures section. |
| Default GameObject | Sets the prefab Unity adds if the surrounding tiles don't match any of the masks in the Used Textures section. Drag a prefab from the Project window to this property. You can't drag an existing instance of a GameObject from the Hierarchy window. |
| Tile Collider | Sets the shape Unity uses to check for collisions with the tile. The options are:
|
| Has Physics Shape | Checks whether the Sprite used has a physics shape. If not, Unity sets Tile Collider to None. |
| Mask Type | Sets the number of surrounding tiles Unity checks to identify a floor layout. The options are:
|
| Random | Randomly picks a sprite if multiple sprites have the same mask. Otherwise, uses the first sprite with the mask. |
| Used Textures | Sets the number of textures. |
| Textures | Displays the textures the auto tile uses. To select a texture, drag a texture from the Project window, or select the picker (⊙). |
| Add (+) | Adds a new texture. |
| Remove (-) | Removes the last texture in the list. |
| Load | Loads a mask template asset you saved with the Save button. |
| Save | Saves the masks as a template asset, so you can reuse the masks for another texture, for example another tilesheet with the same layout for a different level of your game. |
| Scale | Zooms the texture in the Inspector window. |
Texture
The texture area displays the texture, with a grey outline for each sprite in the texture. Click on a sprite to draw red squares that indicate the layout of the floor for that sprite. For example, if your texture has 2 × 2 floor layouts, draw an L shape of red squares for the layout that has a corner wall. For more information, refer to Create an auto tile.
Unity outlines tiles in red if they duplicate the same layout.
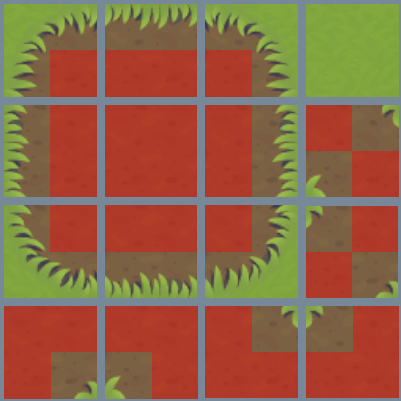
Example 2 × 2 layout
The following layout includes all 16 possible floor layouts if you set Mask Type to Mask_2x2. The red squares indicate the floor for each sprite, and the non-red squares indicate walls.
This example is adapted from the Auto Tile (3 × 3) package sample. For more information, refer to Sample projects.
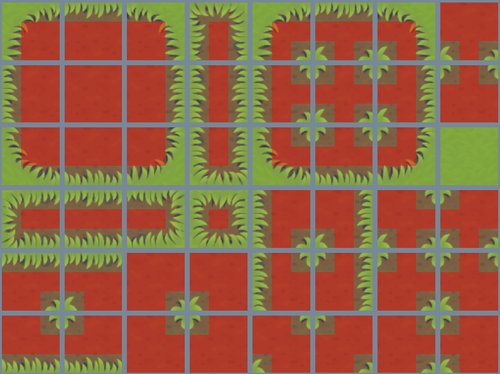
Example 3 × 3 layout
The following layout includes all 48 possible floor layouts if you set Mask Type to Mask_3x3. The red squares indicate the floor for each sprite, and the non-red squares indicate walls.
This example is from the Auto Tile (3 × 3) package sample. For more information, refer to Sample projects.