Bind to a UXML template
This example demonstrates how to set binding paths with UXML templates.
Example overview
The example uses UXML templates to create three toggles and binds them to the properties of a GameSwitchesAsset object.
You can find the completed files that this example creates in this GitHub repository.
Prerequisites
This guide is for developers familiar with the Unity Editor, UI Toolkit, and C# scripting. Before you start, get familiar with the following:
- UI Builder
- Visual TreeAn object graph, made of lightweight nodes, that holds all the elements in a window or panel. It defines every UI you build with the UI Toolkit.
See in Glossary - UXML
- USS
Create the GameSwitch asset
Create scripts to define the GameSwitch struct and a custom asset to hold properties of the GameSwitch struct.
- Create a project in Unity with any template.
- In your Project window, create a folder named
bind-uxml-templateto store all your files. - Create a C# script named
GameSwitchesAsset.cswith the following contents:
using System;
using UnityEngine;

[CreateAssetMenu(fileName = "GameSwitchAsset.asset", menuName = "GameSwitchAsset")]
public class GameSwitchesAsset : ScriptableObject
{
    public GameSwitch useLocalServer;
    public GameSwitch showDebugMenu;
    public GameSwitch showFPSCounter;

    // Use the Reset function to provide default values
    public void Reset()
    {
        useLocalServer = new GameSwitch() { name = "Use Local Server", enabled = false };
        showDebugMenu = new GameSwitch() { name = "Show Debug Menu", enabled = false };
        showFPSCounter = new GameSwitch() { name = "Show FPS Counter", enabled = true };
    }

    [Serializable]
    public struct GameSwitch
    {
        public string name;
        public bool enabled;
    }
}
Create the UXML template and files
Create a UXML template that you can use for each GameSwitch struct instance, and a UXML file that uses the template.
-
Create a UI Document named
game_switch.uxmlwith the following contents:<ui:UXML xmlns:ui="UnityEngine.UIElements" editor-extension-mode="False"> <ui:Box style="flex-direction: row;"> <ui:Toggle binding-path="enabled"/> <ui:TextField binding-path="name" readonly="false" style="flex-grow: 1;"/> </ui:Box> </ui:UXML> Create a UI Document named
game_switches_editor.uxml.Double-click
game_switches_editor.uxmlto open it in UI Builder.Drag
game_switch.uxmlinto the Hierarchy panel three times to create three instances.In the Inspector panel for the first instance, enter
useLocalServerin the Editor Binding Path field.In the Inspector panel for the second instance, enter
showDebugMenuin the Editor Binding Path field.In the Inspector panel for the third instance, enter
showFPSCounterin the Editor Binding Path field.Save the UXML file. The finished UXML file looks like the following:
<UXML xmlns="UnityEngine.UIElements" xmlns:ue="UnityEditor.UIElements" editor-extension-mode="False">
    <Template name="switch" src="game_switch.uxml?"/>
    <Instance template="switch" binding-path="useLocalServer"/>
    <Instance template="switch" binding-path="showDebugMenu"/>
    <Instance template="switch" binding-path="showFPSCounter"/>
</UXML>
Create the custom Editor window
Create a custom Editor window that uses the UXML file and binds to the GameSwitchesAsset asset.
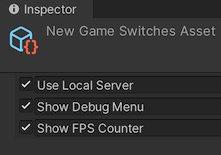
From the menu, select Assets > Create > UIToolkitExamples > GameSwitches to create a new asset named
GameSwitchesAsset.asset.Create a folder named
Editor.-
In the Editor folder, create a C# script named
GameSwitchesEditor.cswith the following contents:using System.Collections.Generic; using UnityEditor; using UnityEngine; using UnityEngine.UIElements; using UnityEditor.UIElements; public class UXMLTemplateBindingExample : EditorWindow { [SerializeField] private VisualTreeAsset m_VisualTreeAsset = default; [SerializeField] private GameSwitchesAsset gameSwitch; [MenuItem("UI Toolkit Examples/UXML Template Binding Example")] public static void ShowExample() { UXMLTemplateBindingExample wnd = GetWindow<UXMLTemplateBindingExample>(); wnd.titleContent = new GUIContent("UXML Template Binding Example"); } public void CreateGUI() { VisualElement root = rootVisualElement; m_VisualTreeAsset.CloneTree(root); root.Bind(new SerializedObject(gameSwitch)); } } In the Inspector window of
GameSwitchesEditor.cs, do the following:Set Visual Tree Asset to
game_switches_editor.uxml.Set Game Switch to
GameSwitchesAsset.asset.
Test the binding
- From the menu, select UI Toolkit Examples > UXML Template Binding Example to open the custom Editor window.
- Update the toggles and text fields in the Inspector and Editor windows. Changes in one place update the other.