Introduction to screen space ambient occlusion in URP
Screen space ambient occlusion darkens creases, holes, intersections and surfaces that are close to each other in real time. In the real world, nearby geometry blocks some of the ambient light that reaches these areas, so they appear darker. URP calculates the effect from the depth and normal information of the geometry that’s visible on screen, so only on-screen geometry contributes to the occlusion.
The effect works with every shader that the Universal Render Pipeline (URP) provides, as well as any custom opaque Shader Graphs you create.
Note: Ambient occlusion works independently from the post-processing effects in URP. You add the Screen Space Ambient Occlusion Volume Override from the Lighting category rather than from the post-processing categories.
The following images show the same scene with ambient occlusion disabled, with ambient occlusion enabled, and with only the ambient occlusion texture visible.
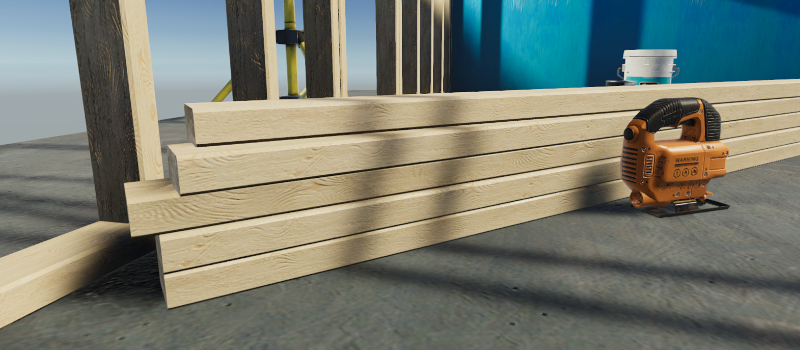
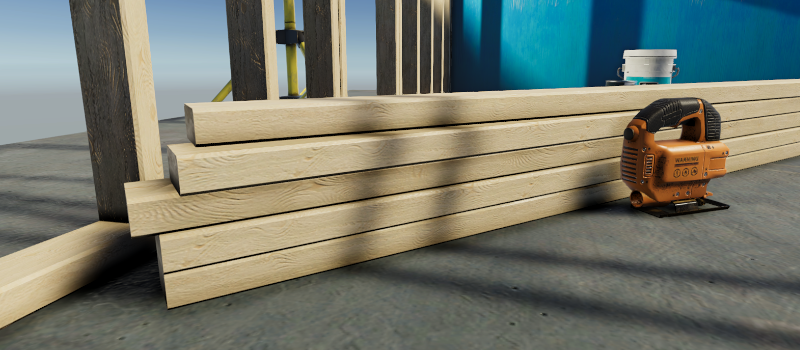
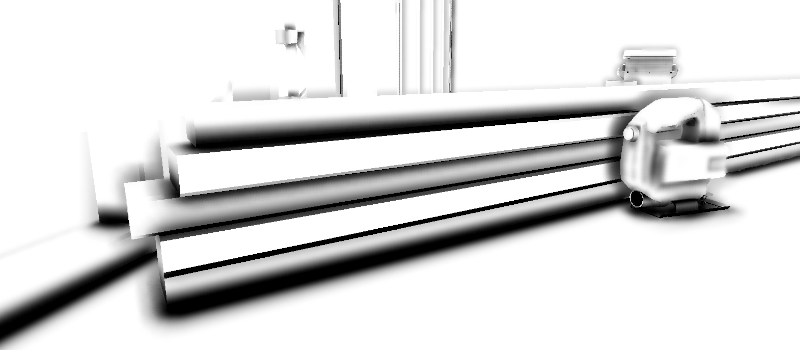
Ambient occlusion modes
URP provides two ambient occlusion algorithms, which you select with the Mode property of the Volume Override. Both are screen space techniques. Ground Truth Ambient Occlusion (GTAO) is the default for new Volume Overrides and produces higher quality results. Screen Space Ambient Occlusion (SSAO) is faster to render but produces noisier results.
For a comparison of the two modes and guidance on which to use, refer to Ambient occlusion modes in URP.
Falloff Distance and Direct Lighting Strength examples
The following animation shows how the ambient occlusion texture changes as the Falloff Distance value increases, so that occlusion stays visible further from the camera.
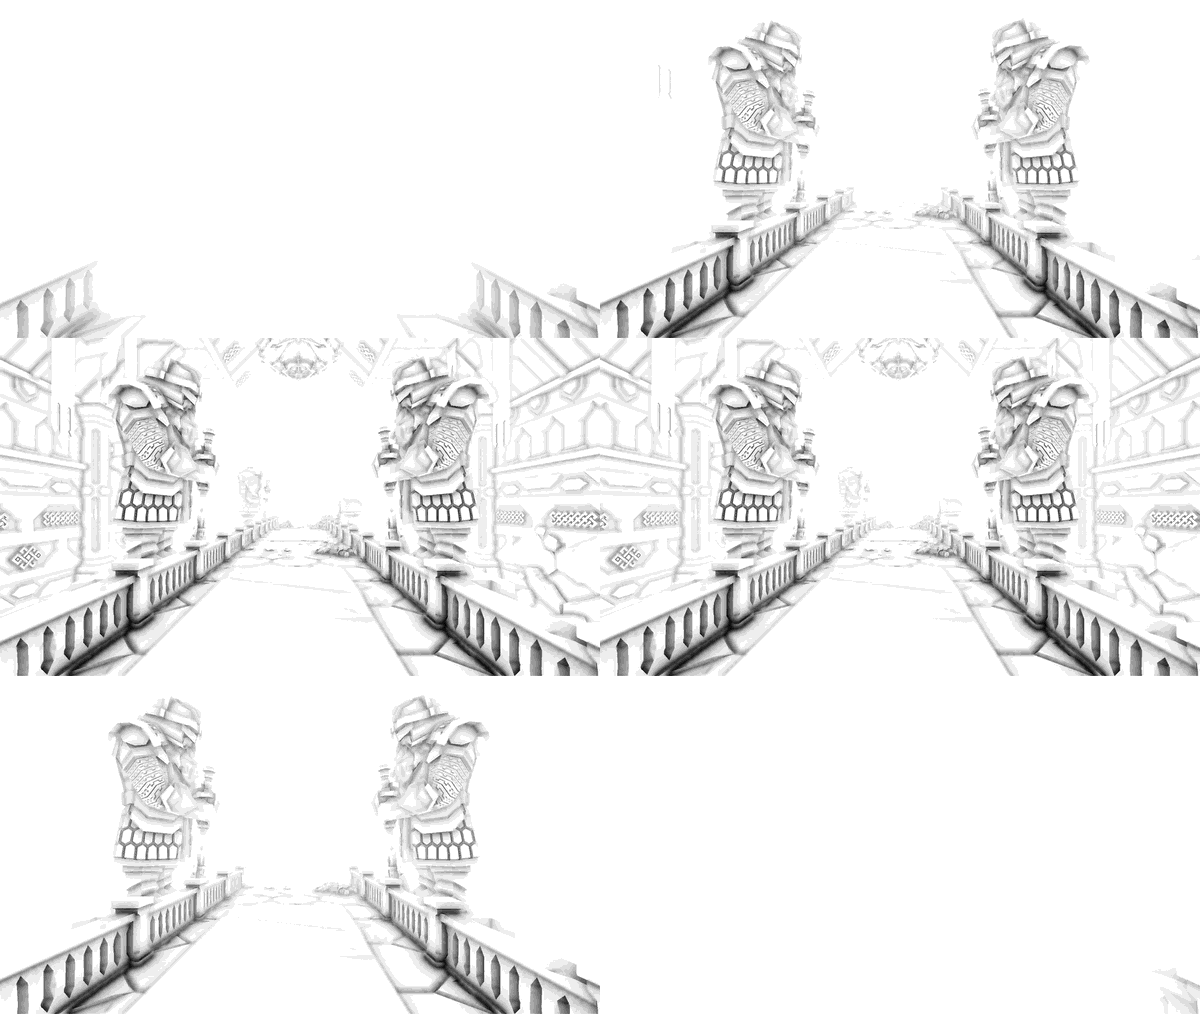
The following images show the effect of Direct Lighting Strength on surfaces that direct light illuminates.
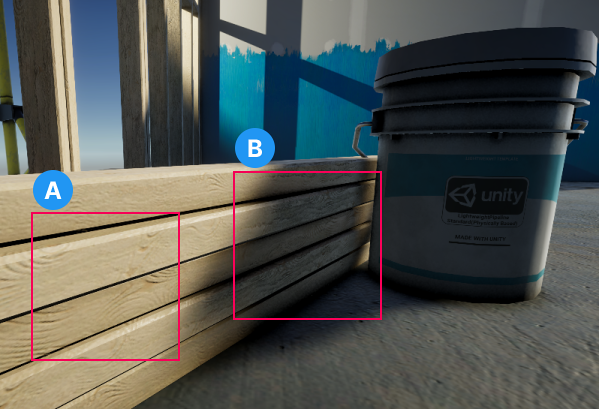
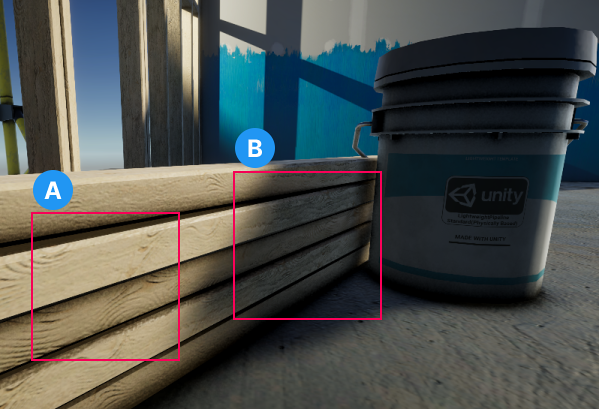
In both images, A shows the effect on surfaces that direct light illuminates, and B shows the effect in areas that one or more shadows cover.
Normal vectors
URP uses normal vectors to calculate how exposed each point on a surface is to ambient lighting. Where URP gets the normal vectors depends on the rendering path, the ambient occlusion mode, and the Depth Source property of the Screen Space Ambient Occlusion Volume Override:
- In the Deferred and Deferred+ rendering paths, URP uses the normals that the G-buffer already contains, in both modes. Depth Source has no effect.
- In the Forward and Forward+ rendering paths, GTAO always uses the normals texture,
_CameraNormalsTexture, which URP generates in the depth-normals prepass. - In the Forward and Forward+ rendering paths, SSAO uses the source that Depth Source sets.
Unless you set Quality to Custom, URP uses the Depth Source value from the Quality preset you select. The default preset, Medium, uses Depth Normals. For the value that each preset uses, refer to Screen Space Ambient Occlusion Volume Override reference for URP.
In the Forward and Forward+ rendering paths, when Depth Source is Depth Normals, URP runs the depth-normals prepass. Custom shaders need a DepthNormals pass block to write to the normals texture.
When Depth Source is Depth, URP reconstructs the normal vectors from the depth texture instead, so it doesn’t run the depth-normals prepass and your custom shaders don’t need a DepthNormals pass block. The Normal Quality property controls how many depth samples URP uses for each normal vector, which trades accuracy against performance.
In many scenes, Depth produces results comparable with Depth Normals. In some cases, Depth Normals gives a significant increase in quality. The following images show such a case.