Edit the collider’s geometry
You can edit a collider’s geometry manually or have Unity generate its shape automatically.
Unity automatically generates a collider’s geometry when you drag a sprite into the scene and add a Collider 2D component to it. The generated collider shape matches the outline of the sprite as close as possible.
To edit the collider’s shape:
- Select Edit Collider
 in the Inspector window to edit the collider’s geometry. You can also access the collider’s editing mode from the Tools overlay in the Scene view window.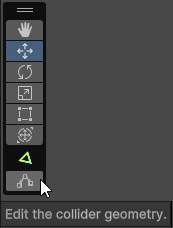
- To move an existing vertex, select and hold it, then move it to a new location.
- To create a new vertex, hover your cursor over the outline of the collider’s shape. A dot shows the position of the cursor on the collider’s geometry. Click on the dot to create a new vertex at that position.
- To remove a vertex, hold Ctrl (macOS:Cmd) while hovering your cursor over the edges of the collider’s geometry, which turn red. Click the red edges to remove the vertex that connects them.
- Exit the collider editing mode by selecting Edit Collider in the Inspector window or Tools overlay again.