Profile a Web build
Record performance data for Web builds using the Unity Profiler.
To connect a Web build to the Unity Profiler, you can use the temporary local server created during the Build and Run process or manually connect to a device using its IP address. Both methods require a Profile button in the application. This button is included in the Default and PWA Web templates, but you must add it to all other templates.
Notes:
- Profiling is only available for development builds.
- Unity can profile basic draw call data for Web applications, but the Frame Debugger doesn’t work on the Web platform.
To profile on a different platform, refer to Collect performance data on a target platform.
Profile on a temporary local server (automatic connection)
Note: The Default and PWA Web templates include a Profile button by default. For all other templates, you must Add the Profile button to your template before following these steps.
To profile your Web build on a Unity temporary local server:
- Open the Build Profiles window (menu: File > Build Profiles).
- Select Web as the target platform.
- Enable Development Build.
- Enable Autoconnect Profiler.
- Select Build and Run. Unity starts a temporary local server and opens the build in your browser. The build automatically connects to the Profiler and starts profiling.
- To disconnect, in the running build, select Stop Profiling.
- View real-time performance data in the Profiler window.
Tip: To collect profiling data when the browser window is inactive, in Player Settings (menu: Edit > Project Settings > Player), enable Run In Background.
Profile on another device or server (manual connection)
Note: The Default and PWA Web templates include a Profile button by default. For all other templates, you must Add the Profile button to your template before following these steps.
To profile your Web build on a custom server or another device:
Prepare your build
- Open the Build Profiles window (menu: File > Build Profiles).
- Select Web as the target platform.
- Enable Development Build.
- Select Build or build your project with scripting.
Connect to the Profiler and collect data
Open the Profiler window (menu: Window > Analysis > Profiler).
-
Select Play Mode > Enable Web Profiling.
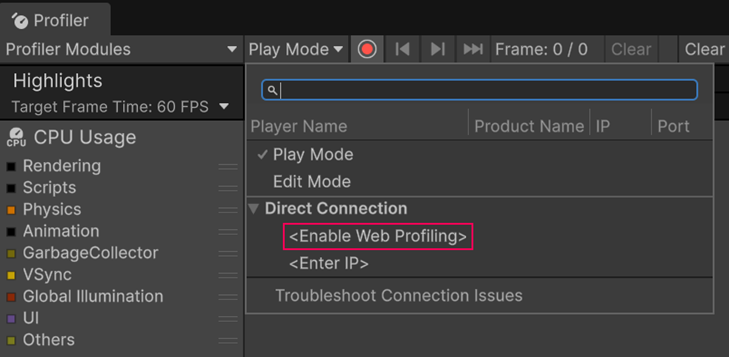
The Enable Web Profiling option in the Profiler window. A window opens showing that web profiling is active. Copy the IP address and port from the window.
-
Run your build. In the running build, select Profile.
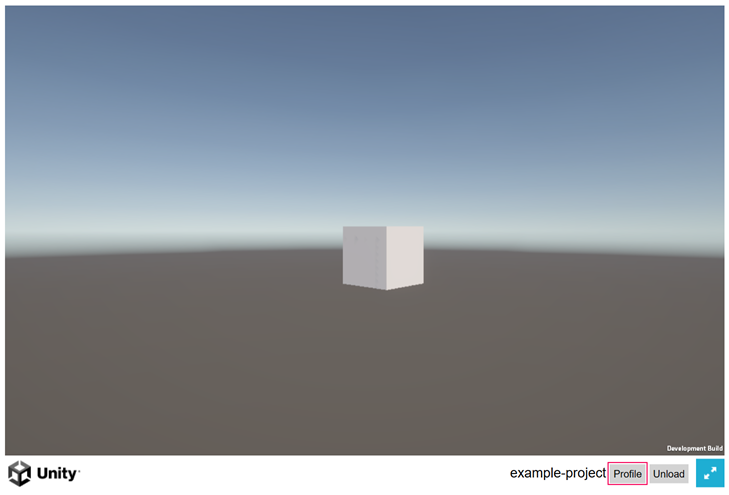
The Profile button in a Web build. A window opens requesting the connection information. Paste in the IP address and port.
To disconnect, in the running build, select Stop Profiling.
View real-time performance data in the Profiler window.
Collect startup data on another device or server
If your build is running on the same device as the Unity Editor, you can enable the Autoconnect Profiler option in the Build Profiles window to collect startup data automatically. To use Autoconnect Profiler on another device, you must manually add the IP address in the player arguments of your build.
To configure another device to use Autoconnect Profiler:
Open the
index.htmlfile of your build.-
Find the following line:
var config = { arguments: [] // ... } -
Modify it to include the IP address and port you copied from the Profiler window, where
xxxxxxis the IP address and port:var config = { arguments: ["--player-connection-ip=xxxxxx"], // ... } Save the
index.htmlfile and run your build.
Add the Profile button to a custom Web template
To add the Profile button to a custom Web template:
-
In your custom template’s
index.htmlfile, add the following near the top of the file:#if DEVELOPMENT_PLAYER <script src="<<<TemplateData/profiler.js>>>"></script> #endif -
In the script section where you create the Unity instance, add the following code after the instance is available:
#if DEVELOPMENT_PLAYER var profile = unityProfiler.createButton(unityInstance); profile.style.position = 'fixed'; profile.style.bottom = '5px'; profile.style.left = '5px'; // Adds the Profile button to the body element of the page. // You can change this line to append the button to a different element as needed. document.body.appendChild(profile); #endif -
(Recommended) When handling player quit or unload, add the following to remove the Profile button and clean up resources:
unityProfiler.shutDown();
After making these updates, follow the steps to Profile on a temporary local server or Profile on another device or server.