Parameters
| position | Position in 3D space as seen from the current handle camera. |
| text | Text to display on the label. |
| image | Texture to display on the label. |
| content | Text, image and tooltip for this label. |
| style | The style to use. If left out, the label style from the current GUISkin is used.Note: Use HandleUtility.GetHandleSize where you might want to have constant screen-sized handles. |
Description
Make a text label positioned in 3D space.
Labels have no user interaction, do not catch mouse clicks and are always rendered in normal style. 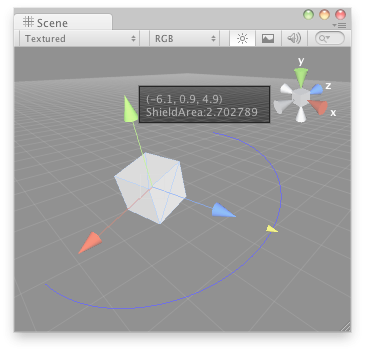
Label in the Scene View.
	// Create a 180 degrees wire arc with a ScaleValueHandle attached to the disc
	// that lets you modify the "shieldArea" var in the WireArcExample.js, also
	// lets you visualize some info of the transform

		// cast & store references
		Shield shield = (target as Shield);
		Transform transform = shield.transform;

		// 3D UI: arc and scale handle
	    	Handles.color = Color.blue;
		Handles.DrawWireArc(transform.position, transform.up, -transform.right, 180, shield.shieldArea);
		shield.shieldArea = Handles.ScaleValueHandle( shield.shieldArea, transform.position + transform.forward*shield.shieldArea, transform.rotation, 1, Handles.ConeCap, 1);

		// start of 2D UI section
		Handles.BeginGUI();

		// information label
		Handles.Label(transform.position + Vector3.right*2, "Shield Area: " +shield.shieldArea);

		// reset button:
		GUILayout.BeginArea(new Rect(Screen.width - 100, Screen.height - 80, 90,50));
		if(GUILayout.Button("Reset Area")) { shield.shieldArea = 5; }
		GUILayout.EndArea();

		// end of 2D UI section
		Handles.EndGUI();

	    }
	}
And the script attached to the Game Object which should show the custom handles:
	// DummyLavelScript.js

	var shieldArea : float = 5;