Using Animation Curves
Список свойств
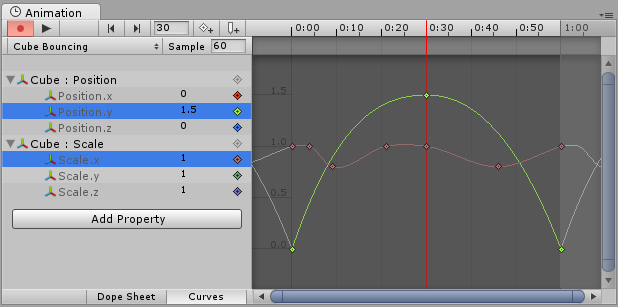
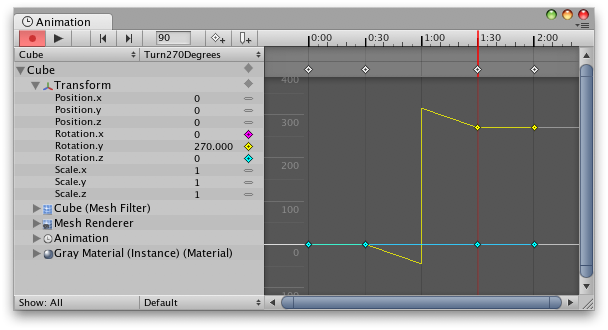
In an Animation Clip, any animatable property can have an Animation Curve, which means that the Animation Clip controls that property. In the property list area of the Animation View, all animated properties are listed. With the Animation View in Dope Sheet mode, the animated values for each property appear only as linear tracks, however in Curves mode you are able to see the the changing values of properties visualised as a grap view.
In “Curves” mode, the Animation Curves have colored curve indicators, each colour representing the values for one of the currently selected properties in the property list. For information on how to add curves to an animation property, see the section on Using the Animation View.

Что такое кривые, ключи и ключевые кадры
An Animation Curve has multiple keys which are control points that the curve passes through. These are visualized in the Curve Editor as small diamond shapes on the curves. A frame in which one or more of the shown curves have a key is called a keyframe.
If a property has a key in the currently previewed frame, the curve indicator will have a diamond shape.
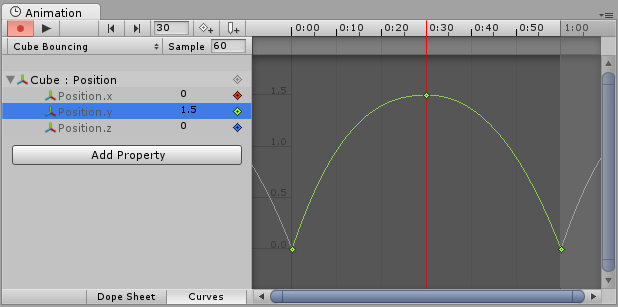
The Curve Editor will only show curves for the properties that are selected. If multiple properties are selected in the property list, the curves will be shown overlaid together.
Добавление и передвижение ключевых кадров
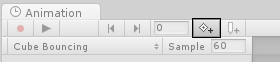
You can add a keyframe at the currently previewed frame by clicking the Keyframe button.
A keyframe can be added at the currently previewed frame by clicking the Keyframe button. This will add a keyframe to all currently selected curves. Alternatively you can add a keyframe to a single curve at any given frame by double-clicking the curve where the new keyframe should be. It is also possible to add a keyframe by right-clicking the Keyframe Line and select Add Keyframe from the context menu. Once placed, keyframes can be dragged around with the mouse. It is also possible to select multiple keyframes to drag at once. Keyframes can be deleted by selecting them and pressing Delete, or by right-clicking on them and selecting Delete Keyframe from the context menu.
Поддерживаемые анимируемые свойства
The Animation View can be used to animate much more than just the position, rotation, and scale of a Game Object. The properties of any Component and Material can be animated - even the public variables of your own scripts components. Making animations with complex visual effects and behaviors is only a matter of adding Animation Curves for the relevant properties.
Анимационная система поддерживает свойства следующих типов:
- Float
- Color
- Vector2
- Vector3
- Vector4
- Quaternion
- Boolean
Ни массивы, ни структуры, ни какие-либо другие типы, не перечисленные выше - не поддерживаются.
For boolean properties, a value of 0 equals False while any other value equals True.
Here are a few examples of the many things the Animation View can be used for:
- Animate the Color and Intensity of a Light to make it blink, flicker, or pulsate.
- Animate the Pitch and Volume of a looping Audio Source to bring life to blowing wind, running engines, or flowing water while keeping the sizes of the sound assets to a minimum.
- Animate the Texture Offset of a Material to simulate moving belts or tracks, flowing water, or special effects.
- Animate the Emit state and Velocities of multiple Ellipsoid Particle Emitters to create spectacular fireworks or fountain displays.
- Анимировать переменные в ваших собственных скриптовых компонентах, чтобы со временем изменять разные вещи.
When using Animation Curves to control game logic, please be aware of the way animations are played back and sampled in Unity.
Типы интерполяции вращения
In Unity rotations are internally represented as Quaternions. Quaternions consist of .x, .y, .z, and .w values that should generally not be modified manually except by people who know exactly what they’re doing. Instead, rotations are typically manipulated using Euler Angles which have .x, .y, and .z values representing the rotations around those three respective axes.
When interpolating between two rotations, the interpolation can either be performed on the Quaternion values or on the Euler Angles values. The Animation View lets you choose which form of interpolation to use when animating Transform rotations. However, the rotations are always shown in the form of Euler Angles values no matter which interpolation form is used.
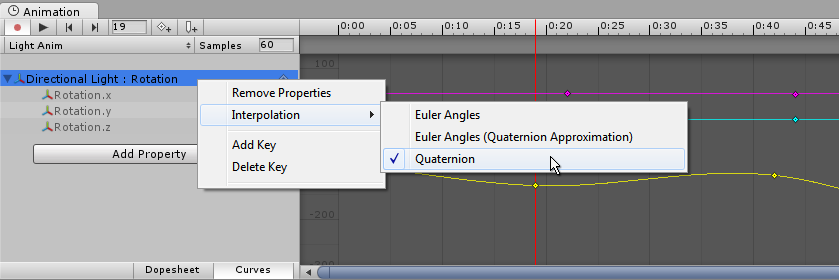
Quaternion интерполяция
Quaternion интерполяция всегда выдаёт красивые результаты по кратчайшему пути между вращениями. Это позволяет избежать артефактов интерполяции вращения, таких как шарнирный замок (Gimbal Lock). Однако, Quaternion интерполяция не может представить вращения больше чем на 180 градусов, т.к. в таком случае короче дойти до нужного поворота вращением в другую сторону. Если вы используете Quaternion интерполяцию и разместите два ключа более чем на 180 градусов друг от друга, тогда кривая будет выглядеть прерывисто, хоть само вращение и будет при этом плавным - оно просто пойдёт по другому пути, т.к. он короче. Если вы желаете иметь вращения более чем на 180 градусов, придётся расположить дополнительные ключи между вращениями. При использовании Quaternion интерполяции, изменение ключей или касательных одной кривой может сказаться и на форме других двух кривых, т.к. все три кривые созданы из внутреннего представления кватерниона. При использовании Quaternion интерполяции ключи всегда связаны, так что создание ключа в определённом времени одной из кривых, приведёт к созданию кличей в том же времени и на двух других кривых.
Euler Angles интерполяция
Euler Angles interpolation is what most people are used to working with. Euler Angles can represent arbitrary large rotations and the .x, .y, and .z curves are independent from each other. Euler Angles interpolation can be subject to artifacts such as Gimbal Lock when rotating around multiple axes at the same time, but are intuitive to work with for simple rotations around one axis at a time. When Euler Angles interpolation is used, Unity internally bakes the curves into the Quaternion representation used internally. This is similar to what happens when importing animation into Unity from external programs. Note that this curve baking may add extra keys in the process and that tangents with the Constant tangent type may not be completely precise at a sub-frame level.