Extend a scanned trunk with texture blending
Tree trunks are often close to the camera and difficult to model which makes them an excellent candidate for photogrammetry. This page describes how to seamlessly extend a scanned trunk using texture blending. The idea is to overlap a photogrammetry mesh with a procedural branch, then replace the overlapping region with a new band of geometry that joins the two objects. A set of textures is generated and mapped to the band to make the blend region seamless. A procedural canopy can be created off of the procedural child resulting in a complete model.
Note
The description of the process that follows assumes you are familiar with the basics of SpeedTree and is more of a guide to the general approach than it is a step-by-step tutorial.
Import the mesh and its textures
To use a 3D scan:
- Import the mesh as a mesh asset.
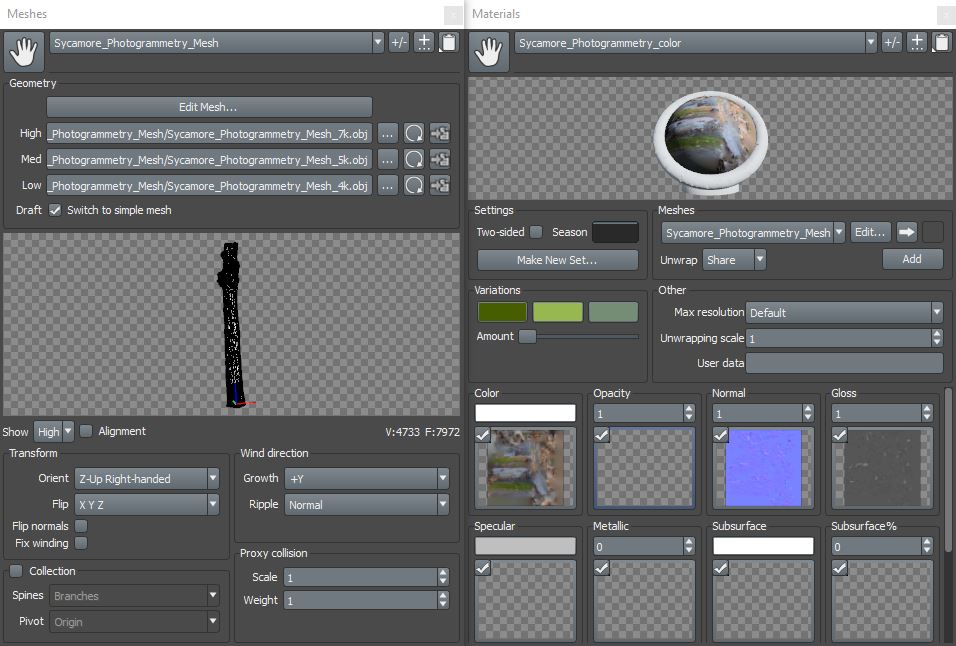
- Create a material asset that uses the textures associated with the scan. Be sure to associate the mesh asset with the material.
Note
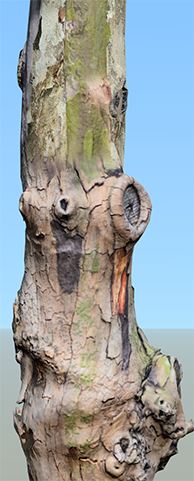
Meshes must be a single model with a single material. Photogrammetry meshes are typically saved as single meshes with unwrapped UV data that correspond to a texture atlas.
Add the mesh to the model
Once you have assets in place, use a Mesh generator to make it part of your model.
- Add a Mesh generator to the model.
- Assign the material asset to the Mesh generator. The generator will automatically pick up the mesh asset via its association with the material asset.
Note
You can move or rotate a mesh manually by switching to node editing mode, clicking on the mesh in the scene, and using the gizmo to transform the mesh.
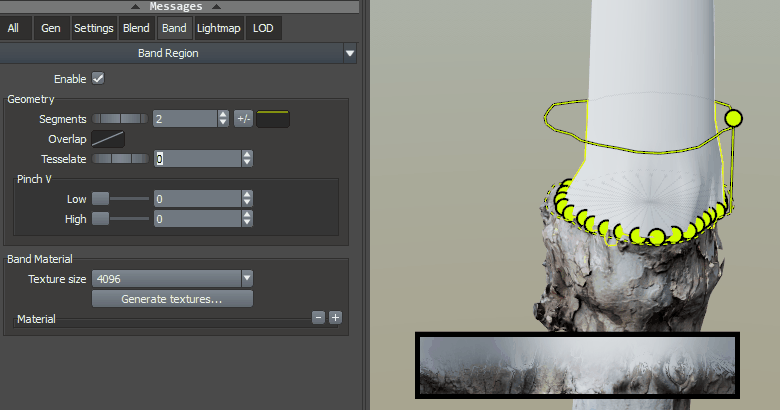
Add a band stitch
- Select the Mesh generator.
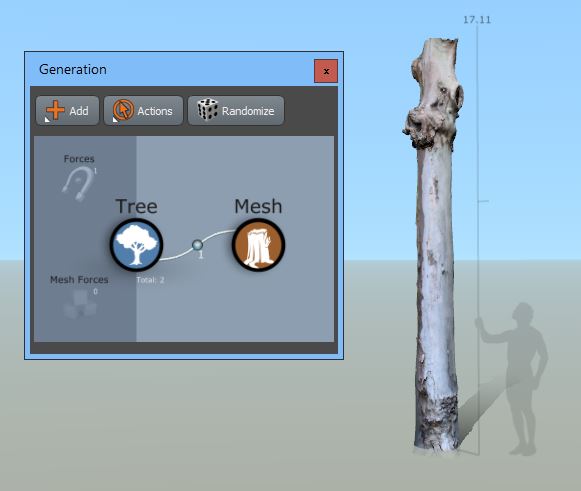
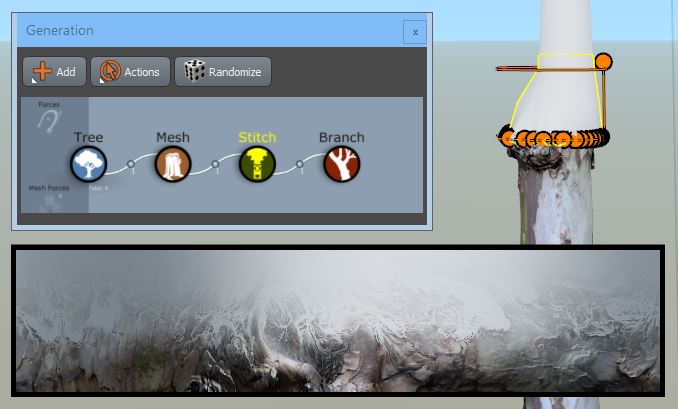
- Add a Bake stitch (Add > Photogrammetry > Band stitch). You should see a Stitch generator and a Branch generator added to the trunk as pictured below.
Choose a good material for the child
Create a material for the child branch and apply it. This material should match the scanned trunk as closely as possible (all maps: color, normal, gloss, etc.).
Note
Make sure you tile the map on the child branch such that the bark pattern density matches that of the photogrammetry model. The quality of the blend will be greatly improved by a good match between the material on the photogrammetry model and the material/mapping it's being blended onto.
Put the stitch in a good spot
The stitch generates near the center of the mesh. If it doesn't generate in a valid position, you'll need to reposition it.
To reposition the stitch:
- Switch to node editing mode.
- Select either the stitch ring (if it's not valid) or the stitch geometry (if it is valid).
- Move the stitch to the desired location. It should be placed near the end but not all the way to the end of the trunk as pictured below. When the stitch is positioned correctly you'll see a white band connecting the mesh and the branch.
Note
Leave enough trunk geometry beyond the stitch location to be used in the blending process. The height of the blend region can be controlled in the Blend property group on the Stitch generator. Taller stitches require more trunk geometry beyond the stitch.
Edit the blend
Now that you have the stitch where you'd like it, it's time to make the blend region as seamless as possible.
To edit the blend, use the properties in the Blend group to control how the textures from the parent and child will be blended together. When the stitch is selected and in a valid location, you will see a preview of the texture at the bottom of the Tree Window.
There will typically be a little bit of back and forth between blend settings, child positioning, child radius editing, and stitch positioning to get the stitch just right.
Generate and apply the textures
Now that the stitch is valid and the texture preview is satisfactory, it's time to generate the texture maps for the band region.
To generate and apply the texture maps:
- Select Band Material > Generate Textures. A series of maps that match the preview will be generated.
- Use these maps to make a new material on the Material Asset Bar.
- Apply that material to the band (Band:Material) and the band region should seamlessly blend the mesh and the branch.
Note
If you change anything about the mesh, the branch, or the blend you'll need to export a new set of maps. If a material has already been made from the maps, it will update automatically.
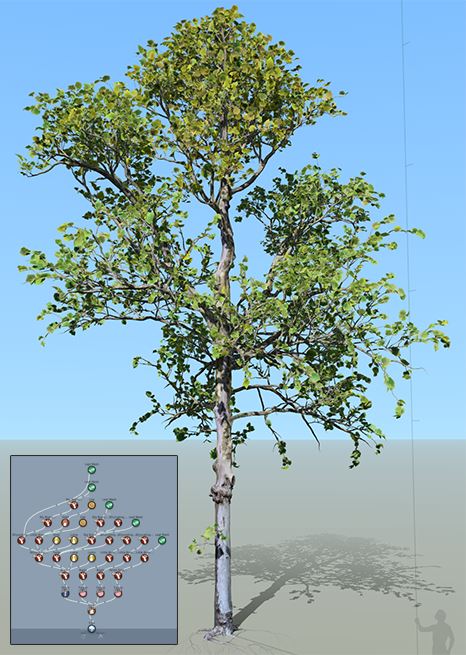
Build out the rest of the model
Use traditional SpeedTree techniques to add a procedural branch structure and leaf canopy to the model. Start by adding child branches to the blended branch and go from there. Pictured below are a completed model and the corresponding generator hierarchy.
Note
It's often a good idea to add a few twigs or other decorations to the photogrammetry mesh using Targets to further blend it in with the procedural geometry.
Best practices
The following list outlines a few things to keep in mind when using photogrammetry trunk meshes with texture blending.
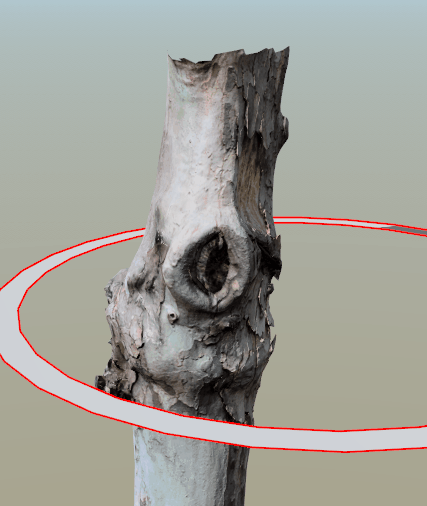
Choose a reasonably smooth portion to place the stitch if you can.
You can increase the Clearance property of a stitch to "eat" more of the trunk geometry Switch the stitch.
Switch to node editing mode to move the trunk mesh, stitch, and branch until the stitch is as seamless as possible.
Don't forget to generate a new set of textures if you move anything.
A single Stitch generator can create multiple stitches. Use this fact to stitch up several holes on a single mesh without having to have a unique generation editor configuration for each one.