Shadows
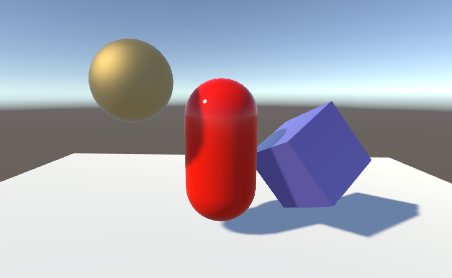
Unity’s lights can cast Shadows from an object onto other parts of itself or onto other nearby objects. Shadows add a degree of depth and realism to a scene since they bring out the scale and position of objects that can otherwise look “flat”.
How Do Shadows Work?
Consider the simplest case of a scene with a single light source. Light rays travel in straight lines from that source and may eventually hit objects in the scene. Once a ray has hit an object, it can’t travel any further to illuminate anything else (ie, it “bounces” off the first object and doesn’t pass through). The shadows cast by the object are simply the areas that are not illuminated because the light couldn’t reach them.
Another way to look at this is to imagine a camera at the same position as the light. The areas of the scene that are in shadow are precisely those areas that the camera can’t see.
In fact, this is exactly how Unity determines the positions of shadows from a light. The light uses the same principle as a camera to “render” the scene internally from its point of view. A depth buffer system, as used by scene cameras, keeps track of the surfaces that are closest to the light; surfaces in a direct line of sight receive illumination but all the others are in shadow. The depth map in this case is known as a Shadow Map (you may find the Wikipedia Page on shadow mapping useful for further information).
Enabling Shadows
You can enable shadows for an individual light with the Shadow Type property in the inspector.
The Hard Shadows setting produces shadows with a sharp edge. Hard shadows seldom occur in everyday life (unless you are an astronaut) but they involve less processing overhead than the more realistic Soft Shadows and are acceptable for many purposes. Also, soft shadows tend to reduce the “blocky” aliasing effect from the shadow map. The Strength setting determines how dark the shadows are; in general, some light will be scattered by the atmosphere and reflected off other objects, so you usually don’t want shadows to be set to maximum strength. The Resolution property sets the rendering resolution for the shadow map “camera” mentioned above. If you find your shadows have very visible edges then you might want to increase this value. The near plane property allows you to choose the value for the near plane when rendering shadows. Any objects closer than this distance to the light will not cast any shadows.
Each Mesh Renderer in the scene also has properties called Cast Shadows and Receive Shadows which must be enabled as appropriate.
Cast Shadows has simple On and Off options to enable or disable shadow casting for the mesh. There is also a Two Sided option to allow shadows to be cast by either side of the surface (ie, backface culling is ignored for shadow casting purposes) while Shadows Only allows shadows to be cast by an otherwise invisible object.
Shadow Mapping and the Bias Property
The shadows for a given light are determined during the final scene rendering. When the scene is rendered to the main view camera, each pixel position in the view is transformed into the coordinate system of the light. The distance of a pixel from the light is then compared to the corresponding pixel in the shadow map. If the pixel is more distant than the shadow map pixel, then it is presumably obscured from the light by another object and it will get no illumination.
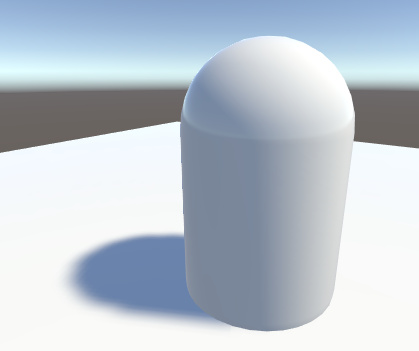
A surface directly illuminated by a light can sometimes appear to be partly in shadow. This is because pixels that should be exactly at the distance specified in the shadow map will sometimes be deemed farther away (a consequence of using a low resolution image for the shadow map; or using shadow filtering). The result is arbitrary patterns of pixels in shadow when they should really be lit, giving a visual effect known as “shadow acne”.
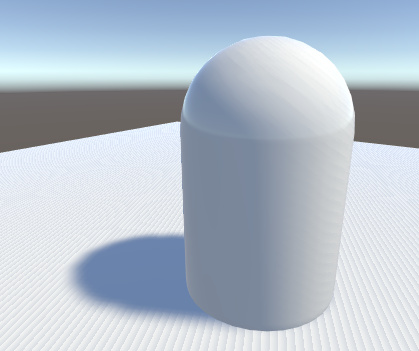
To prevent shadow acne, a bias value can be added to the distance in the shadow map to ensure that pixels on the borderline will definitely pass the comparison as they should; or while rendering into the shadow map, objects can be inset a bit along their normals. These values are set by the Bias and Normal Bias properties in the light’s inspector when it has shadows enabled.
Do not set the Bias value too high though, however, since areas of a shadow near to the object casting it can then sometimes be falsely illuminated. This effect is known as “Peter Panning” (i.e. the disconnected shadow makes the object look as if it is flying above the ground, like Peter Pan).
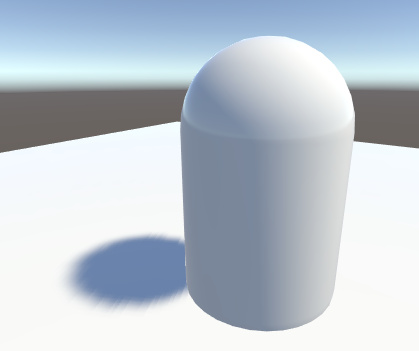
Likewise, setting the Normal Bias value too high will make the shadow appear too narrow for the object:
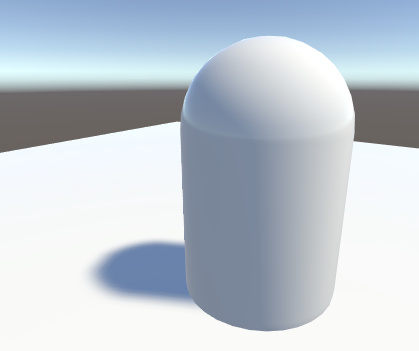
The bias values for a light may need a bit of tweaking to make sure that neither shadow acne nor Peter Panning occur. It is generally easier to gauge the right value by eye rather than attempt to calculate it.