애널리틱스 설정
To get started with Unity Analytics, you must first link your game to a Unity Services Project ID. A Unity Services Project ID is an online identifier which is used across all Unity Services (Ads, Multiuser, IAP, etc). These can be created within the services window itself, or online on the Unity Services website. The simplest way is to use the Services window within Unity, as follows.
Step 1. Link your project with a Unity Services Project ID.
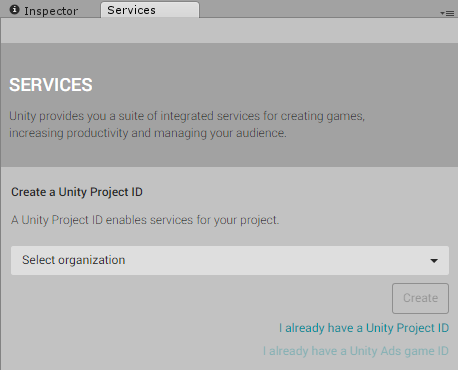
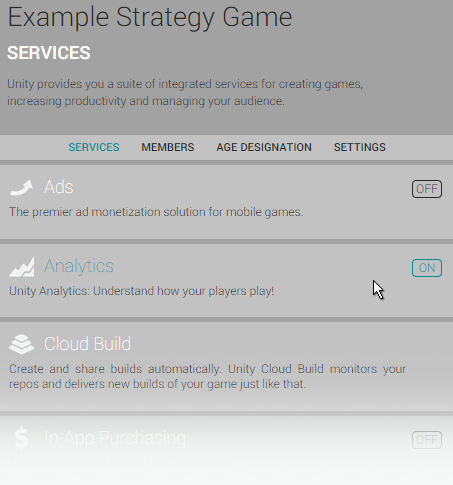
Open the Services Window, by going to the menu: Window > Unity Services, or click the cloud button in the toolbar. 
새 Project ID를 만들거나 기존 ID를 선택할 수 있습니다.
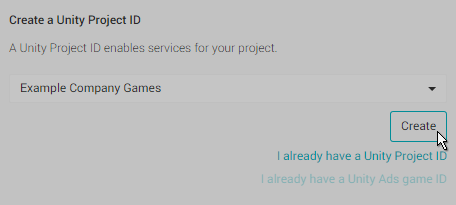
If this is the first time you are connecting your project to Unity Services, you’ll neet to create a new project ID. The organization is typically your company name. The project name for the new Services ID will automatically be taken from the name of the Unity Project you’re currently working on.
Although the name for new Unity Services Project IDs are automatically picked from the project’s name, you can change the name later if you like. This can be done in the Settings section of the services window.
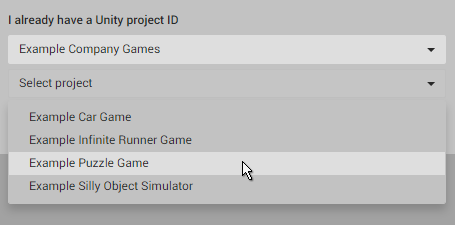
Alternatively, if you have already set up a Unity Services Project ID for this project you can select the organisation and project name from your list of existing projects here. You may have already set up a Unity Services Project ID if you have used one of the other Unity services with this project already, such as Unity IAP, Multiplayer, Ads, or Cloud Build.
Step 2. Enable Analytics for this project.
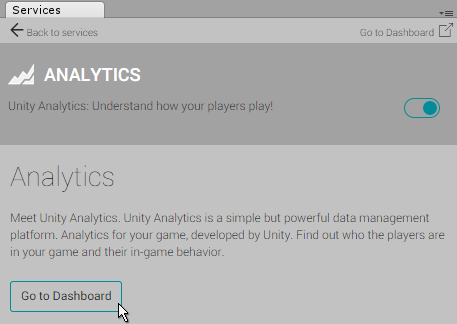
In the Services window, select “Analytics” and then click the “Off” button to toggle it On. If you haven’t already done so, at this stage you will need to complete the mandatory Age Designation field for your project. (Again, you may have already done this for a different Unity Service, such as Ads). This age designation selection will appear in the Services window.
Step 3. Hit Play in your project to validate the analytics link.
The Unity Editor can act as a test environment to validate Analytics integration. When you press the Play button, the Editor sends data (an “App Start” event) to the analytics service. This means you can test your analytics without having to build and publish your game.
플레이 버튼을 누른 후 프로젝트 애널리틱스 대시보드에서 검증 여부를 확인할 수 있습니다. 애널리틱스 대시보드는 서비스 창에서 Services -> Analytics -> Go To Dashboard를 클릭하면 됩니다.
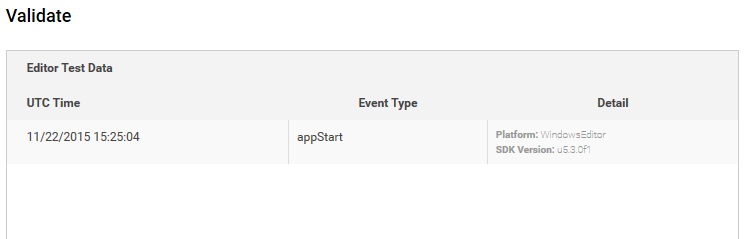
대시보드는 웹 브라우저에서 열리며, 프로젝트 이름 아래 개요, 기본 통합, 고급 통합이 보입니다. “Basic Integration”을 클릭한 후 바로 아래에 있는 3단계: “Play to Validate”를 클릭해야 합니다. 프로젝트가 올바르게 설정된 경우 “appStart” 이벤트에 대한 내용을 포함하는 표가 나타납니다. 그 내용에는 날짜와 시간, 현재 에디터 플랫폼과 버전 번호가 포함됩니다.