Record Hand Data with Hand Capture Sample
The Hand Capture sample makes it easy to record custom hand data directly on your XR device. This guide walks you through setting up your project, configuring dependencies, and using the in-headset interface to capture and manage hand recordings.
Getting Started
1. Import the XR Hands Package Ensure you have the XR Hands package (v1.7.0 or newer) installed via Unity Package Manager.
2. Import the Hand Capture Sample
In the Package Manager, locate the XR Hands package and import the Hand Capture sample: Menu: Window > Package Manager > XR Hands > Samples > Hand Capture > Import
3. Install and Configure Dependencies
To use the Hand Capture sample, install the following packages (use Fix in Edit > Project Settings > XR Plug-in Management > Project Validation, or install via Package Manager):
XR Interaction Toolkit (
com.unity.xr.interaction.toolkit, v3.2.0 or newer). See Install XR Interaction Toolkit for installation steps. Also import the following XRI samples:Important
There is a known issue when upgrading from an older version of XRI sample to a newer version. Script references in the demo scene for scripts included in the demos become disconnected when upgrading in-place. Recommendation: Delete existing XRI demo folders from your Samples directory before importing the new XRI samples.
Hand Visualizer sample from the XR Hands package
OpenXR Plugin (com.unity.xr.openxr, v1.11.0 or newer)
TextMesh Pro and TMP Essential Resources
- After installing TextMesh Pro, import TMP Essential Resources:
Window > TextMeshPro > Import TMP Essential Resources
- After installing TextMesh Pro, import TMP Essential Resources:
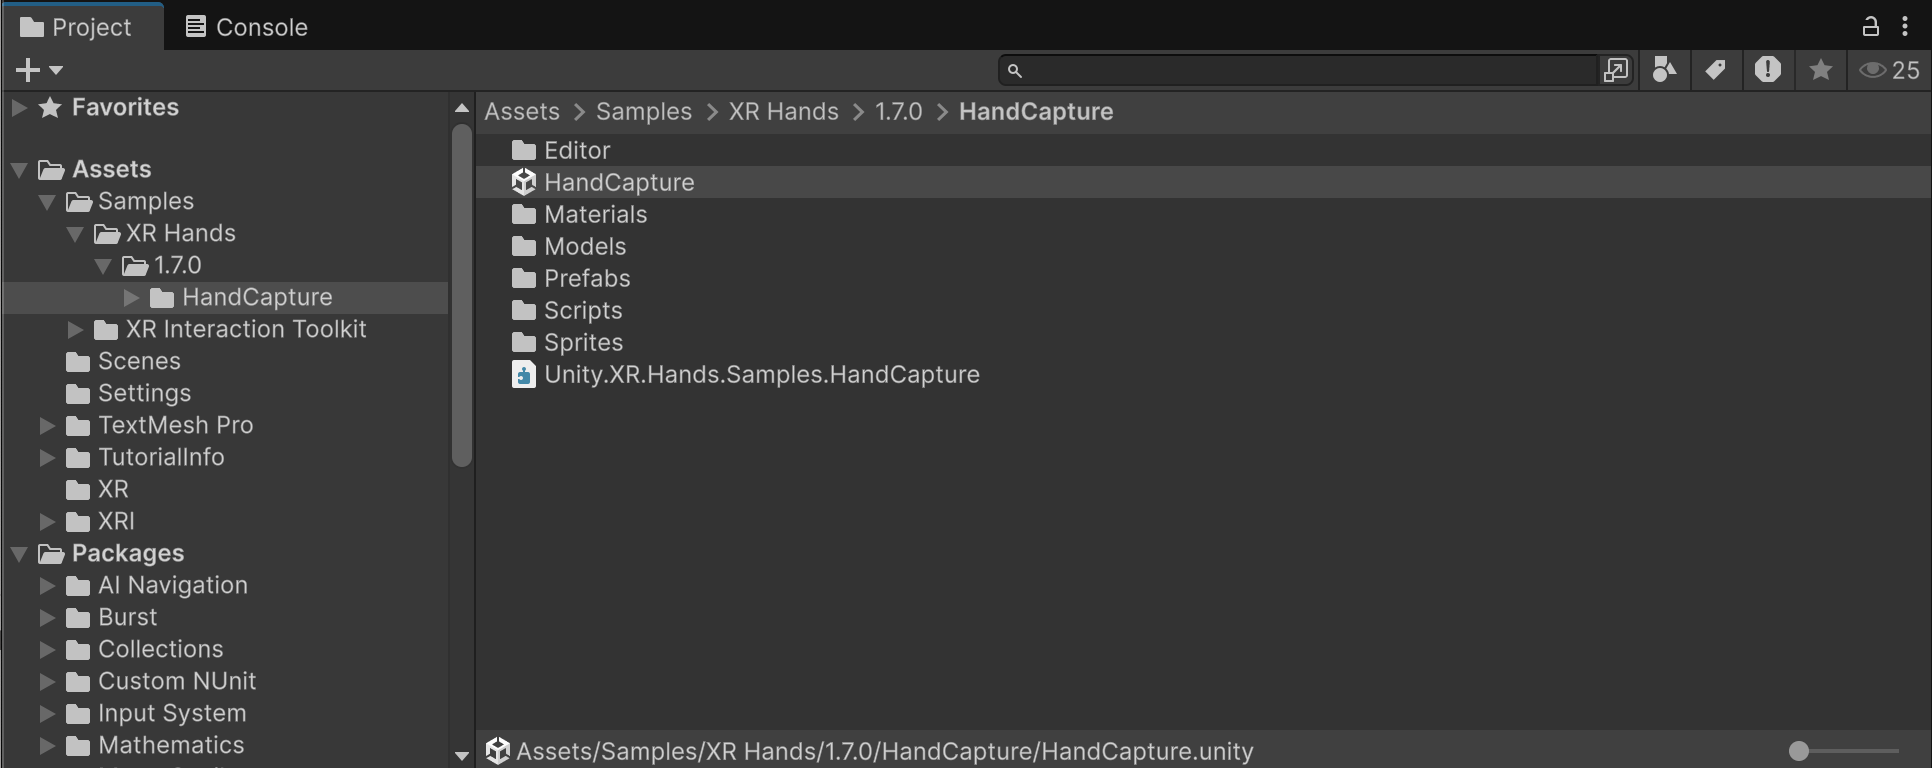
4. Open the Sample Scene
Navigate to: Assets/Samples/XR Hands/[version]/Hands Capture/HandCapture.unity
5. Configure Project Settings
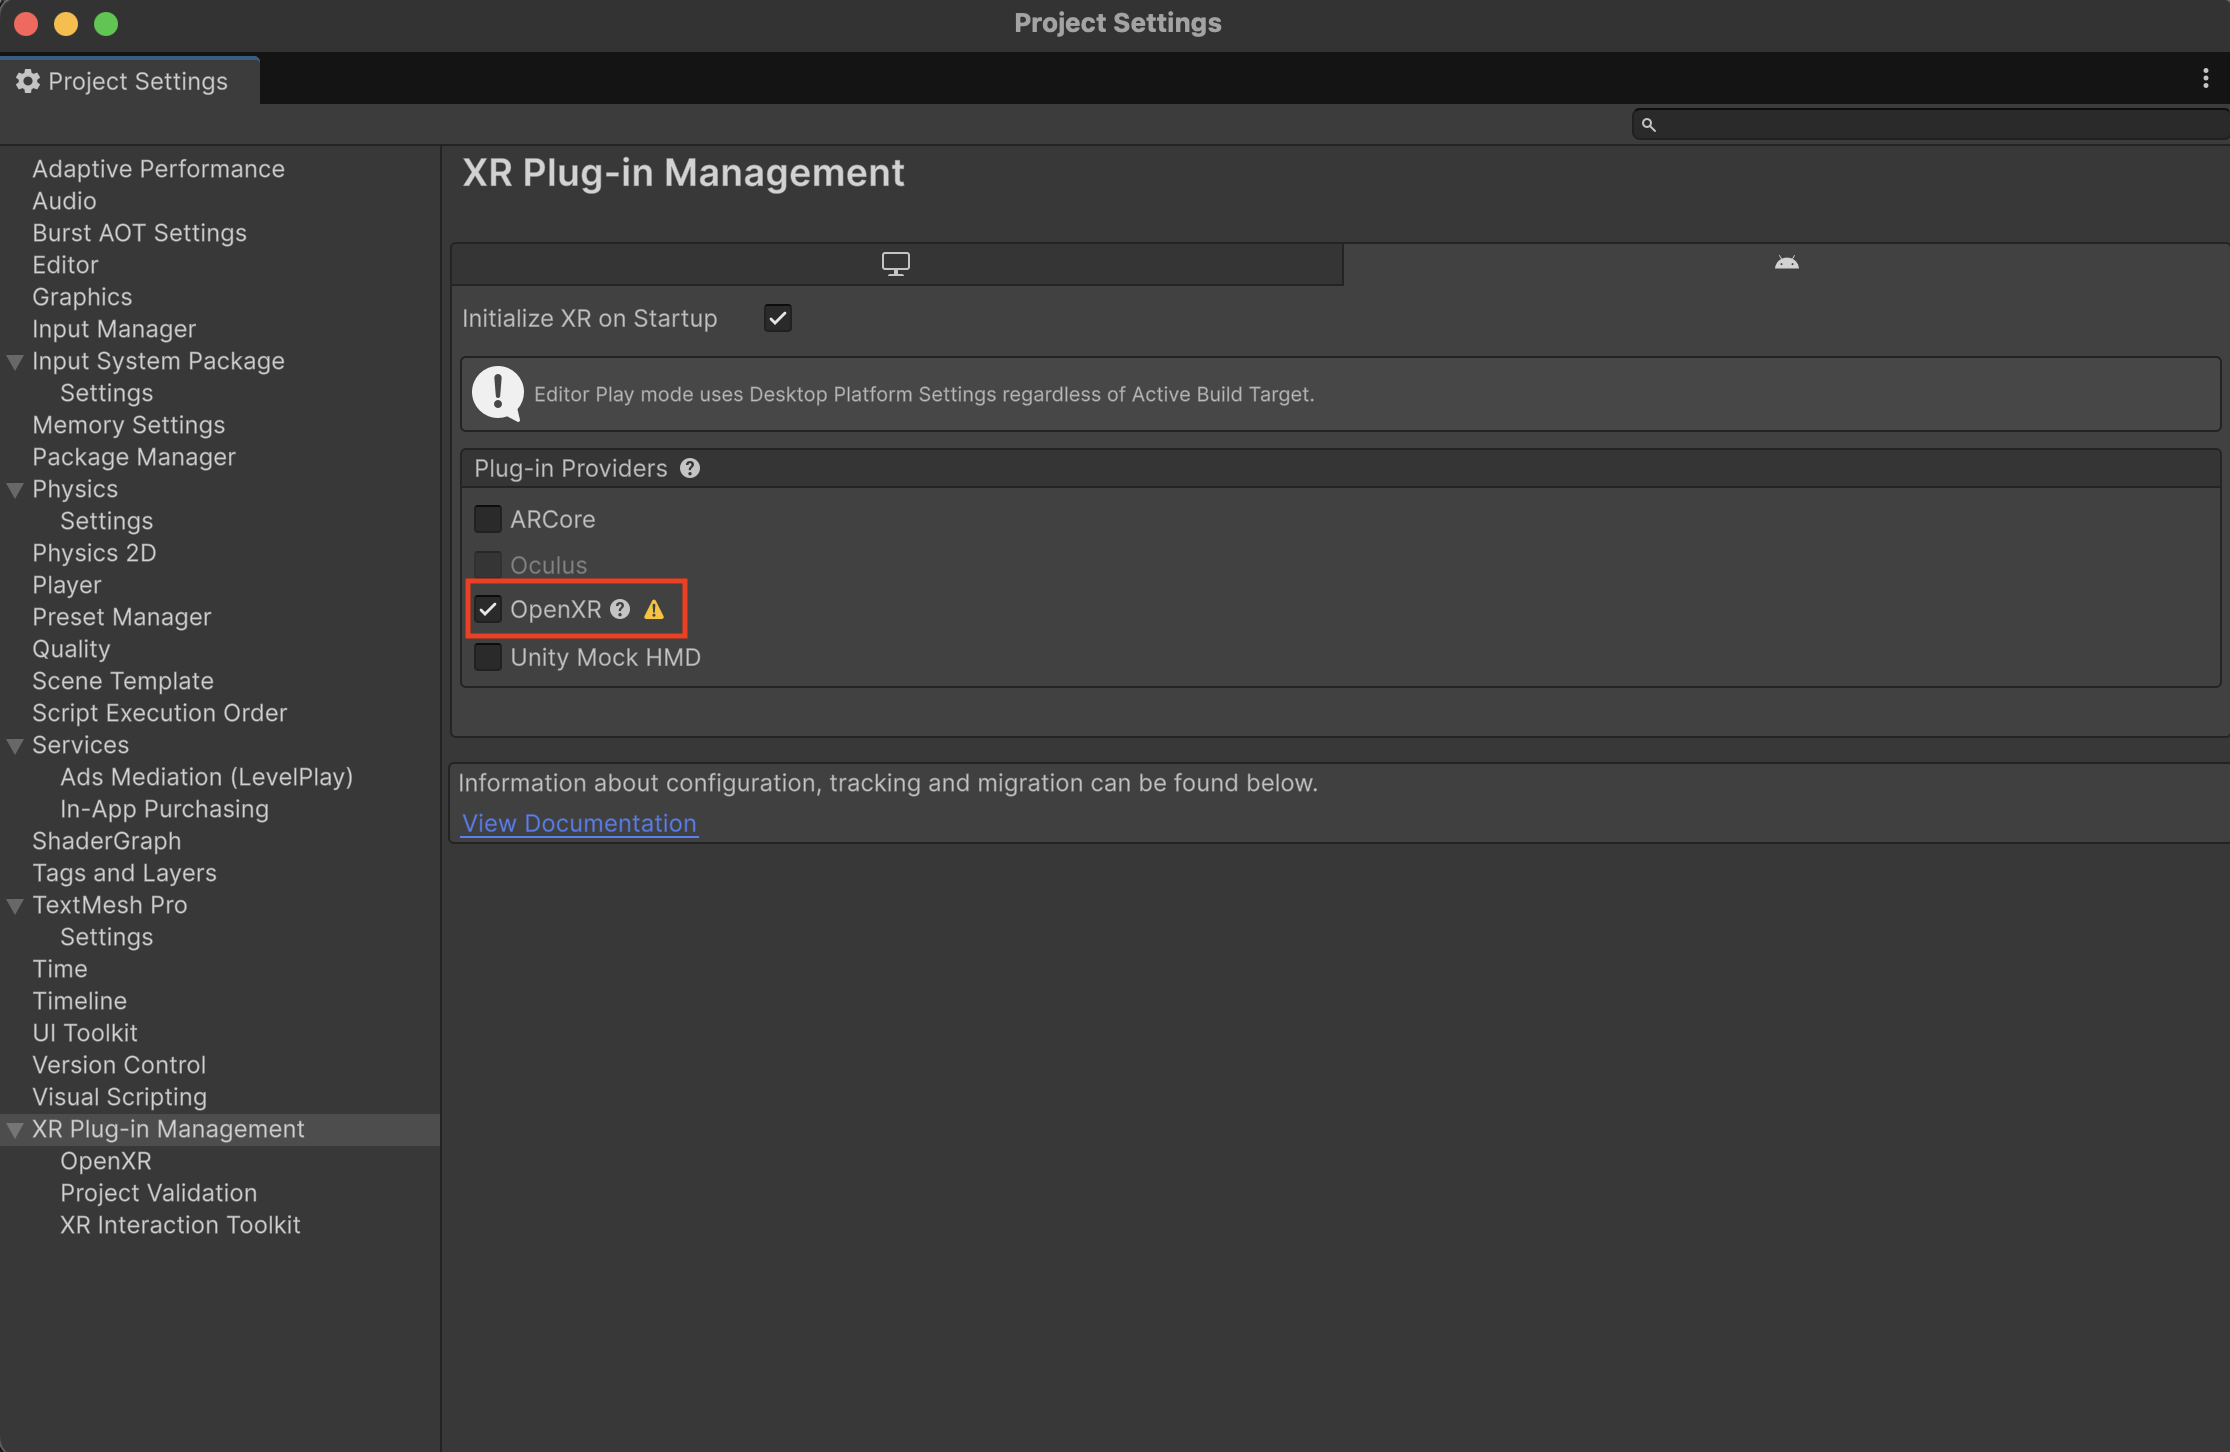
Enable Hand Tracking OpenXR: To enable hand tracking support with an OpenXR project, enable the OpenXR Plug-in Provider in Edit > Project Settings > XR Plug-in Management.
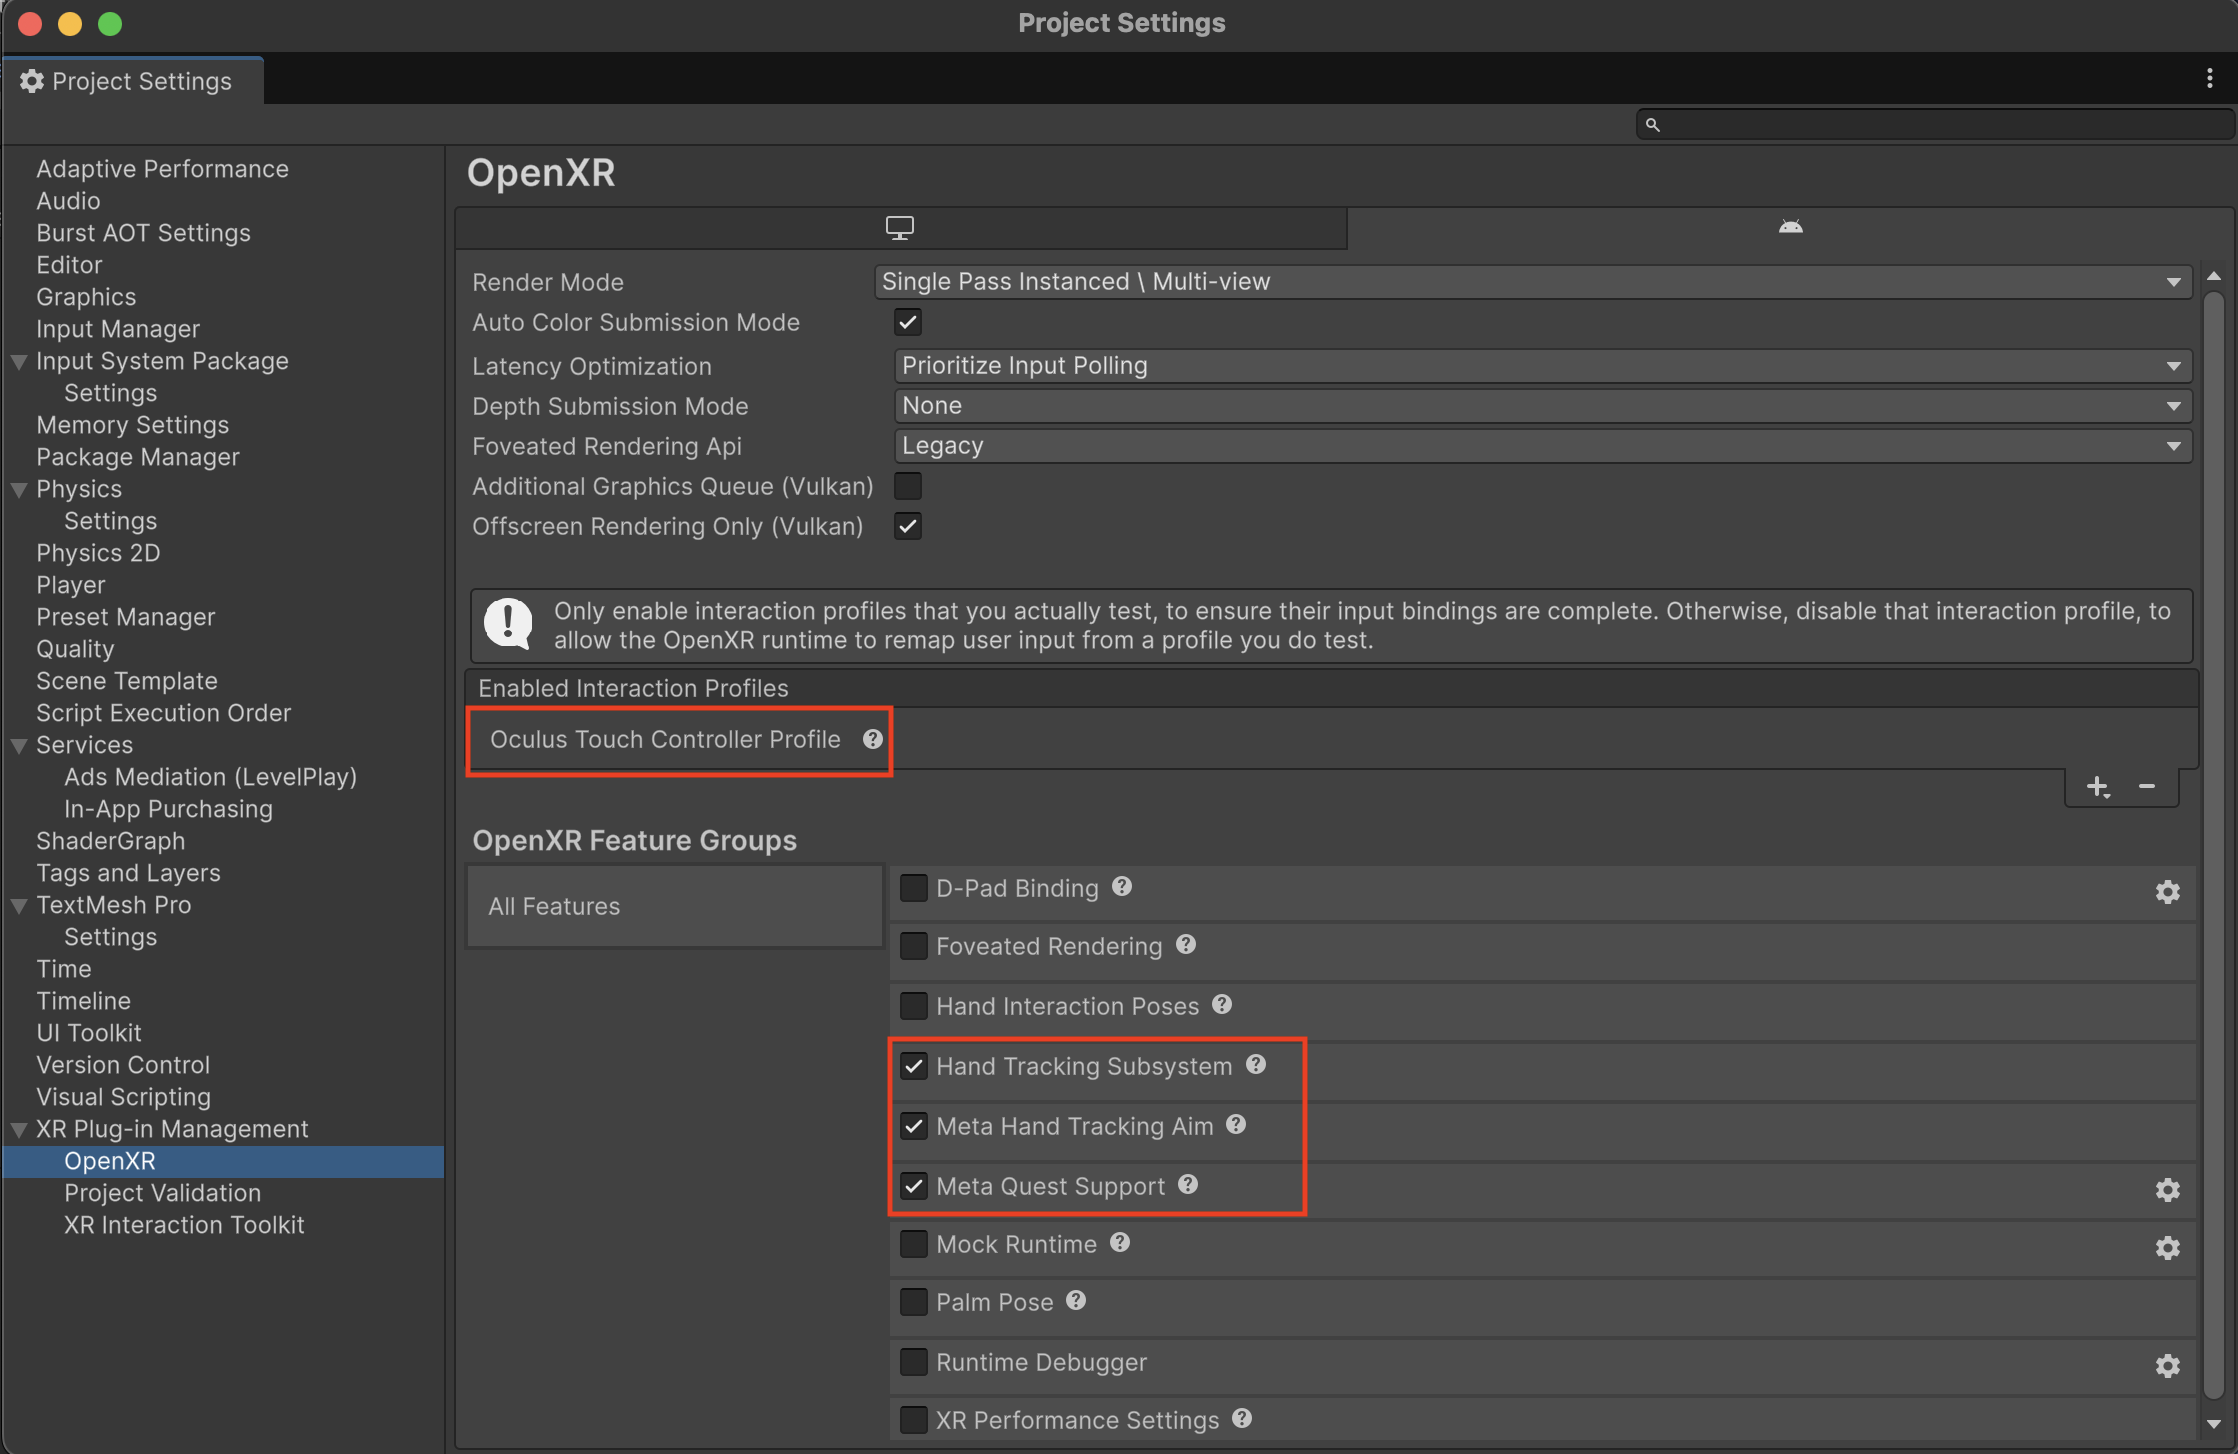
Enable Hand Tracking Subsystem: Then open
Edit > Project Settings > XR Plug-in Management > OpenXRand enable Hand Tracking Subsystem under OpenXR Feature GroupsMeta Quest Support via OpenXR:
If building for Meta Quest headsets, you will also need to enable Meta Quest Support (only available in the Android tab) and Meta Hand Tracking Aim. Then add an Interaction Profile in that same window, such as Oculus Touch Controller Profile, for controller support.
6. Build and Deploy
- Open
File > Build Settingsand select the Hand Capture scene to build to your device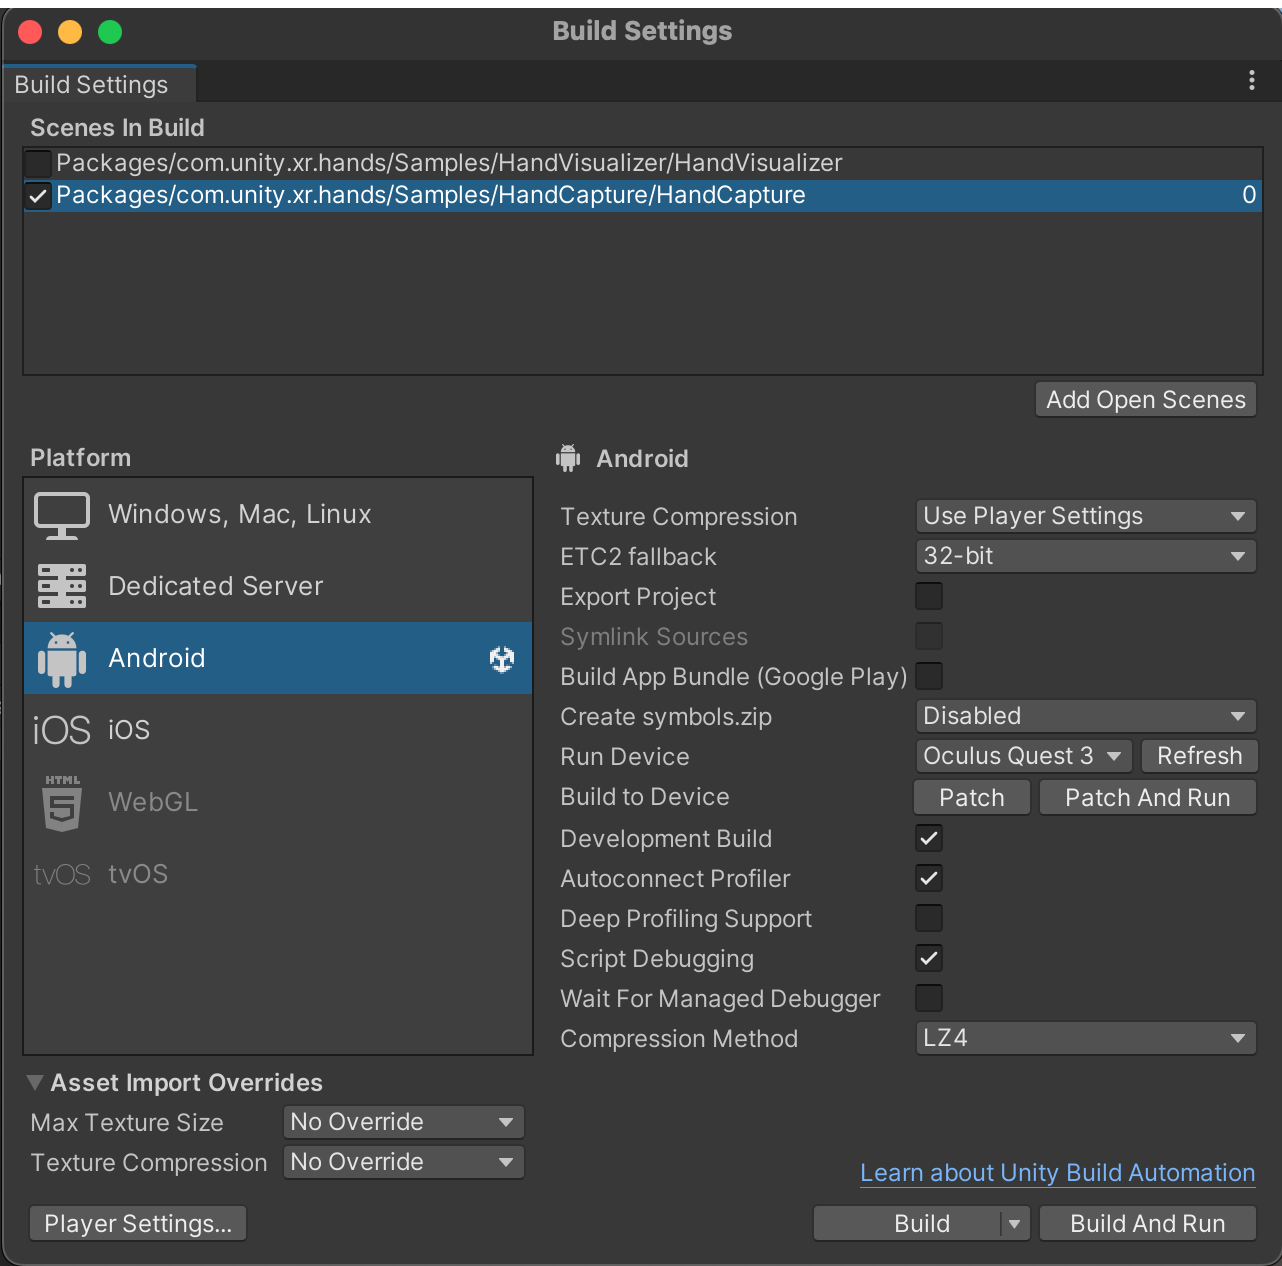
- Deploy and launch the app on your XR device
7. Import Recordings into the Editor After recording hand data on your device, import the recordings into the Unity Editor by following these steps. You can then review the captured data, select your desired hand shape, and create new XRHandShape assets.
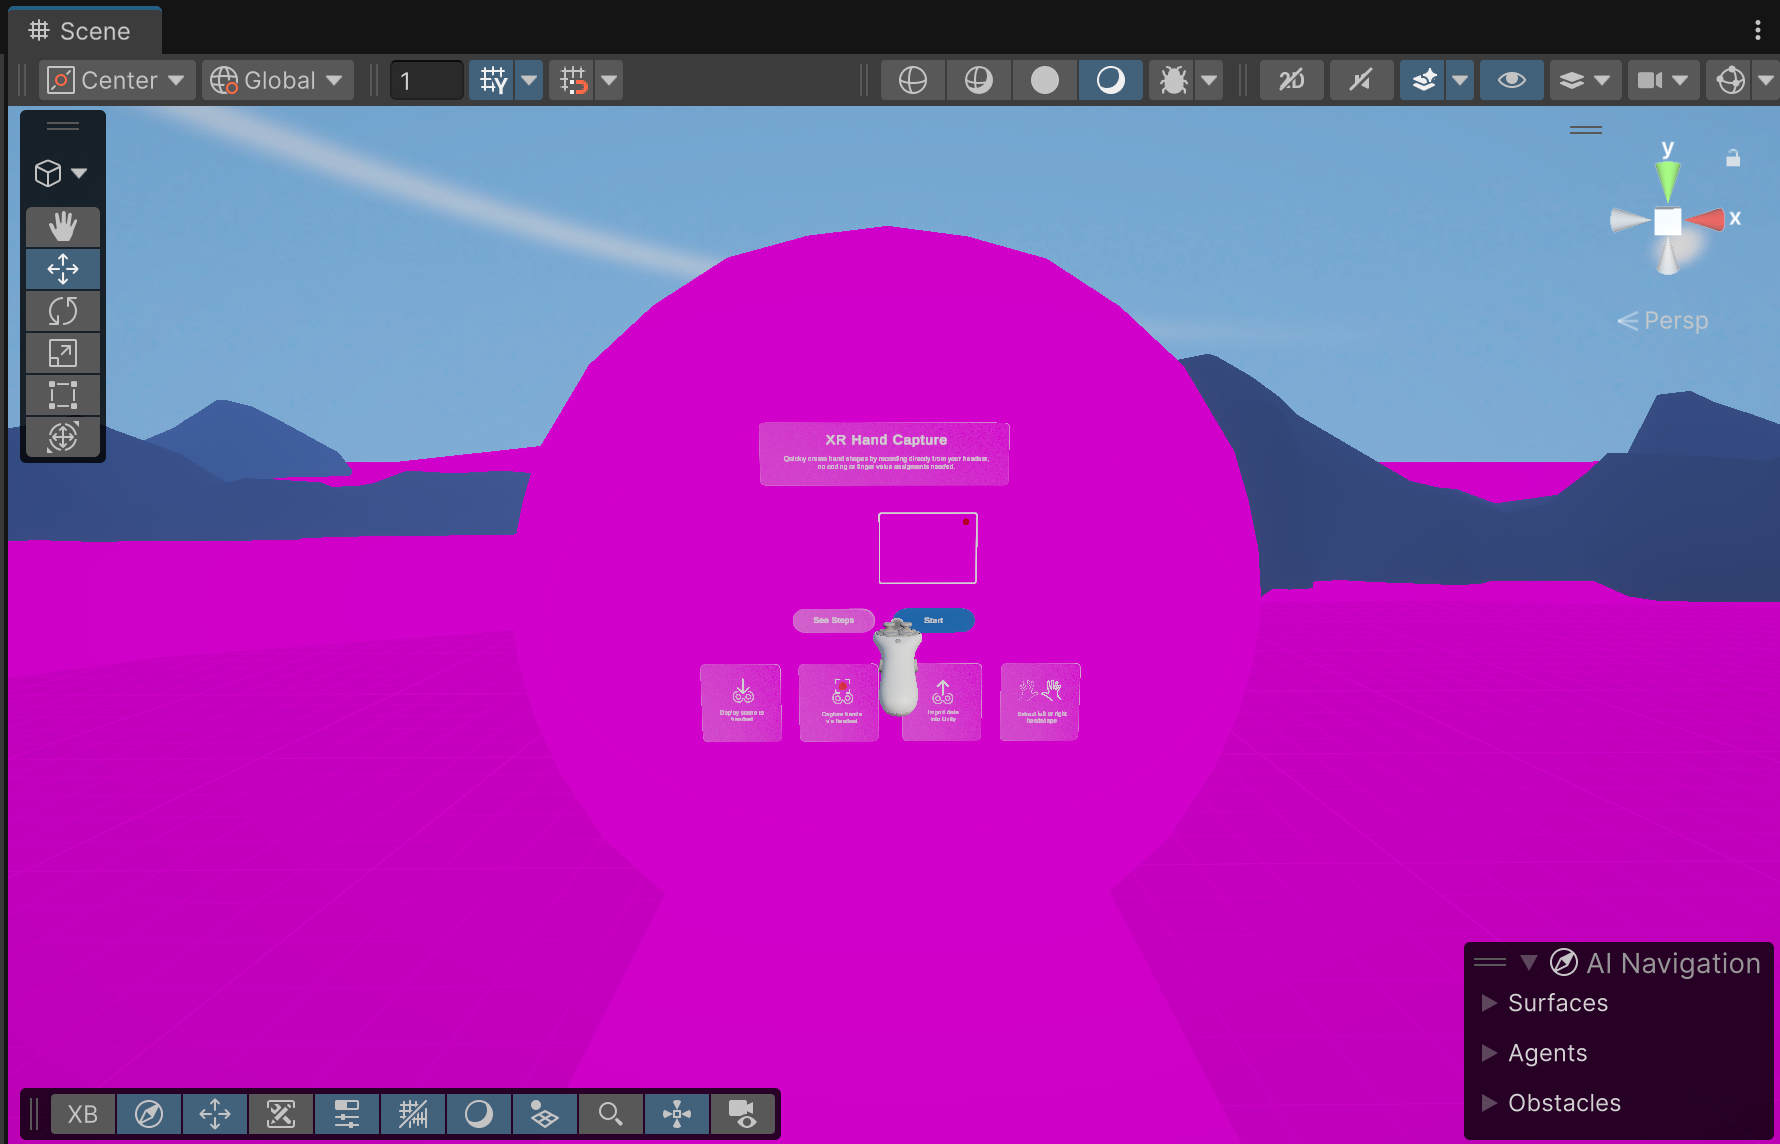
Using the Hand Capture Sample Scene
The in-headset UI guides you through the recording process:
- Instruction Panel
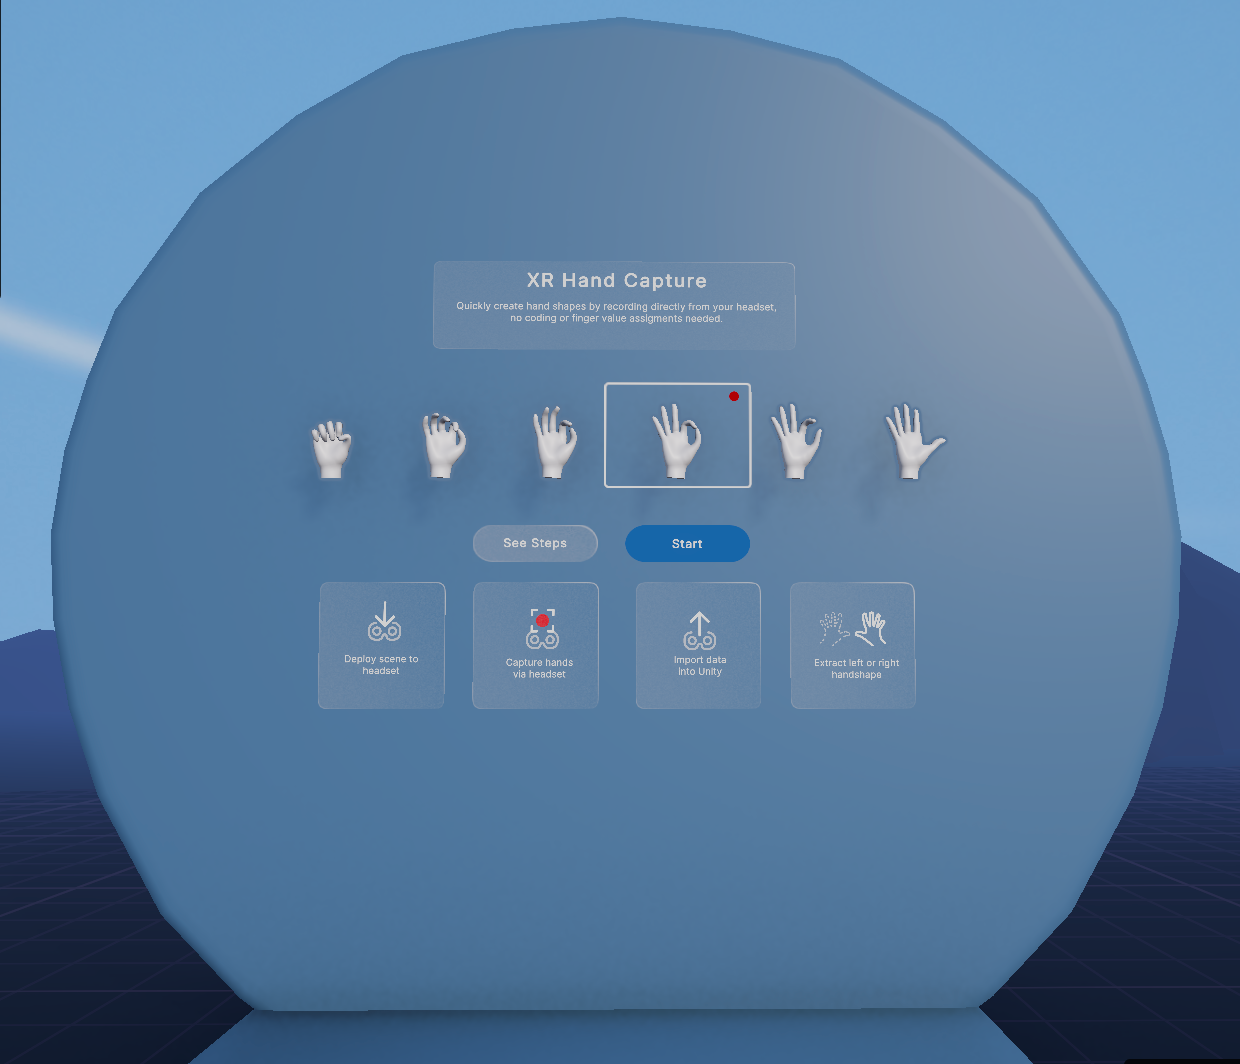
- Use See Steps for detailed instructions
- Press Start to prepare for recording
- Ready To Record Panel
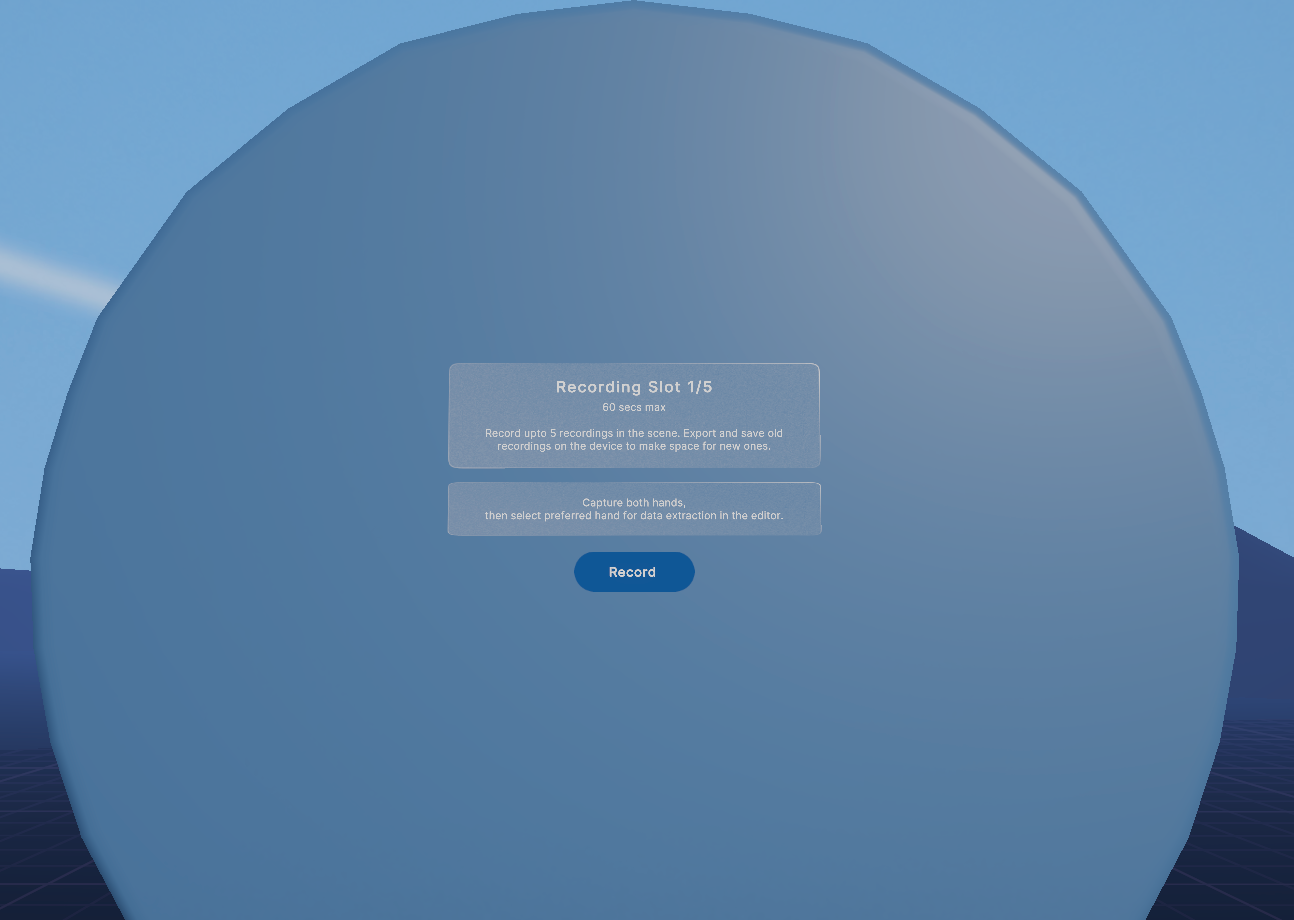
- Displays the current recording slot (e.g., "Recording Slot 1/5")
- Press Record to start capturing hand data
- Recording Panel
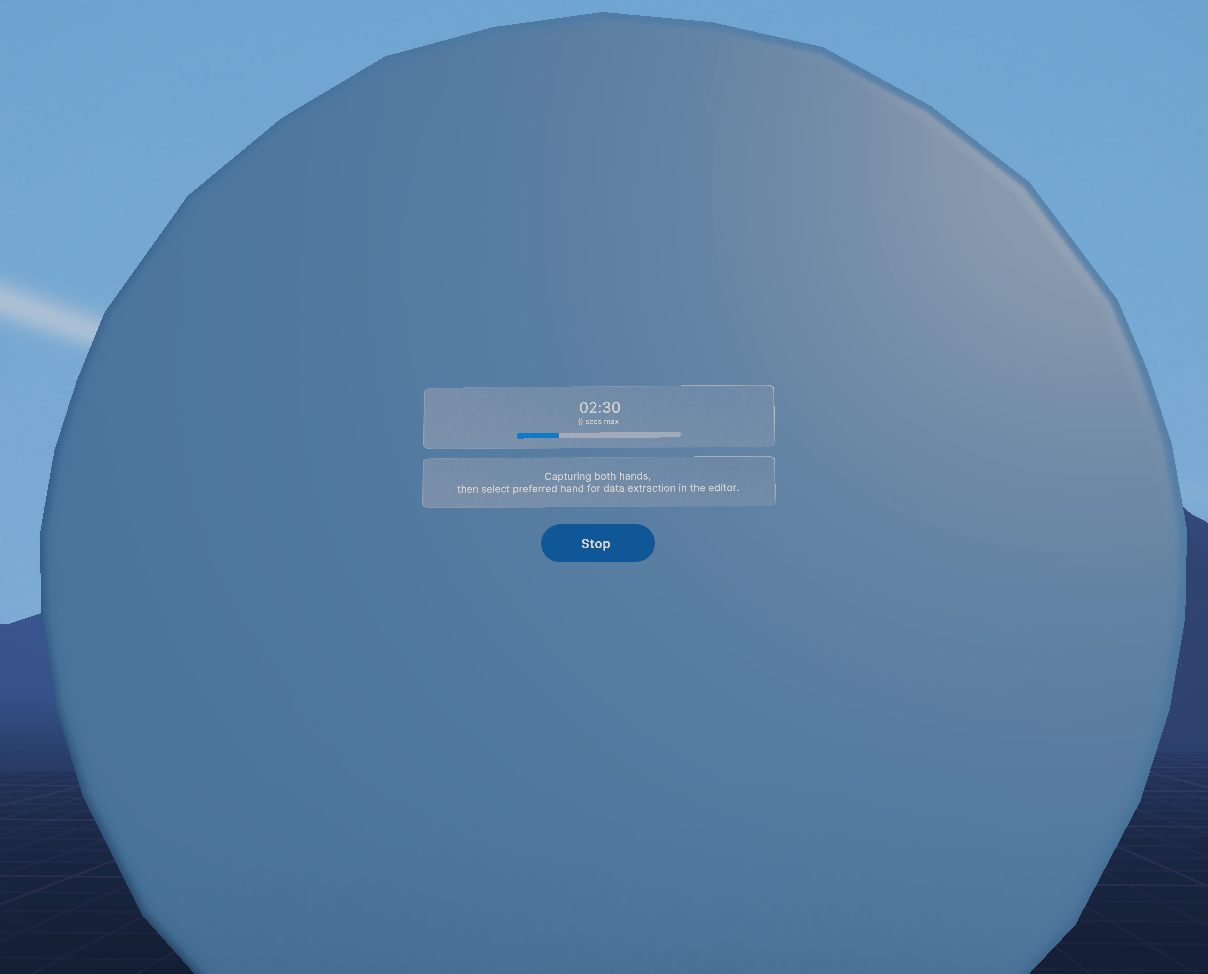
- Shows progress bar and timer (up to 60 seconds)
- Press Stop or wait for timer to finish
- Stop Recording Panel
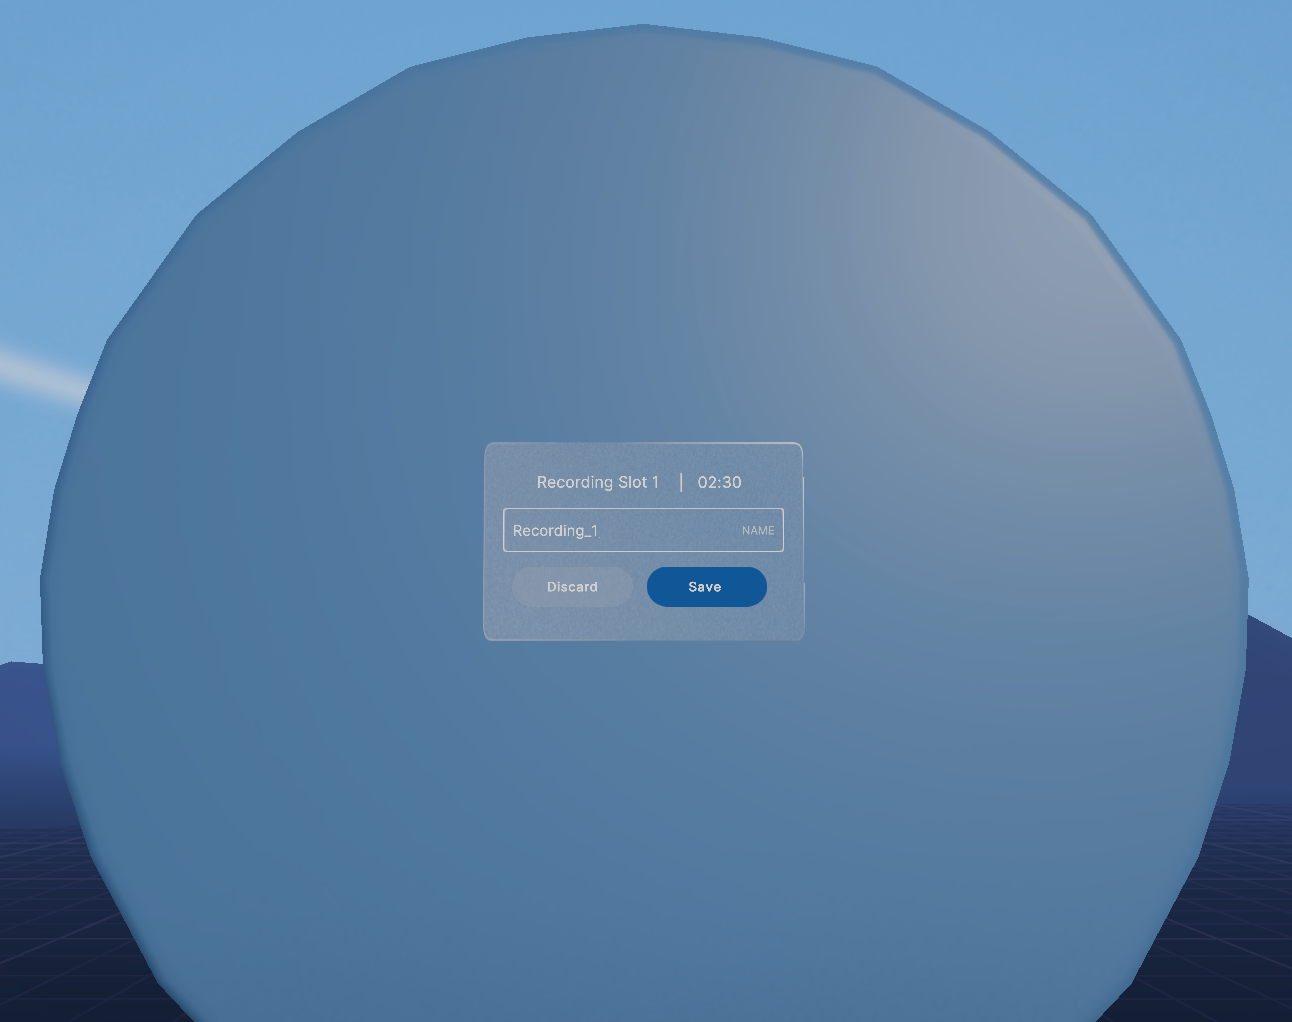
- Name your recording or use the default ("Recording_1", "Recording_2", etc.)
- Save or Delete the recording
- Saved Recording Panel
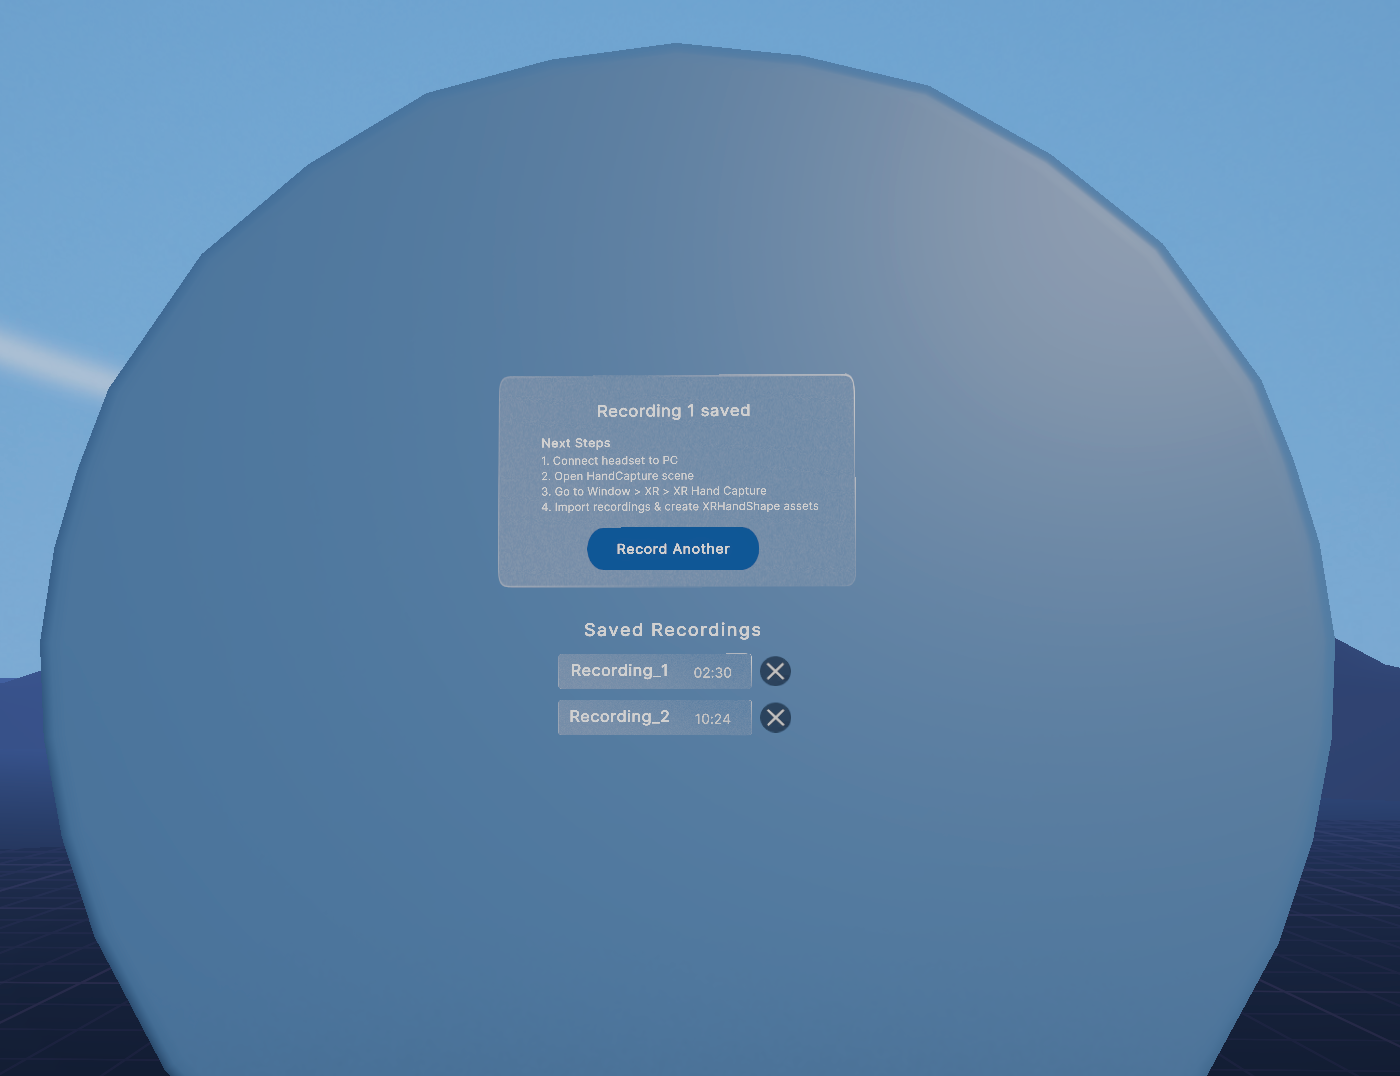
- View saved recordings
- Delete unwanted recordings with the delete icon
- Start a new recording (if slots are available)
- If storage is full, delete recordings to free up space
Notes
- The sample provides 5 recording slots, each capable of storing up to 60 seconds of hand pose data.
- New recordings cannot be made if all slots are occupied. To free up slots, import existing recordings into the Unity Editor and delete them from the device.
- Recording slots are automatically managed. The system assigns the next available slot for each new recording.
- Recordings are persistent in the "Saved Recordings" list, remaining available even after closing and reopening the application. They will only be removed if:
- Manually deleted using the delete icon within the app, or
- The application is uninstalled.
- Default naming convention: Recordings are named
Recording_{index}, with the index automatically incremented for each new recording.- When the app is reopened, the system continues incrementing the index from the highest index of previous sessions.
- To reset the index to 1: Delete all recordings and restart the application.
Best Practices & Recommendations
- For best results, record with your palm facing the camera for detailed finger capture.
- Delete unwanted recordings regularly to maintain device storage.
Troubleshooting
If you find yourself in an error state after importing the sample, it can be helpful to use section below to identify the issue and take the appropriate steps to correct them.
Missing Dependencies

The above error will happen if you have not imported required samples from the XR Interaction Toolkit package. Once imported, these errors should be cleared. You can navigate to Project Validation in XR Plug-in Management to see what might be missing. Clicking Fix will import the main package.
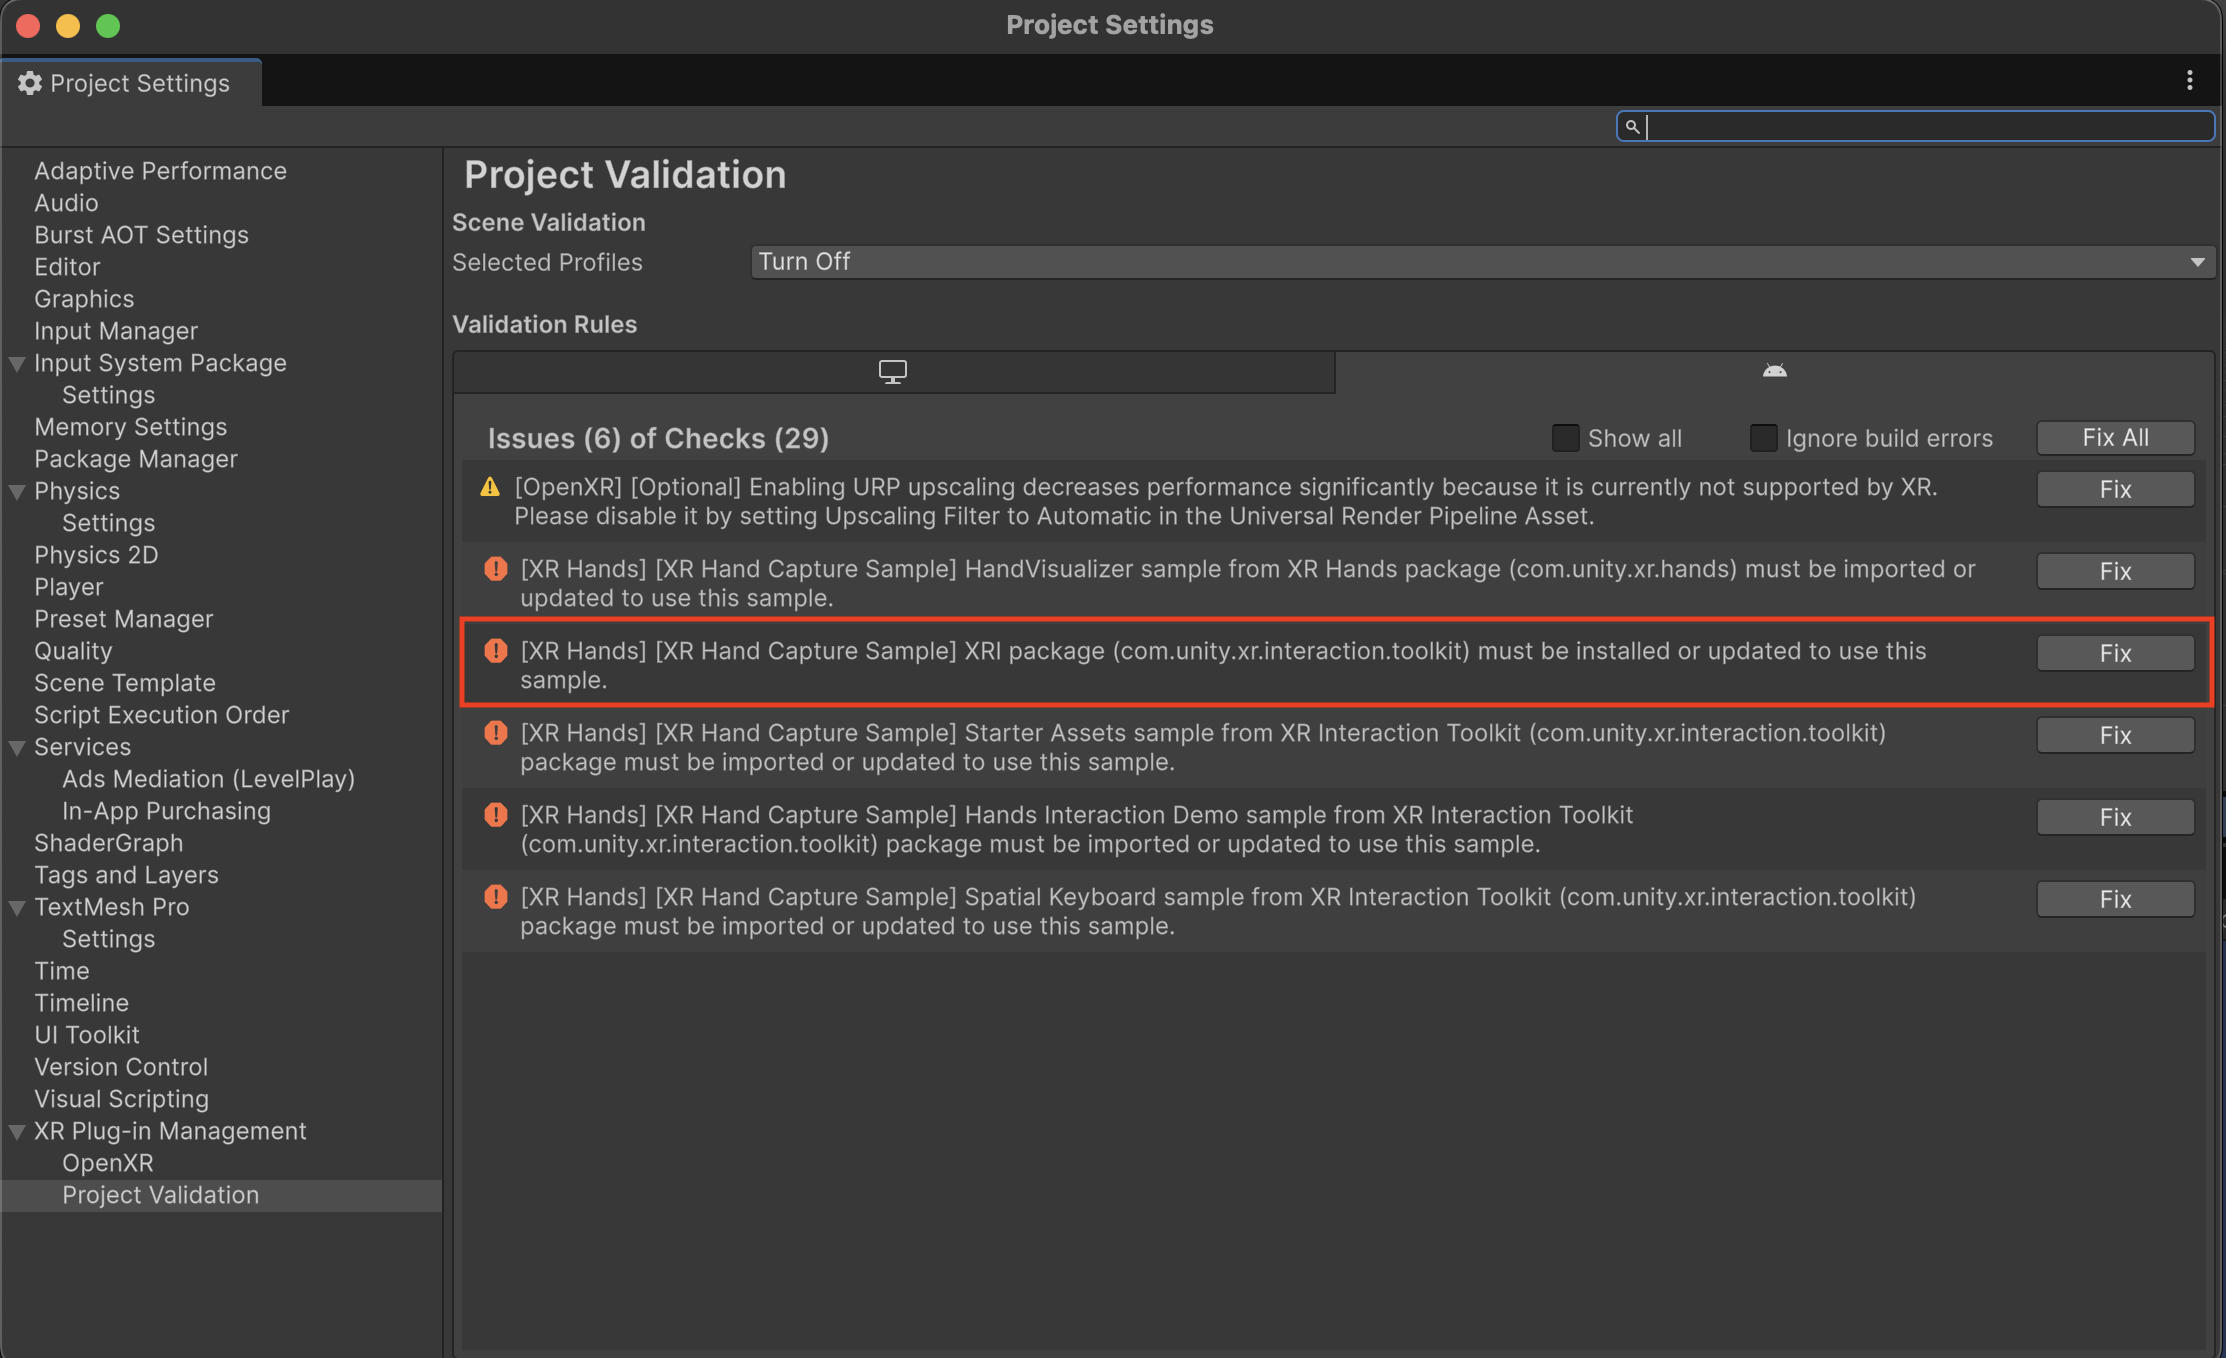
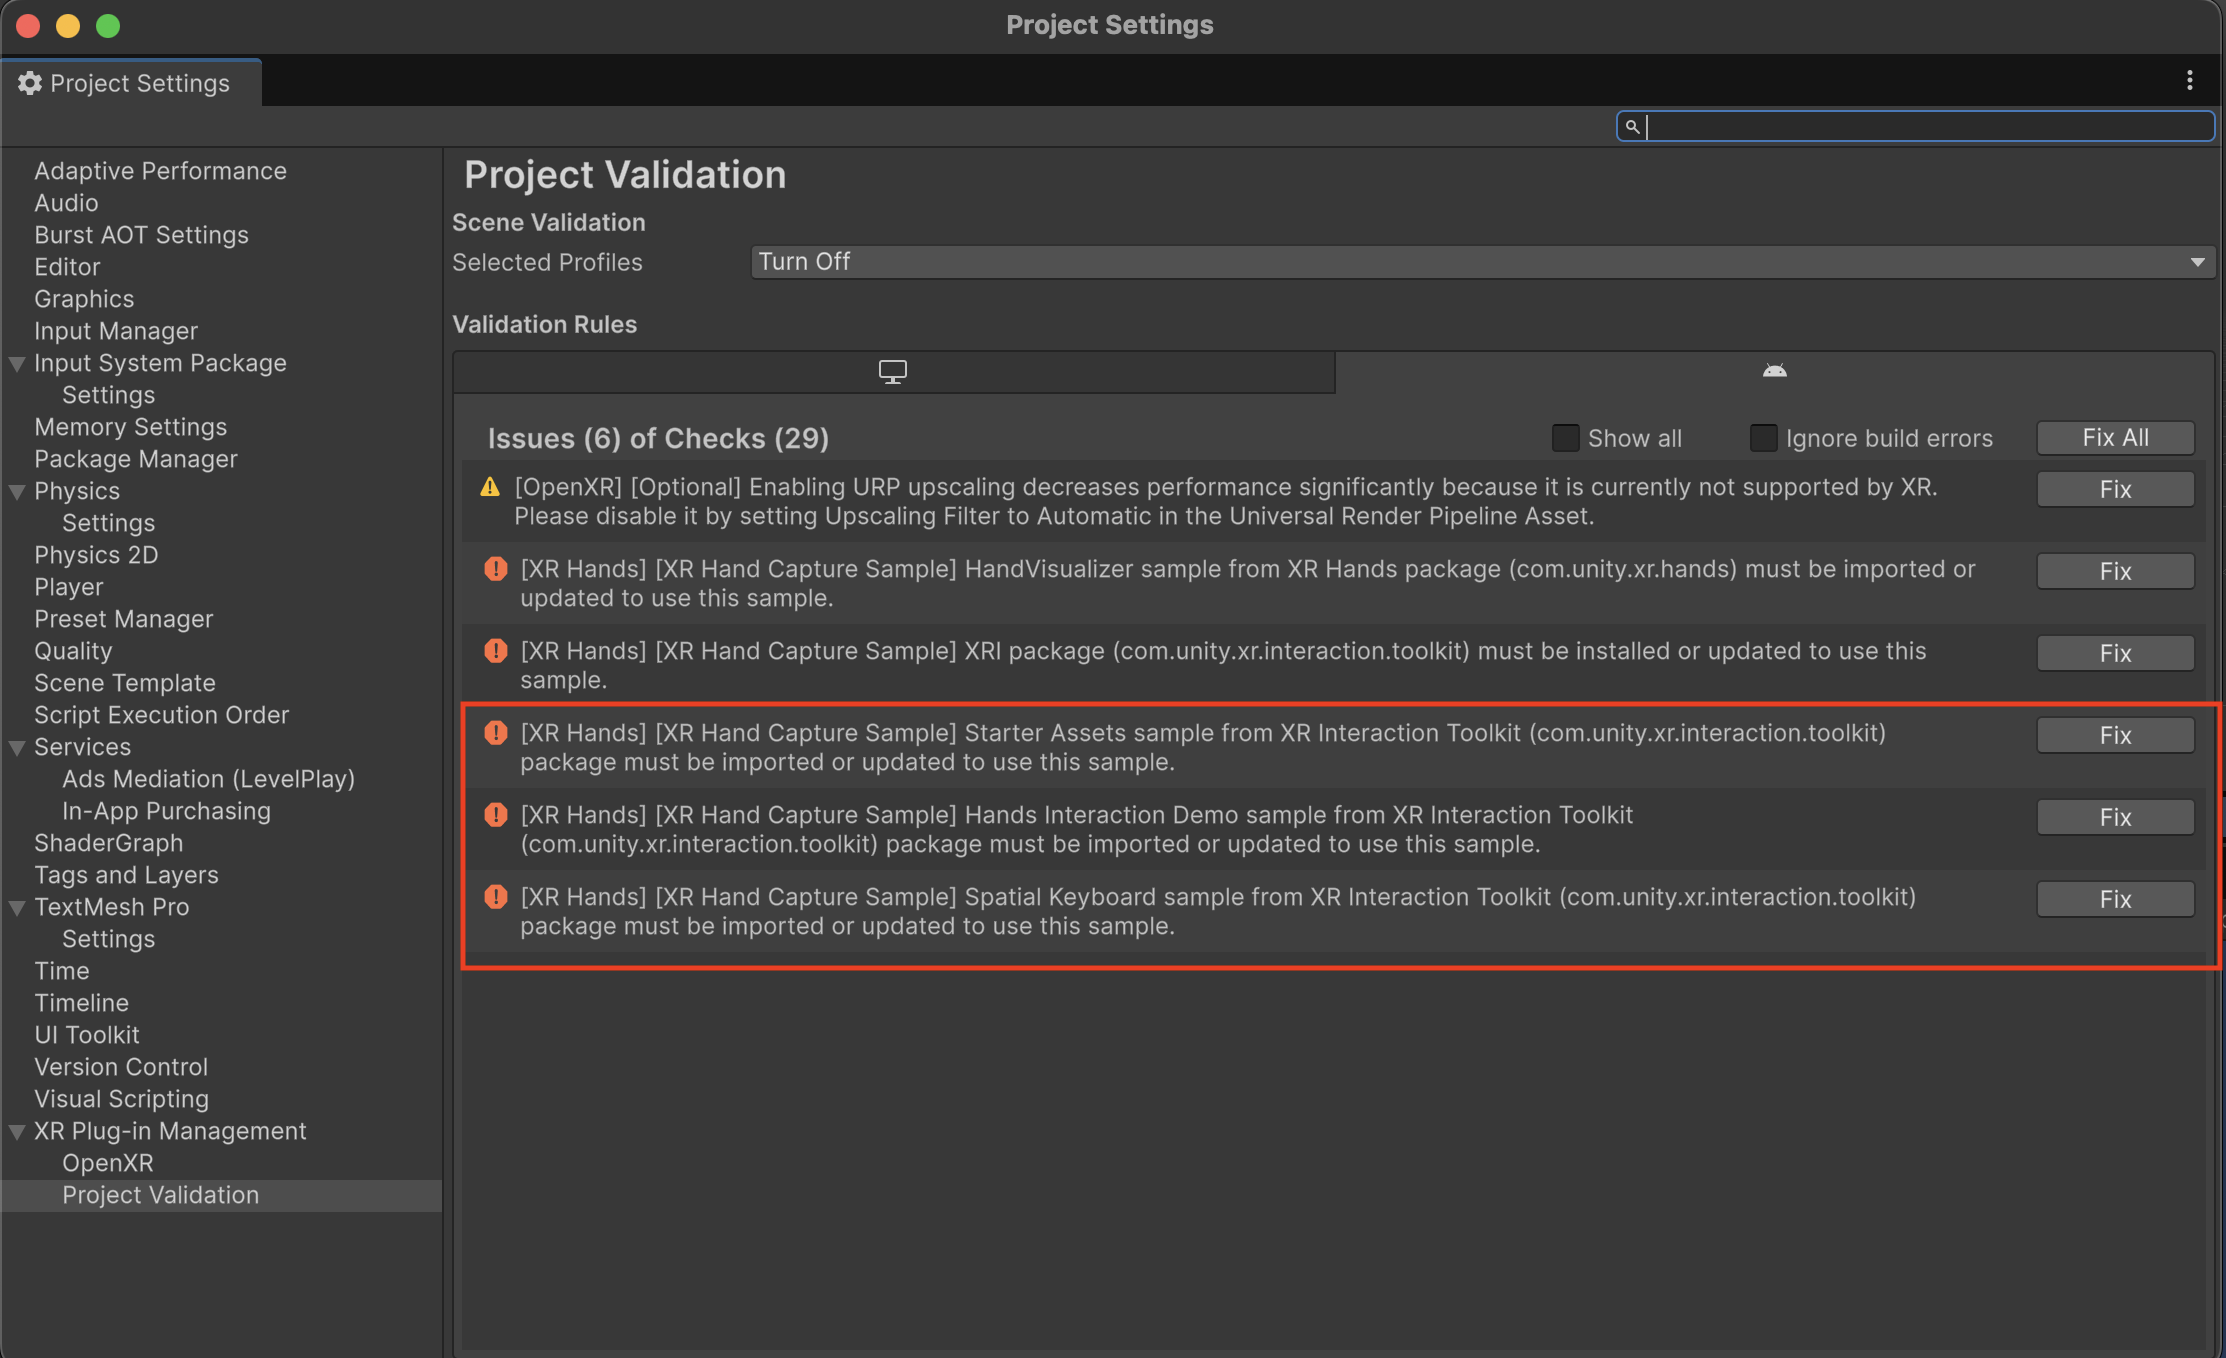
If the XR Interaction Toolkit package has not been imported, you will also need to import the Starter Assets sample, Hands Interaction Demo sample, and Spatial Keyboard sample by clicking Fix as shown in the image below:
Important
There is a known issue when upgrading from an older version of XRI sample to a newer version. Script references in the demo scene for scripts included in the demos become disconnected when upgrading in-place. Recommendation: Delete existing XRI demo folders from your Samples directory before importing the new XRI samples.
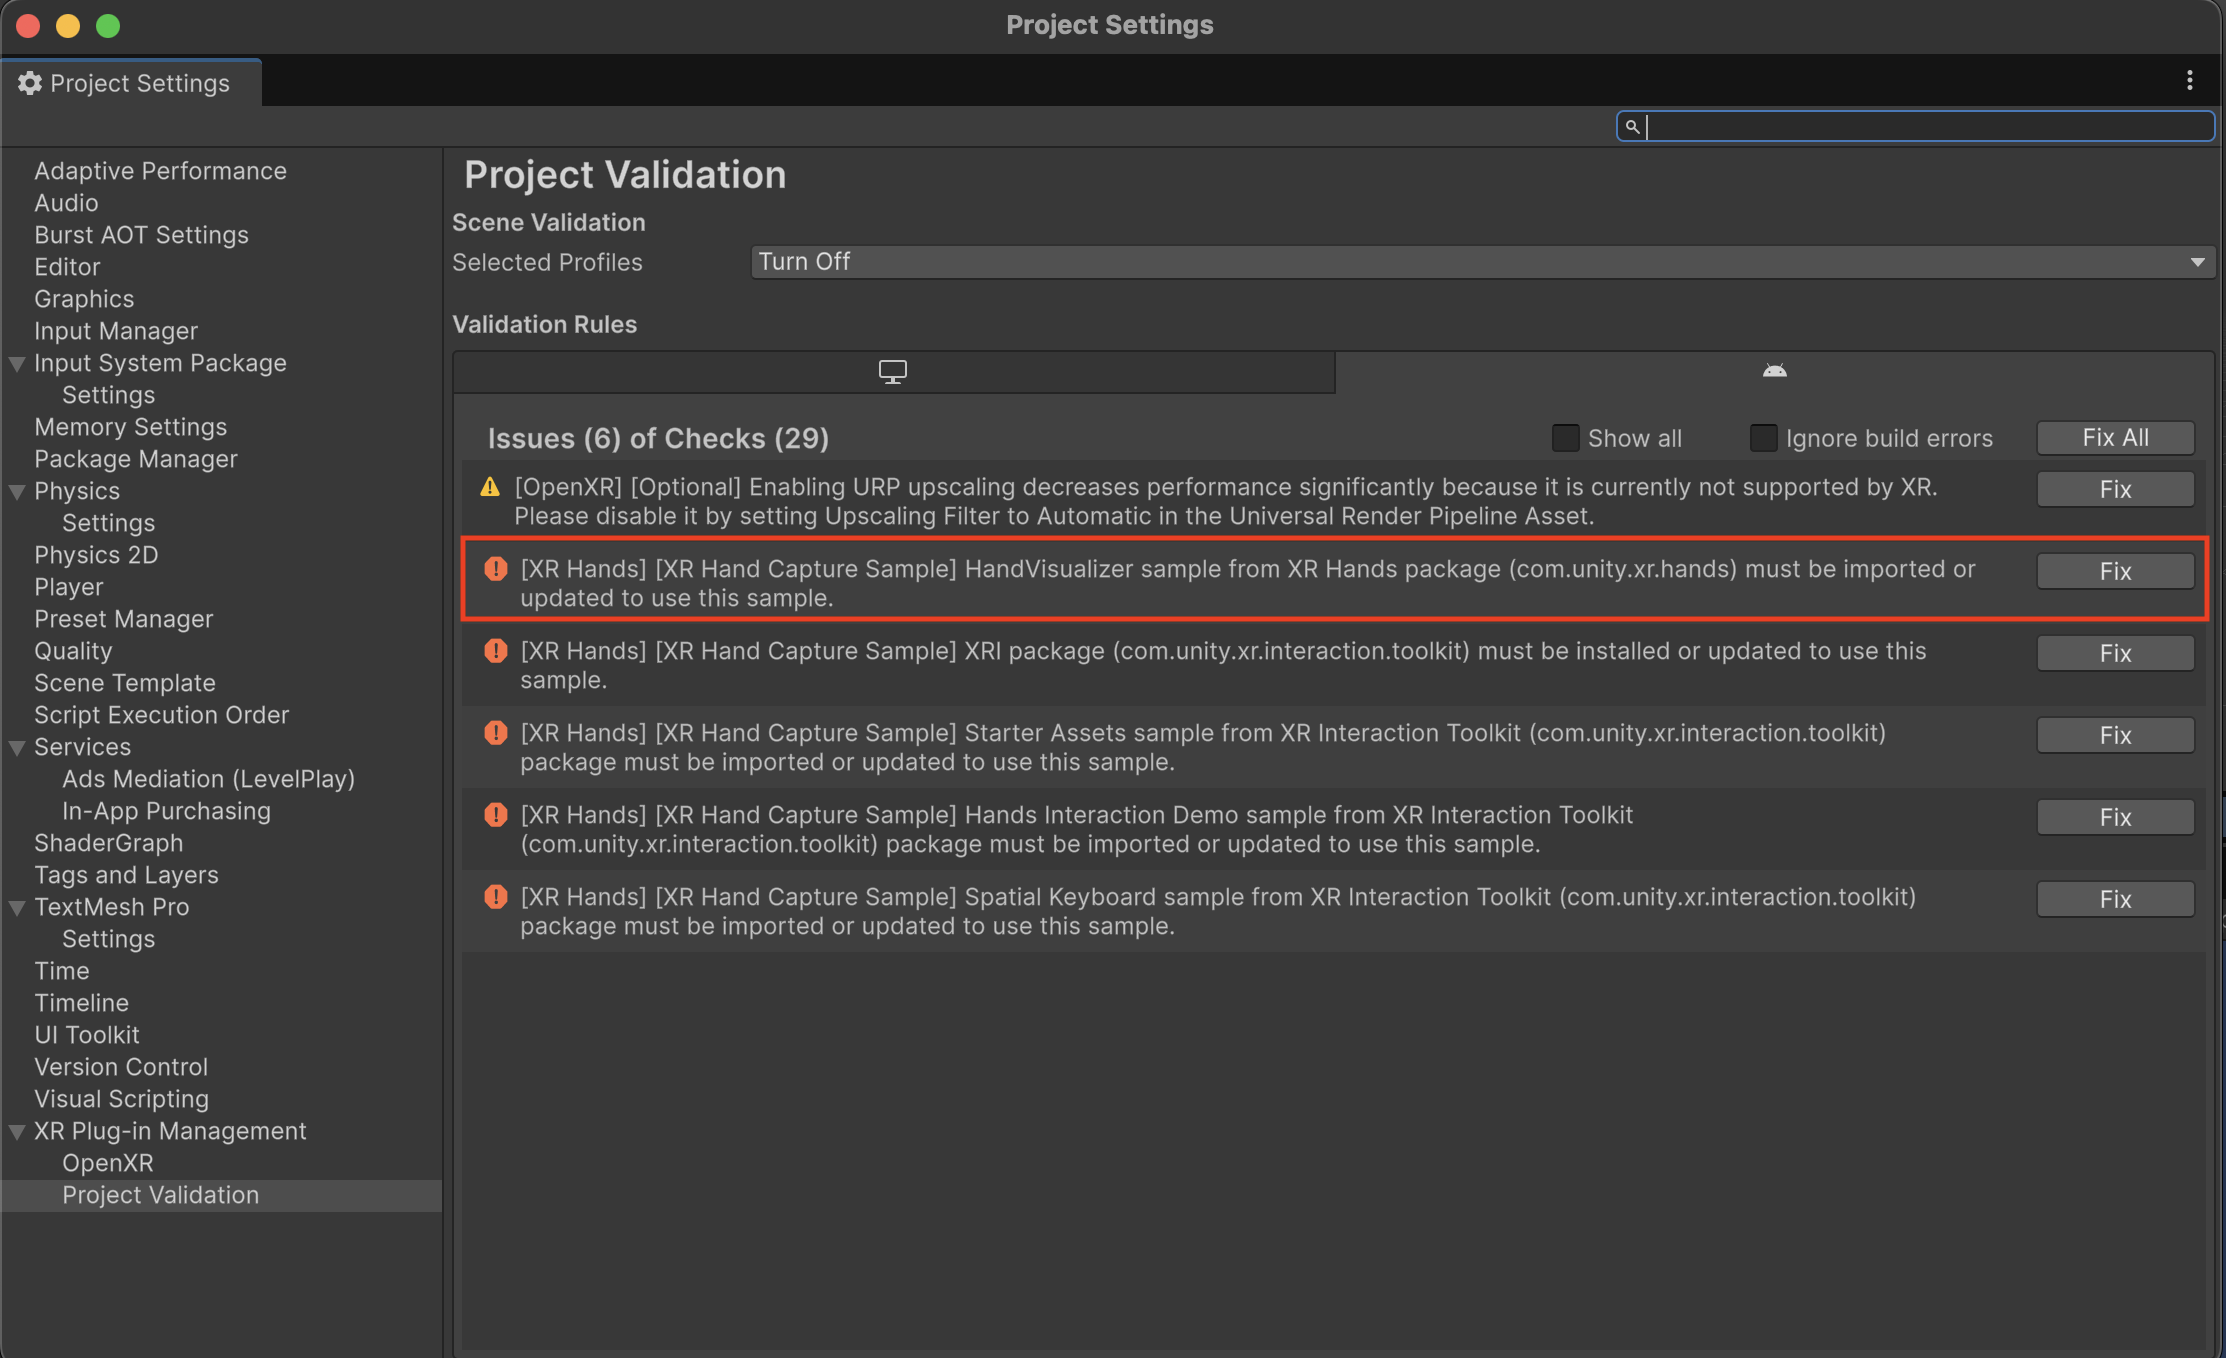
The missing prefab error might also occur if you have not imported the Hand Visualizer from the XR Hands Samples first. Once imported, these errors should be cleared. You can navigate to Project Validation in XR Plug-in Management to see this error as well (see image below). Clicking Fix will import the Hand Visualizer for you.
Incorrect Scene Appearance
If the sample scene appears incorrectly or displays missing materials, it may be due to the project using a Scriptable Render Pipeline (URP or HDRP), while some materials in the sample scene is designed for the Built-in Render Pipeline.
Solution: If you haven't already, import the Hand Visualizer sample. It includes a script that automatically converts materials for compatibility with the Universal Render Pipeline (URP).
If you encounter double-vision artifacts (such as raycast tear drops), this is a known limitation when using Shader Graph shaders on the Built-in Render Pipeline.
Solution: If your project uses the Built-in Render Pipeline, you can avoid the problem by taking one of the following actions:
- Switch to multi-pass rendering. (Performance of multi-pass rendering is typically much worse than single-pass.)
- Change the problematic Materials to use non-Shader Graph shaders.
- Update the project to use the Universal Render Pipeline (URP).